 Contact Us


In this case, one server (the Director) takes over the control of all existing playout servers (clients). This type of setup is necessary if a large number of outputs are required that are not available on a single server. In addition, this setup also makes sense if videos are to be played that require a very powerful server. In this way, the computing power required by the Pixera GUI can be saved.
The Director-Client setup is not limited in size, you can have one client or 20 hooked up to your Director. It is also possible to connect any hardware, whether it is Pixera or a self-built server.

In Pixera it is also possible to synchronize all outputs in the Manager client system very easily. For this, it is necessary that each server is equipped with an Nvidia Quadro Sync Board and that these are connected to each other.
For more information on synchronizing the outputs, please read the article Synchronize Outputs - Genlock & Framelock Setup
First Steps
- Follow Pixera System requirements PDF (NO AMD graphic cards supported!)
- Make sure Director and Client are in the same IP range and on the same subnet
- Make sure the Director can reach the client via IP
- Make sure the Director has access to the Clients' hard drive and is allowed write access
On the Client
- Install Pixera
- Run "presence.exe". This is the Pixera client software and can be found in the “presence” folder inside the Pixera installation:
C:\Program Files\AV Stumpfl\Pixera\build_x-x-x\presence
- Set appropriate IP adapter if needed by pressing the “Configure Network” button
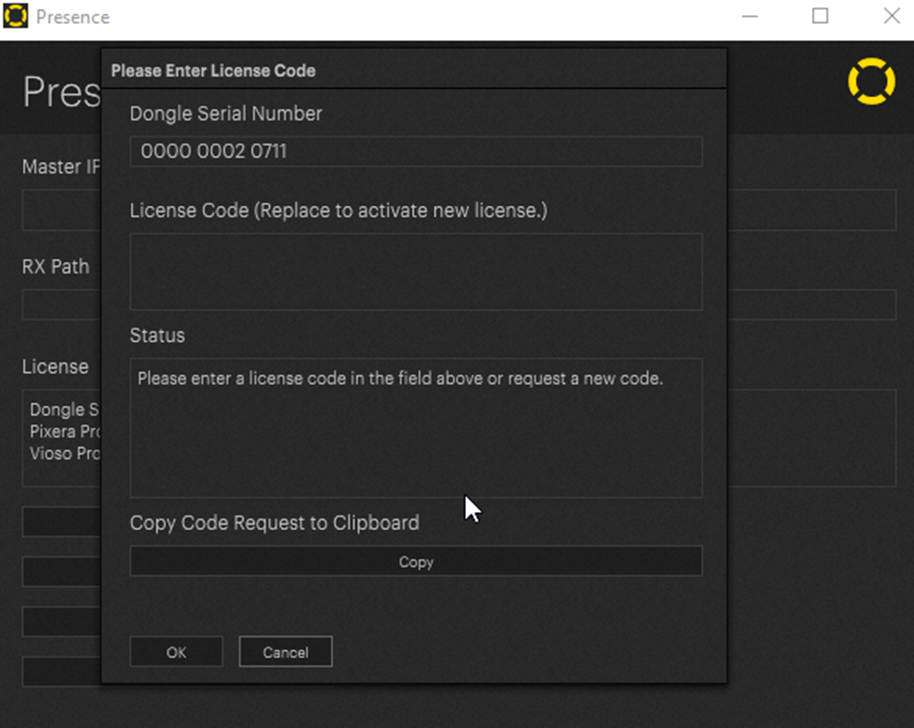
- If installing Pixera for the first time, you will need to input your license code by click the “Manage License” button.
- All other settings will be automatically set once a Director has connected

On the Director
- Install the SAME Pixera version as on the client
- Run Pixera
- Insert the license key when asked
- Go to the settings Tab
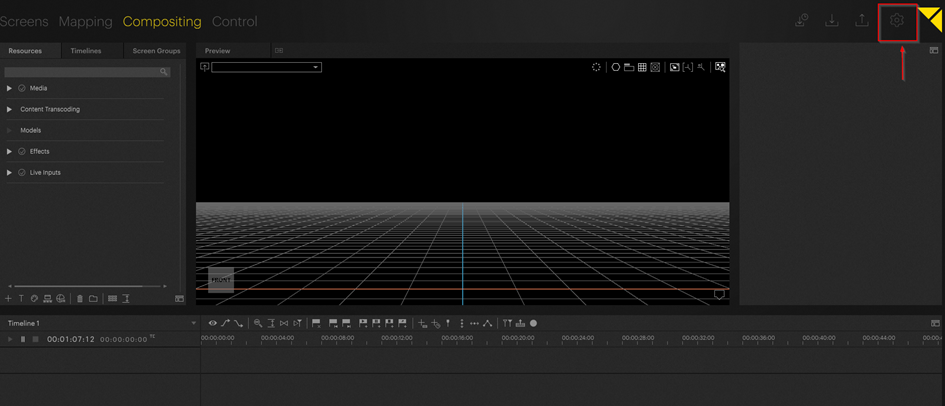
- Choose Discovery
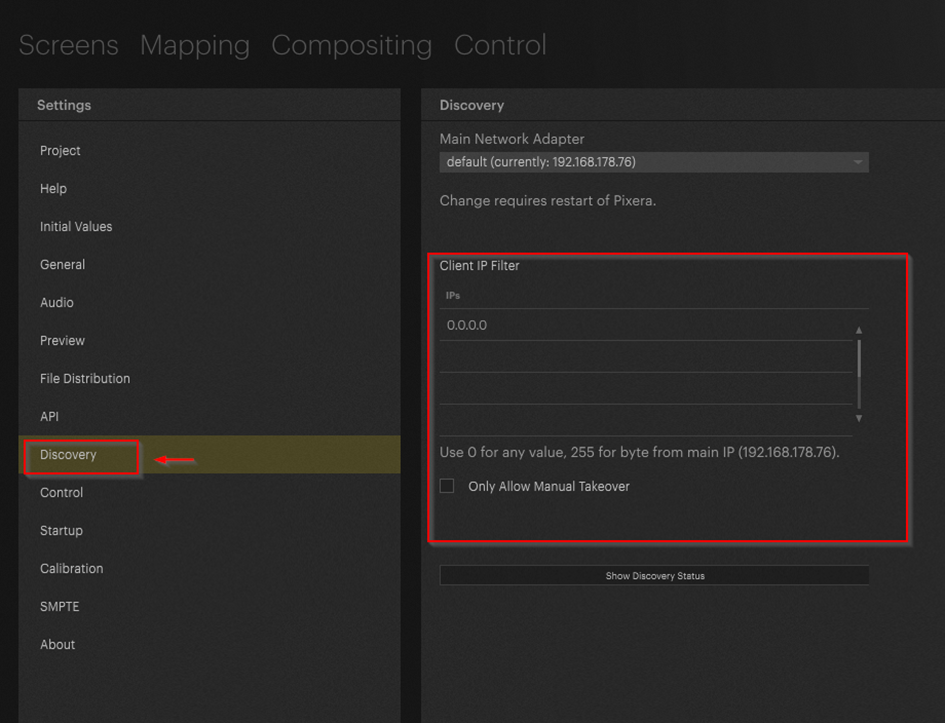
- In the section Client IP Filter either directly set multiple client IP addresses or use 0.0.0.0 for all connections or 255.255.255.255 for no connection. Just click on the list to change values
NOTE: Best practice is to type in exactly the IP addresses of your clients
- Set Main network adapter if needed. Please restart if Main Network adapter has been changed.
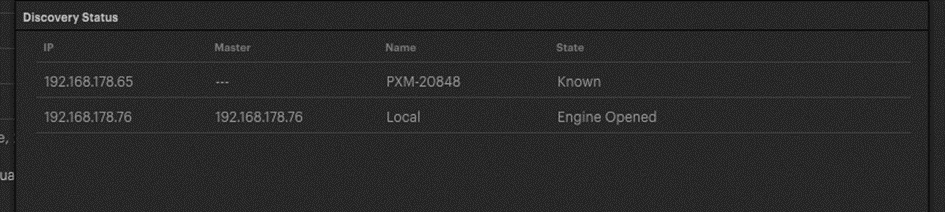
- Hit the “Discovers status” button to see if you reach your clients
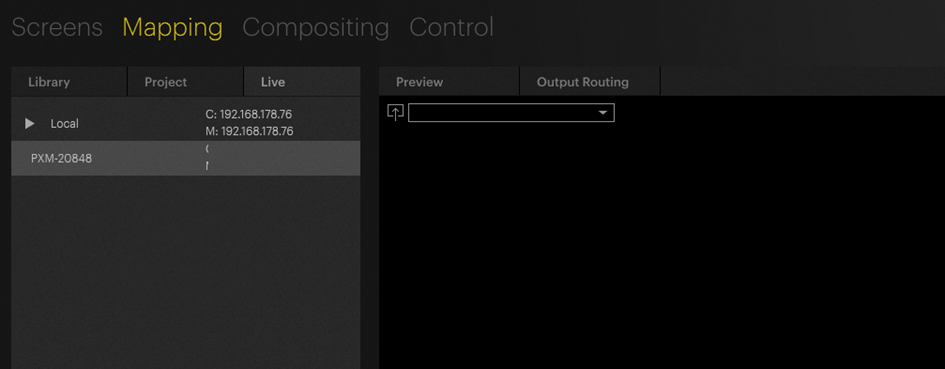
- Go to Mapping Tab/Live
- Click on the Client so you can see the inspector Parameters on the righthand side change to this:
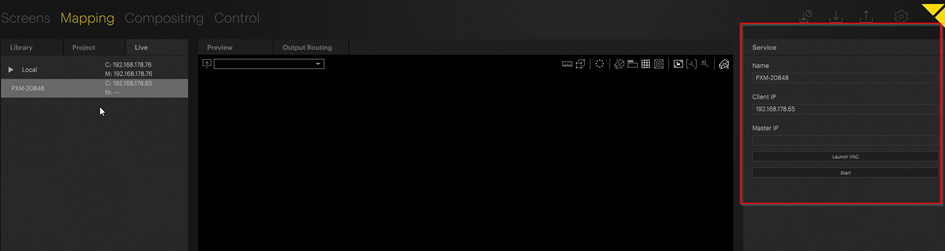
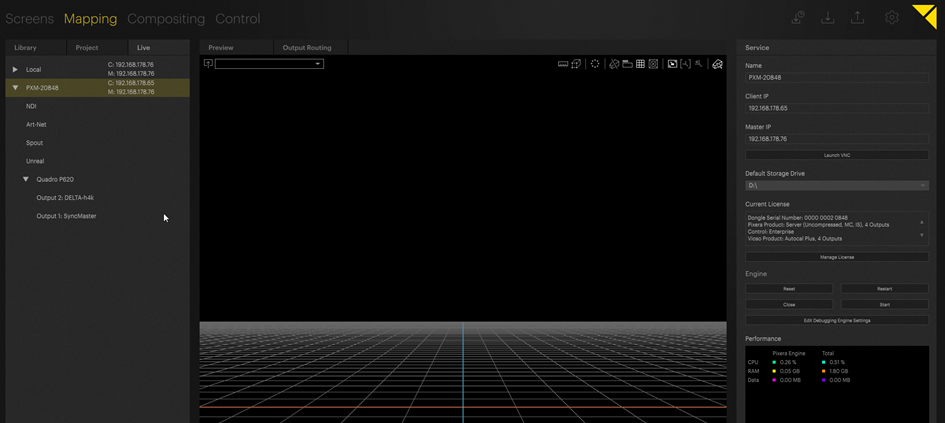
- Hit the “Start” button. Now you should have all the access to the remote client as if it was the local machine. Assigning Outputs of a client works the same way as for the local engine.
Now your are ready to work with clients.
For more information about Resource Distribution please have a look on the regarding article.