 Contact Us



This guide explains how to set Nvidia to 10-Bit. The PIXERA RX render engine should detect the settings of the graphics card, and automatically adapt its for the Output.
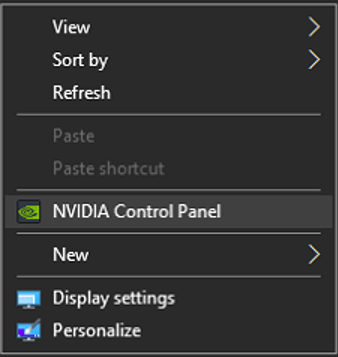
- Open the context menu on the desktop (right click on the desktop).
- Click on NVIDIA Control Panel.
- In the NVIDIA Control Panel click on Change resolution.
This submenu should be visible if the Display tab is unfolded.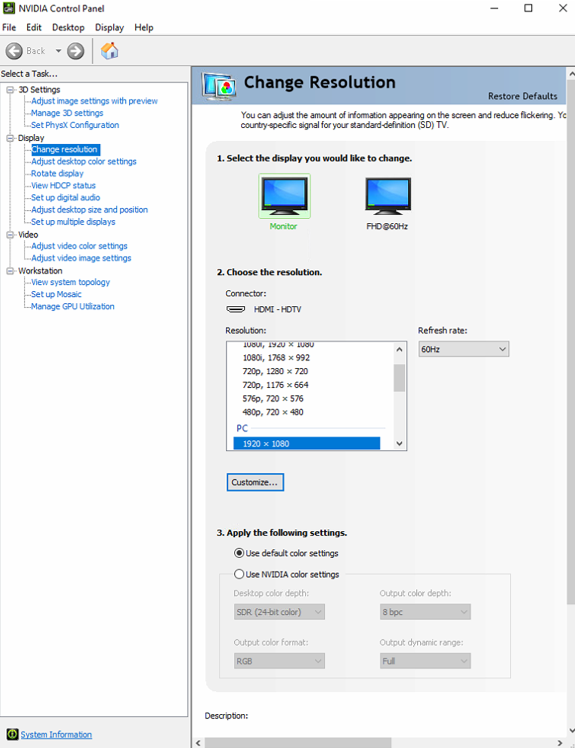
- After entering this menu, you can see your connected displays.
Click on the display where you want to change the Output color depth.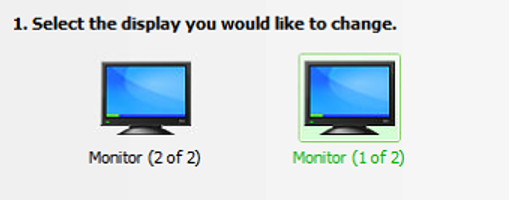
- Near the bottom in this window, you can see Use default color settings and Use NVIDIA color settings.
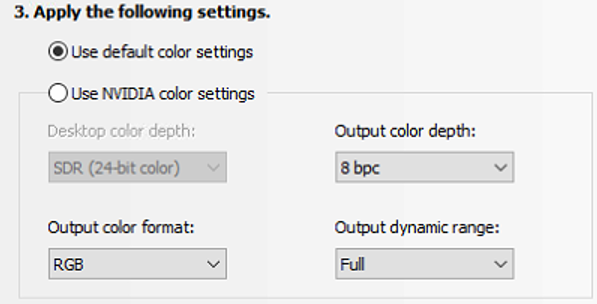
- In Output color depth you can now switch to 10 bpc which means 10-bit per channel.
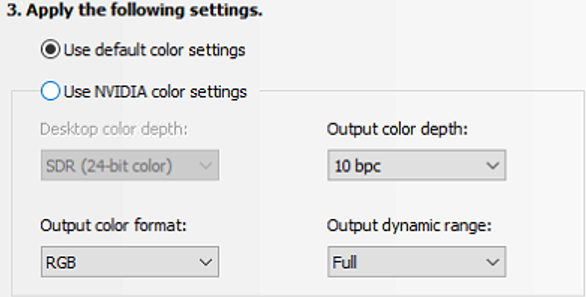
- Do not change the Desktop color depth setting.
- Do not change the Desktop color depth setting.
- Click on Apply to save your changes.
NOTE
You can only switch to a different Output color depth if the display is supporting that accordingly!
If you just see 8 bpc in the dropdown menu, it’s most likely that your display is not supporting multiple bit depths.
To check if the render engine adapts the settings correctly you can utilize the On-Screen Statistics. This statistic can also be activated and deactivated by simply using the shortcut Ctrl + 9.
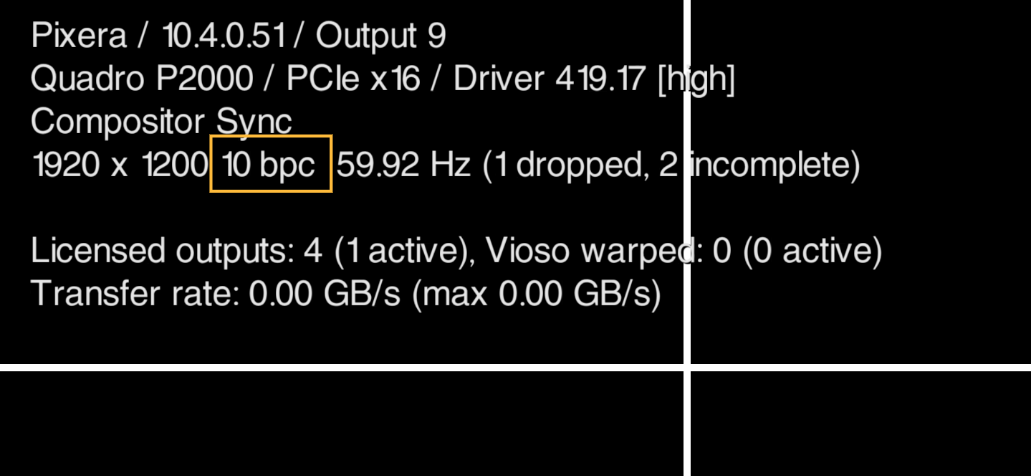
To read more about the On-Screen Statistics, please have a look at the related article: On-Screen Statistic
Forcing the Render Engine to Display 10-Bit
In some rare cases the render engine doesn't recognize the 10-Bit correctly, so you have to force it.
You can do so with adding the following line to C:\ProgramData\AV Stumpfl\RX\user_settings.lua using a text editor and adding it as the first entry, then saving the file.
context_settings.color_bits = 10Now your render display information should display 10 bpc like the screenshot above.
WARNING
In a Multi-Client setup this setting needs to be set on the Manager/Director engine.
Also do not forget to remove it if you go to a setup with 8 bit using this server!
Pixera 26.1 R 39 | 19 August 2026 | CL