 Contact Us


Warning
This article demonstrates the Unreal Engine Setup in Pixera within a single Manager machine. Although possible, a proper Unreal Engine Setup operates with multiple clients and load distribution.
Please never set up a Virtual Production Environment on a single server, as you will always encounter performance problems. The setup will not work. Always use multiple clients and/or graphic cards to achieve a proper setup.
Disclaimer
Virtual Production is a complex topic. It is mandatory to understand the basic setup to be able to advance to the advanced techniques (for example, set extension and multi-pos warp).
Furthermore, it is mandatory to understand all the basic principles of Pixera.
Here is a list of the essential VP related documentation in chronological order:
Unreal 5.2.1 Tips and Tricks (Performance and Testing)
Pixera Connect, an Unreal Plugin - General Usage
Pixera Texture Sharing to Unreal
Studio Camera (Virtual Production)
Set Extension (Virtual Production)
Setting Up an Unreal Scene in Pixera
In a proper VP setup, a high resolution led volume is used. As we are not able to simulate this effectively using a LED volume on smaller demo/work setups, we are going to use generic displays.
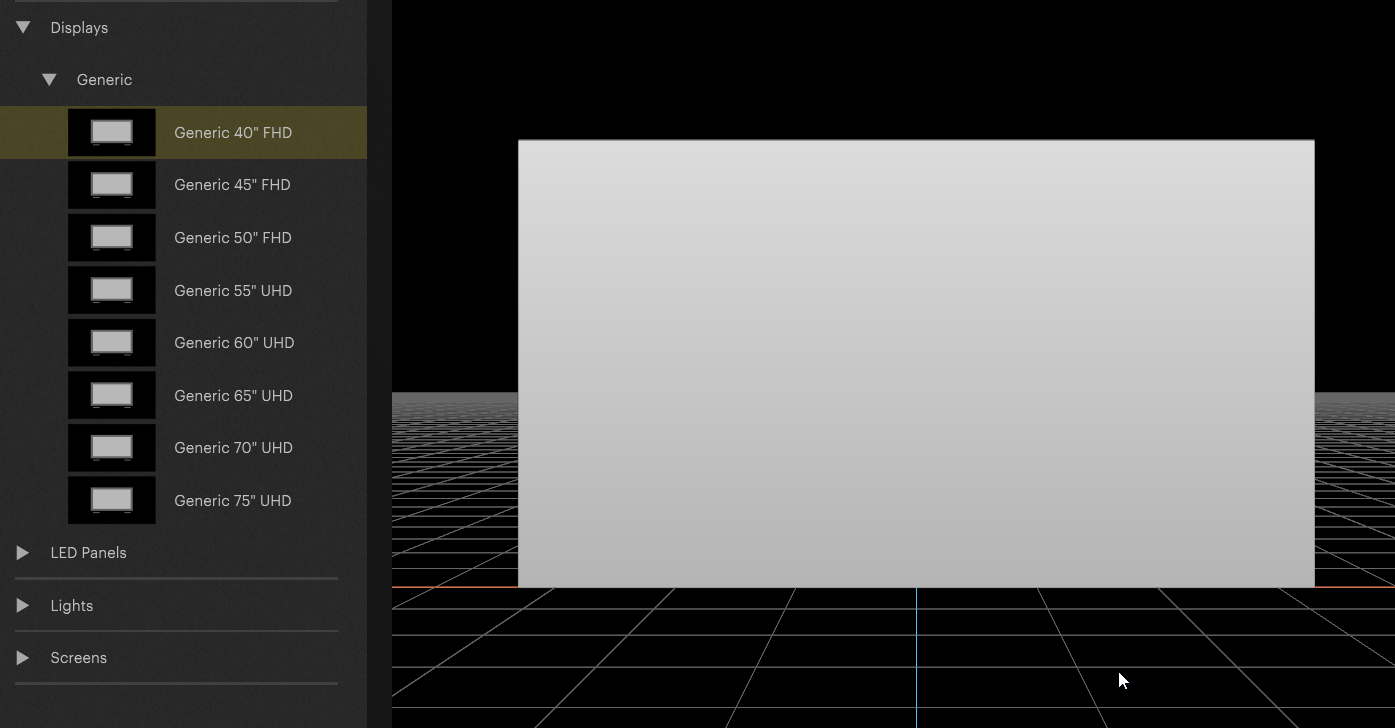
For demonstration purposes, we are going to use a simple setup. Import a display in the workspace:
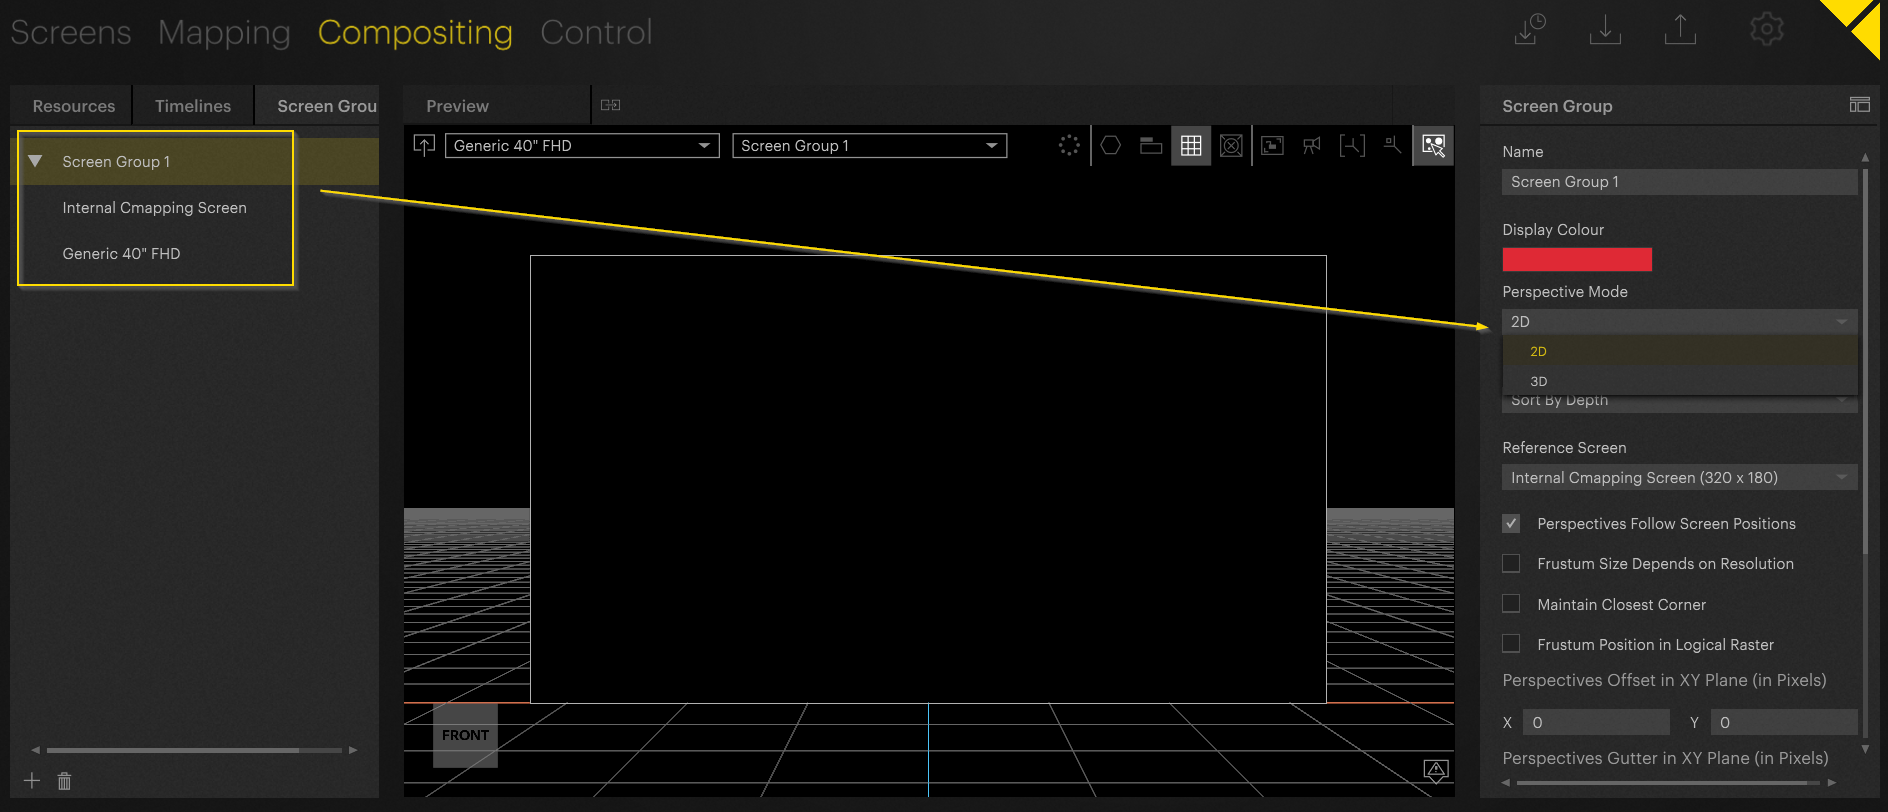
In “Screen Groups” set the “Perspective Mode” to “3D”:
Warning
In case you are running an older image Version the following prerequisites are mandatory to run this setup:
- NVidia Driver minimum 526.47.
-
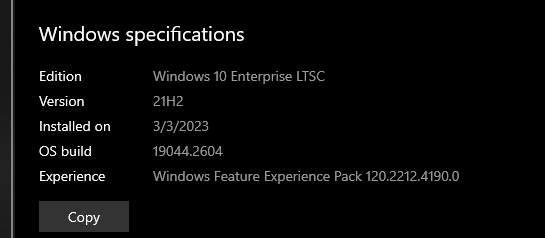
New Windows Release Version 21H2 (paid upgrade):
Please contact AVStumpfl support in case you need more information or / and an upgrade.
Import an Unreal Project into Pixera
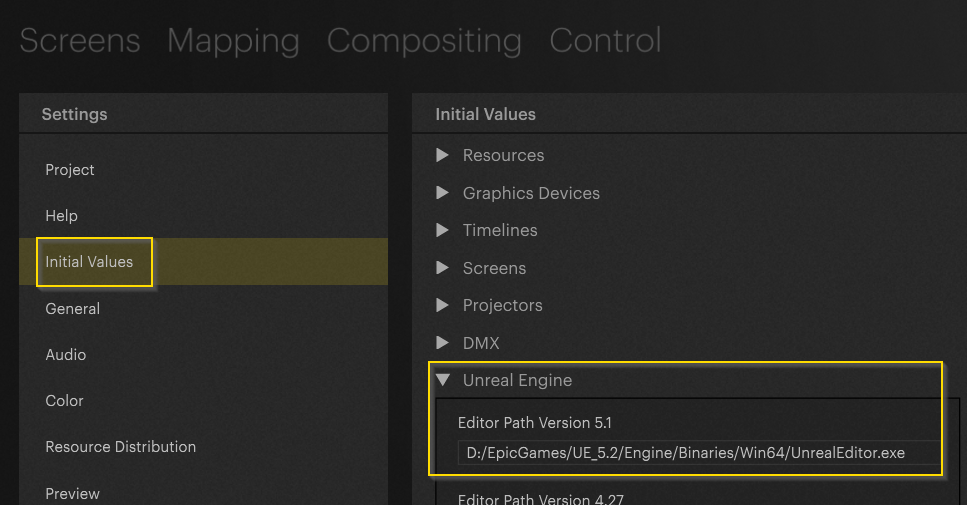
Before the project can be imported, the “Engine Editor Path” must be setup in the Pixera settings. Please add the path to the “UnrealEditor.exe” as shown in the screenshot.
Warning
Unreal 4.27 is no longer supported with Pixera 2.0! However Unreal 4.27 projects can be opened and started in Unreal 5.21. A migration can be easily achieved. For more complex projects there is an official migration guide from Epic available:
Unreal Engine 5 Migration Guide | Unreal Engine 5.0 Documentation
Import the Unreal Project via the import button to your compositing resources:
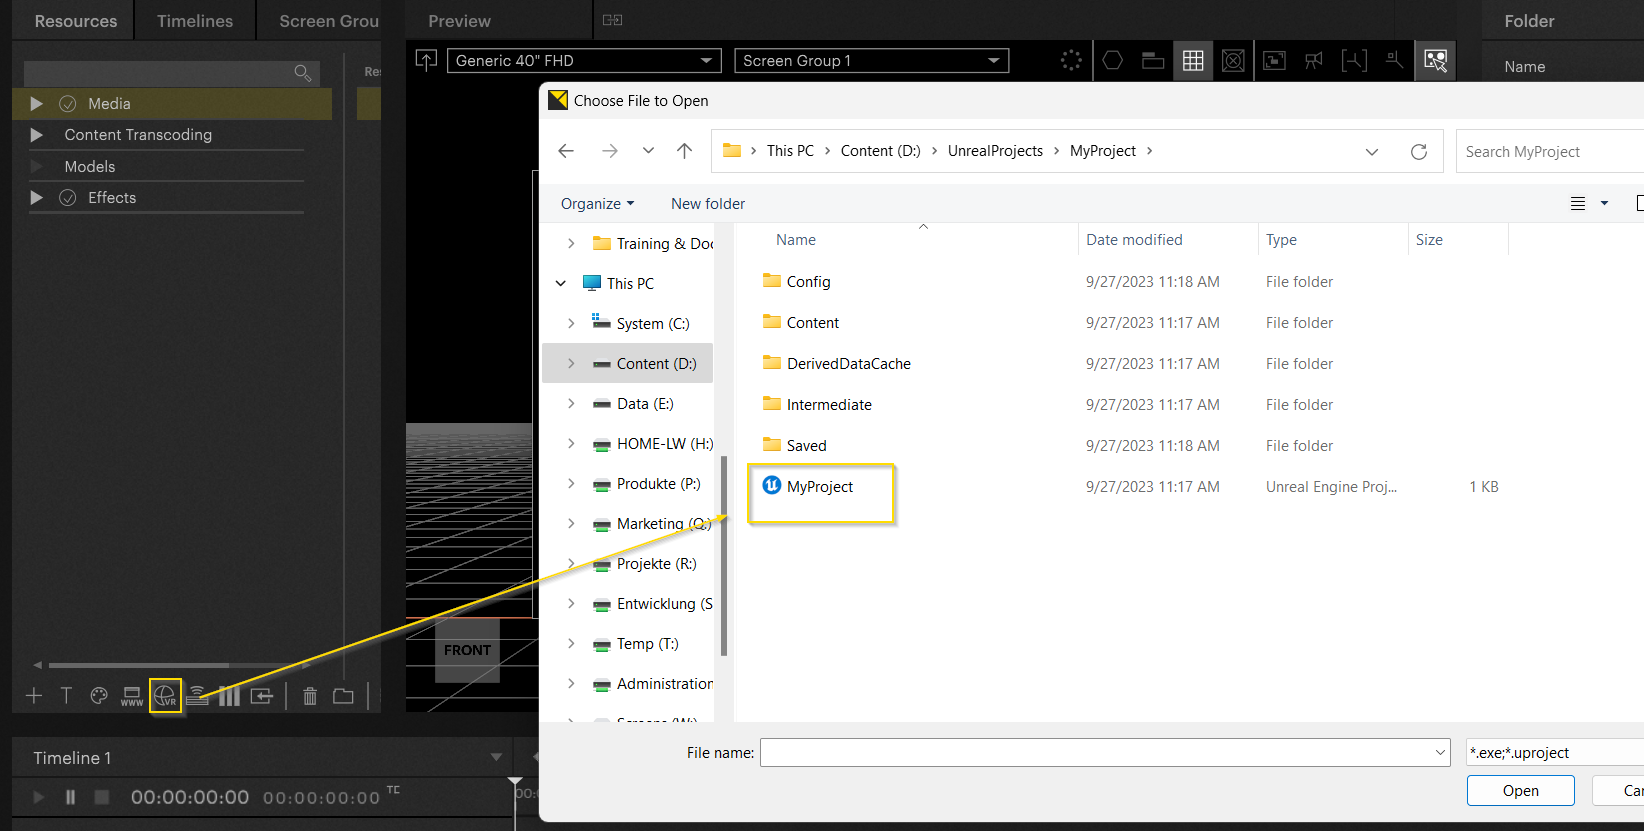
Warning
You can either import a regular Unreal Project file, or an Unreal Packaged exe file. The exe option is only accessible by using the AVStumpfl compiled Unreal Version. The version is only available on request.
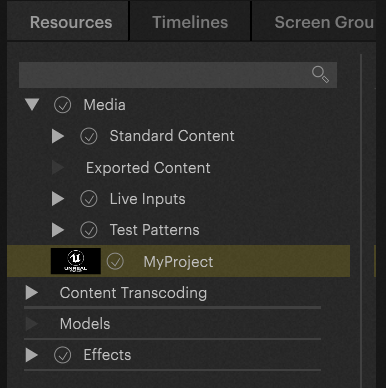
After following the steps, the Unreal Project is accessible in the “Resource Browser”:
Now after selecting the Unreal Project in the “Resource Browser” some important settings are accessible in the inspector. Set the correct “Unreal Engine Target Version” and “Render API”. In upcoming releases, the default will be set to “5.2" and “DX12”. Please check this setting as it is important:
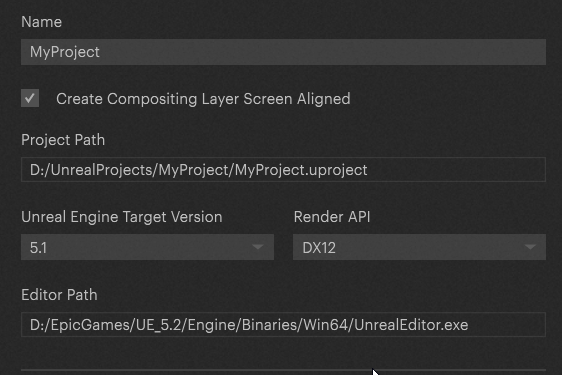
The “Launch” settings control the launch options. The default for a regular Unreal project is “Dash Game” mode. “Packaged” is used for Unreal EXE setups, and "Multiuser" is used for Unreal Multiuser Sessions.

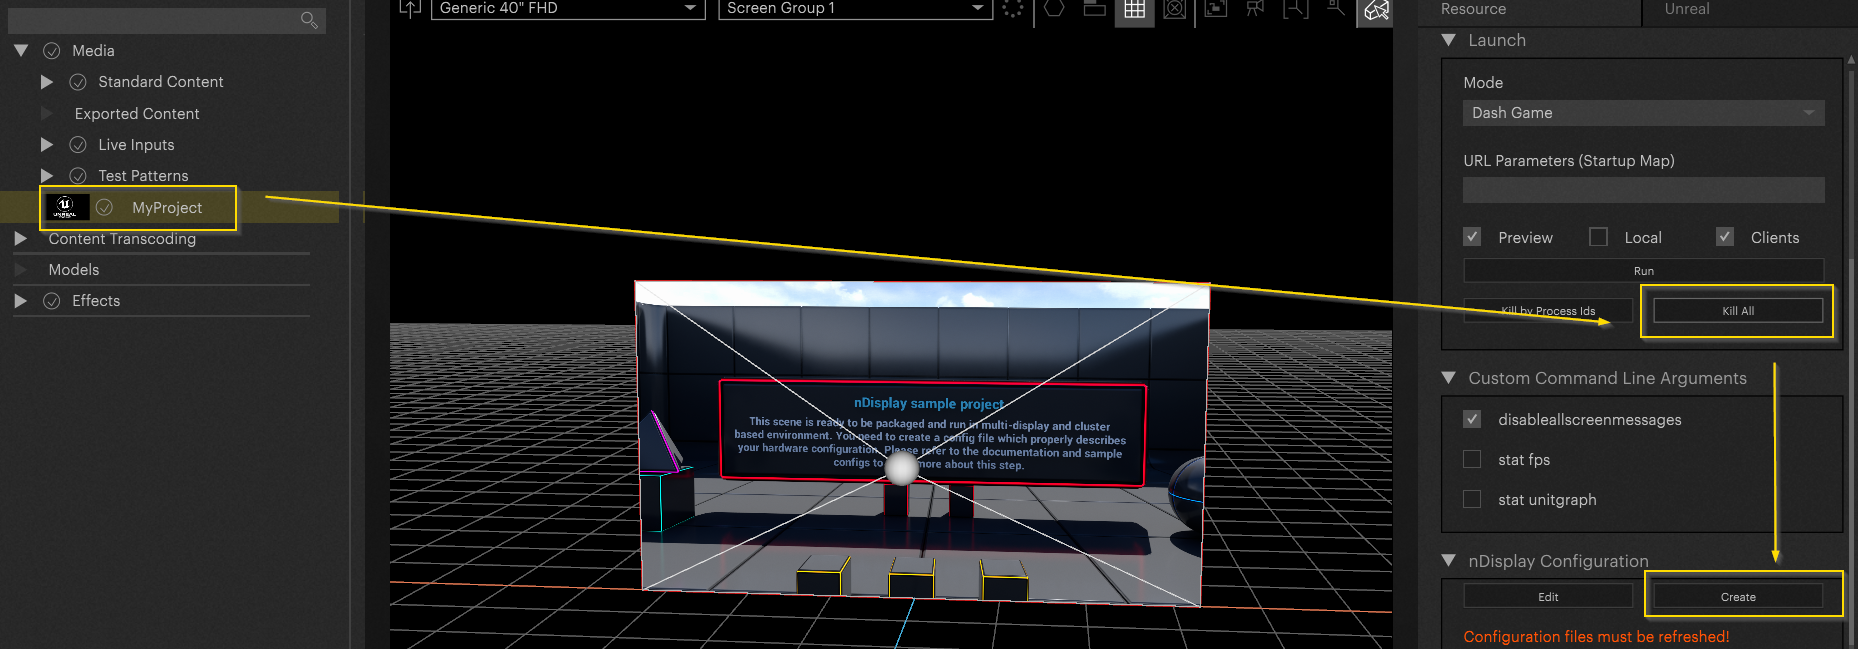
Add the resource to the Timeline and select the resource in the browser afterward, as we must access the settings in the inspector.
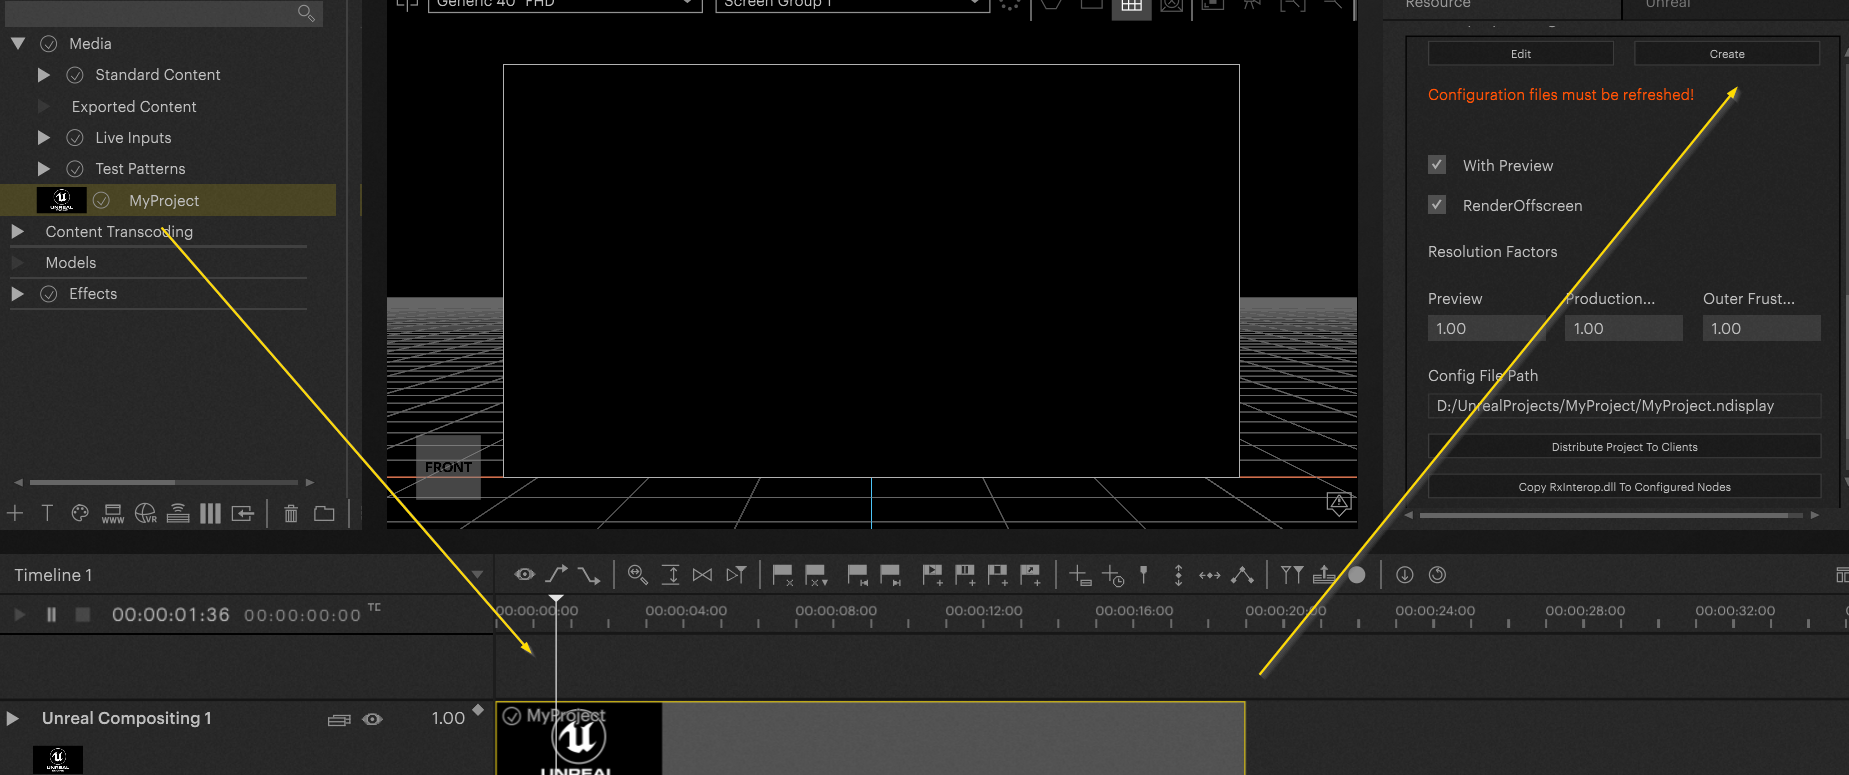
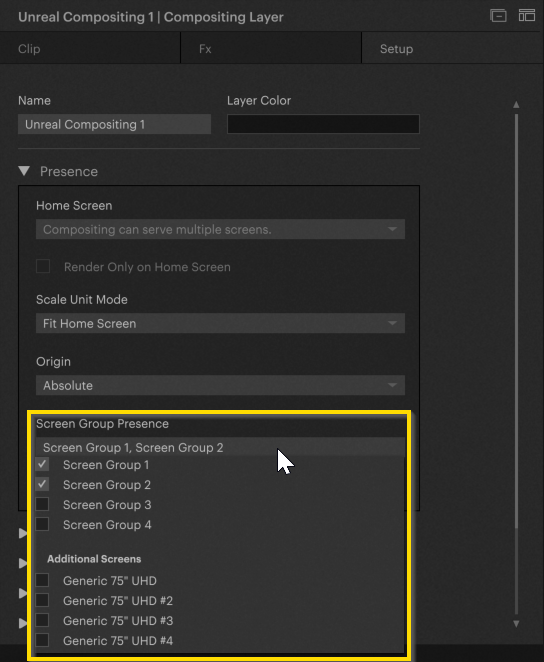
Select the Unreal layer and in “Setup/Screen Group Presence” select all the screen groups you want the project to run on.
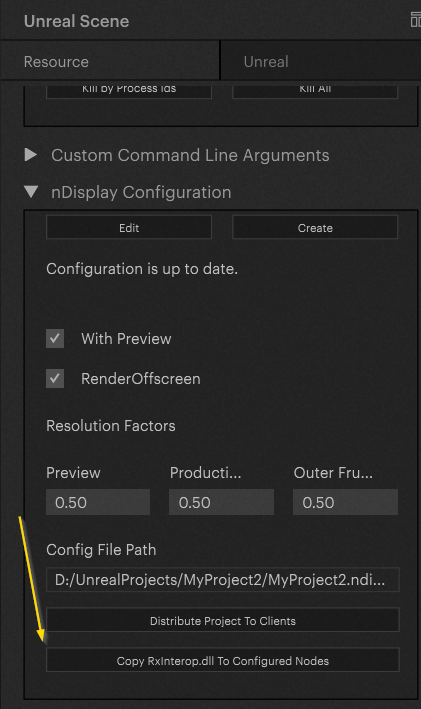
You should then see a red entry in the Unreal resource's "nDisplay Configuration" stating that the nDisplay config needs a refresh. Hit the “Create” button. Pixera will now recreate the nDisplay config files.
Furthermore, activate the “Copy RxInterop.dll to Configure Nodes” button (this only has to be done once):

Warning
When installing Unreal on the regular C - Drive this step will fail and the setup will not work.
This is why the installation on, for example, the D - Drive is important!
Now, click on run in order to start the Unreal Editor in the background with the selection you made. It will then open and show up your project.
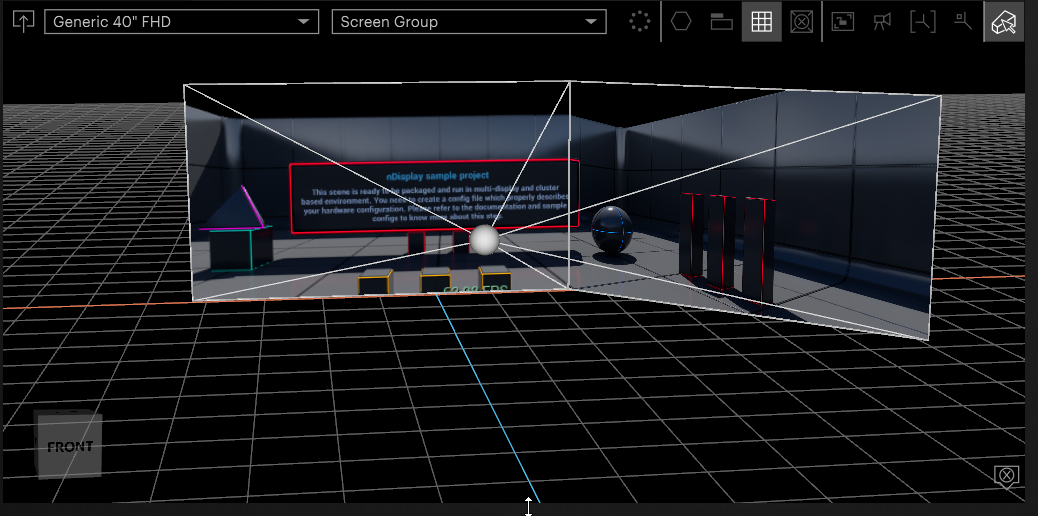
The Unreal scene is now running. In the top right corner, select “Perspectives” from the drop-down:
Select the “eye”. Now you can move the perspective.
Positioning Unreal Setup
With the “World Position” parameter, the position of the Unreal scene inside “Inner compositing” can be moved.
Tips
Pixera utilizes two differentiated 3D spaces. The so called “Outer compositing" and “Inner compositing”. In “Outer compositing” screens, displays, and led volumes are places. This is the space where we mimic the physical world setup.
The “Inner compositing” is an additional 3D space. To be more precise, a 3D content space. This is where the Unreal scene is being placed and displayed.
Through displays/volumes in “Outer compositing” we can “look” into the 3D workspace of the “Inner compositing”.
When moving volumes in the outer compositing we are simultaneously moving the viewport from which we investigate Unreal's 3D scene.
Try it for yourself by changing the position of the display in the “Outer compositing space”.
When changing the position of volumes in the “Outer compositing” it is necessary to kill the Unreal scene and regenerate the nDisplay files.
The “World Rotation” parameter always rotates the world through the root 0/0/0 position in the “Inner compositing” 3D space.

To execute the “World Rotation” parameter after changing the “World Position” parameter, use the “Relative Camera Controls” parameter in the inspector:
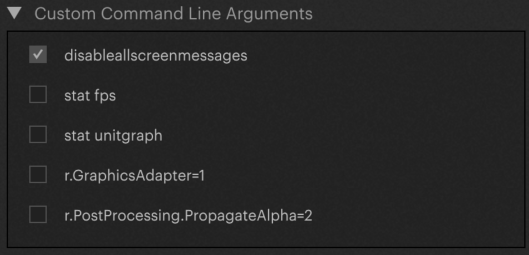
Custom Command Line Arguments
In the resource inspector, it is possible to set up “Custom Command Line Arguments”. The options you are given depend on if you are using a Pixera Server and image vs a Custom Server.
Custom Server
Pixera Machine/Image

Command Line Argument Options:
- -noSplash: Show no Unreal splash window on opening.
- -RenderOffScreen, Will render the project without a visible window.
- disablescreenmessages: Will disable any messages from Blueprints.
- stat fps: Will display a fps statistic of the Unreal Level.
- stat unitgraph: Will display a graph of the Level’s asset usage.
-
r.PostProcessing.PropagateAlpha=2: Will allow layers to appear above and below the Unreal Level when on the timeline.
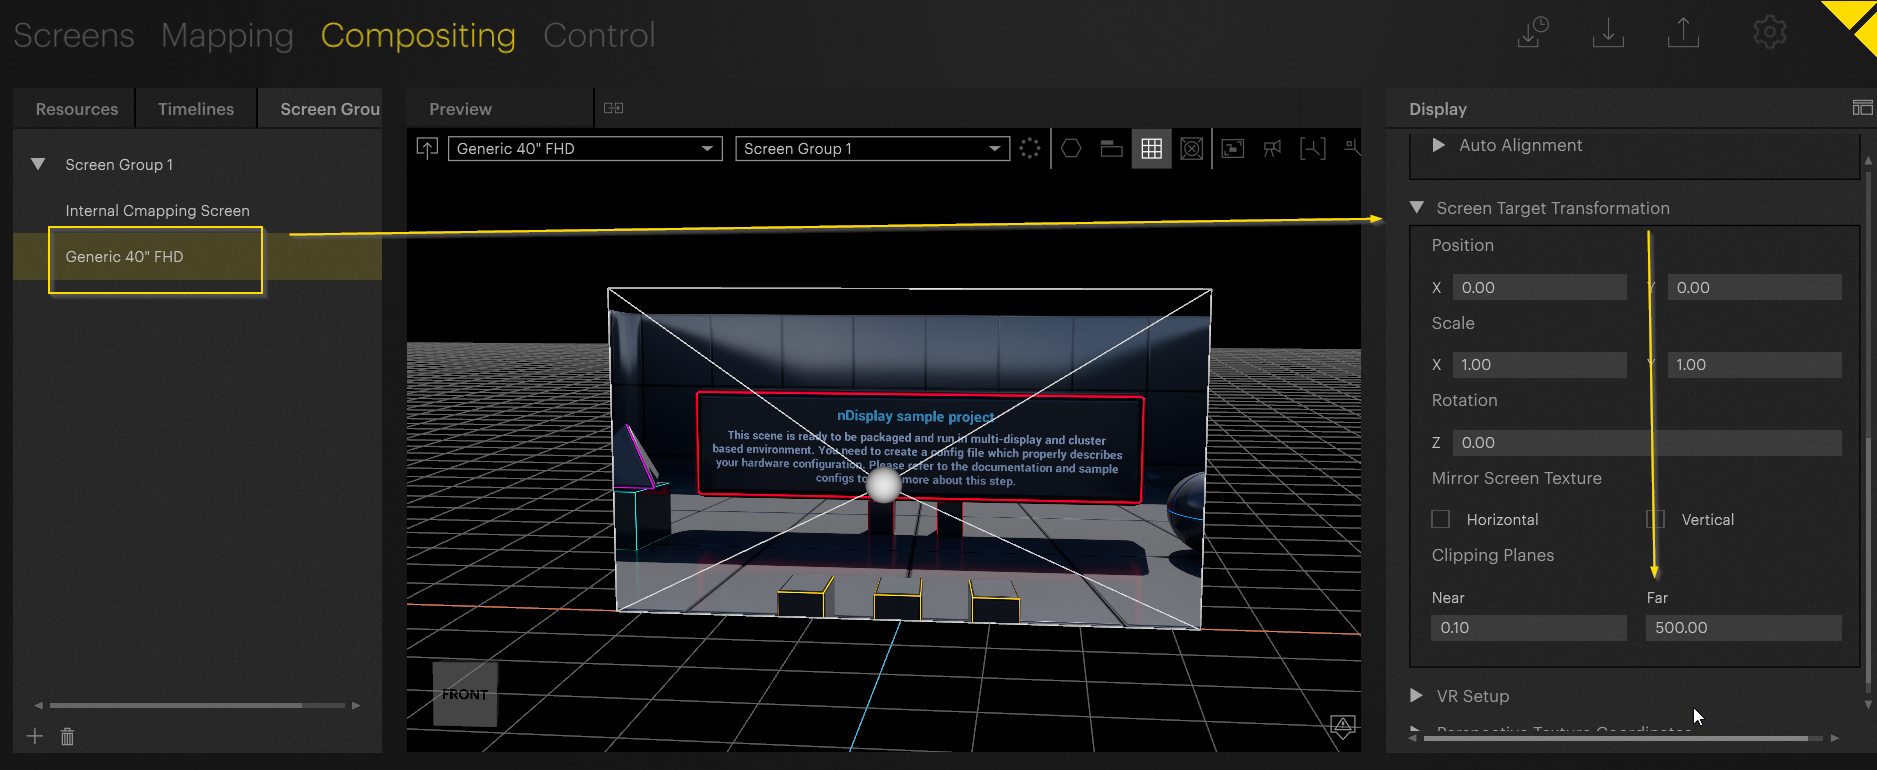
Clipping Plane
By default, the static clipping plane for Unreal setups is set to five hundred (meters):
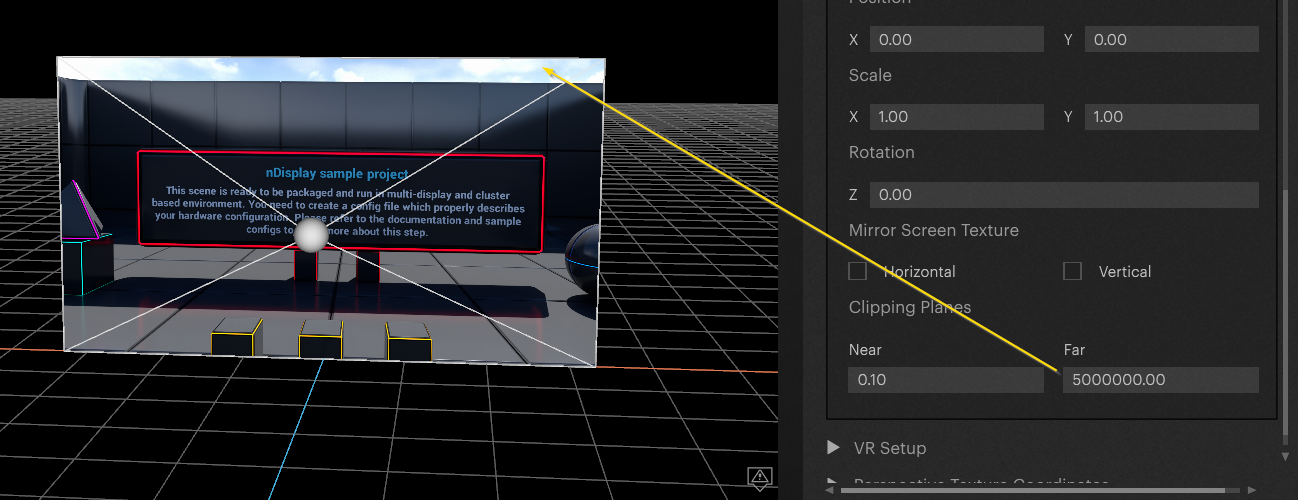
By changing this setting, the render distance is going to be increased. As seen in the screenshot, the sky is now rendered:
Output Assignment
Warning
Lots of setup changes demand a kill and recreate for nDisplay. It is advised to kill and recreate the setup as often as possible to avoid problems.
For now, we only worked on the preview. As soon as we change or add an output configuration, we must kill the nDisplay setup and create a new nDisplay config:
By default, the playback on the local system is deactivated. The settings can be changed in the Unreal resource inspector in the Compositing Tab. By activating "Local" we can display the setup locally:

Warning
There is an important reason this setting is deactivated by default. A proper Unreal VP setup consists of a director for preview and a render client handles the playout. This is the reason that local is deactivated by default.
Pixera opens individual nDisplay configs for preview and playout. They will never be 100% in sync (but they are not required to).
Opening an output as well as a preview on the same machine demands massive performance. Please be aware of that. Unreal might crash as it will quite fast run out of Vram.
Furthermore, please note that Unreal Engine must be installed on all clients on the same drive and path as on the director. Installation of Pixera Unreal Engine Interop installer on all clients is mandatory as well.
Resolution Factors
Often the Unreal scenes can be very demanding. Especially during preprogramming and planning, the setup might be tested on non-production hardware. Or it is not necessary to display the outer frustum in full resolution (example - Virtual Production with tracking. Outer Frustum only responsible for reflections, therefore resolution is not important)
In the inspector, it is possible to scale down the render resolution.
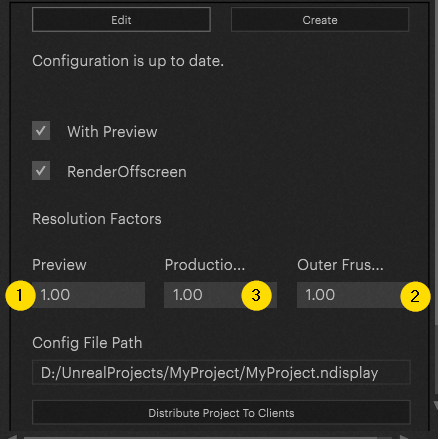
1: Scaling factor for preview
2: Scaling factor for production overall (global resolution scaling for everything)
3: Outer frustum scaling factor
Adding a Second Display
Add a second display to the Workspace:

Kill the current Unreal setup in the inspector and create a new nDisplay config. The scene is now displayed on both screens:
Warning
The Unreal scene is being rendered within Pixera´s inner compositing. It is placed inside Pixera´s content 3D space. The used displays/volume acts like a “window” into this 3D world.
Managing the Render Load
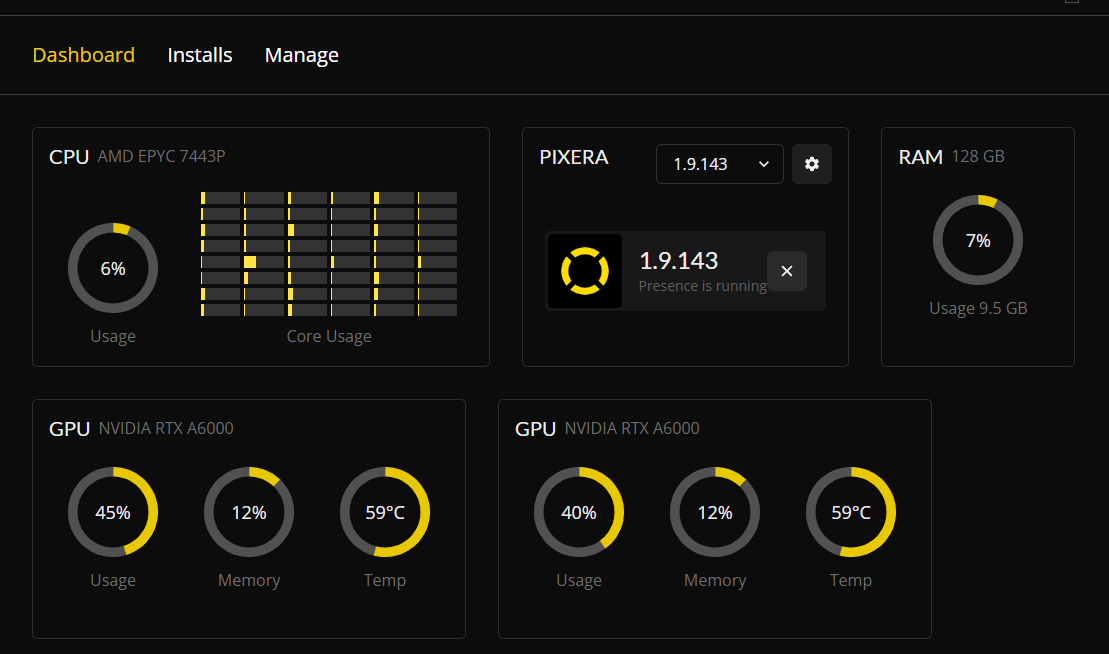
Now, both viewports are being rendered on the same graphics card. Depending on the Unreal scene, this can lead to performance problems.
The screenshot below was taken on a Pixera 4 server with 2 RTX A6000 graphic cards. As you can see the Usage on the first GPU is at 71% load, the second is currently at 0%:
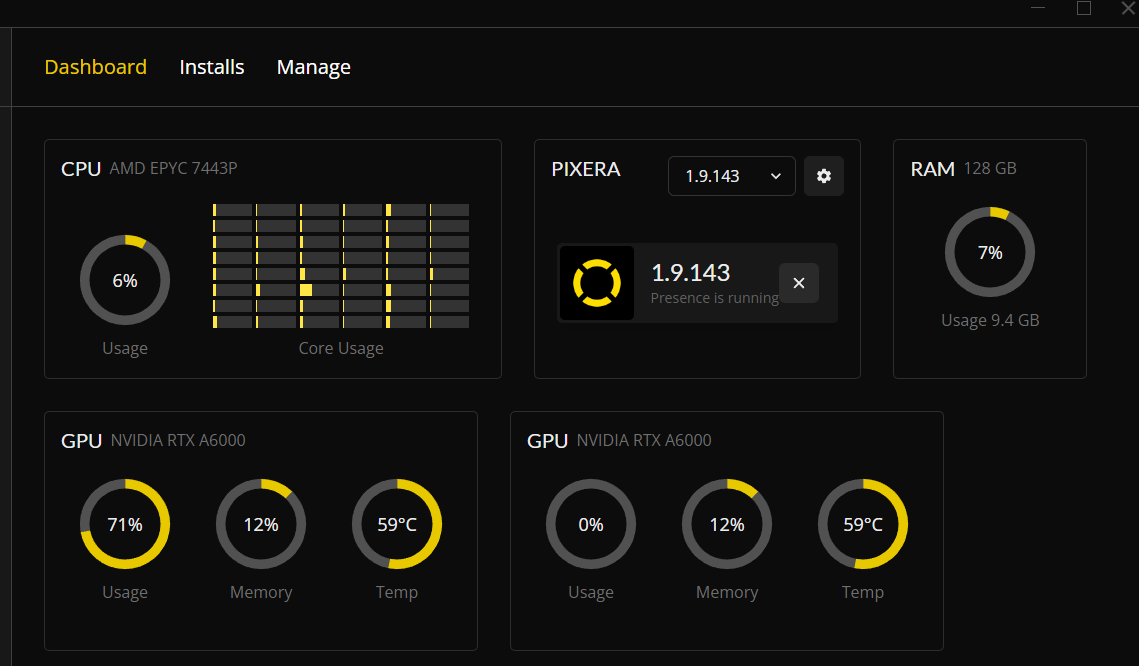
On Multi-GPU systems, the load can be distributed to the second GPU in the settings. Select the resource and hit the “Edit” button. In here, graphic cards can be assigned to displays / led volumes (viewports). The first GPU Index is always zero.
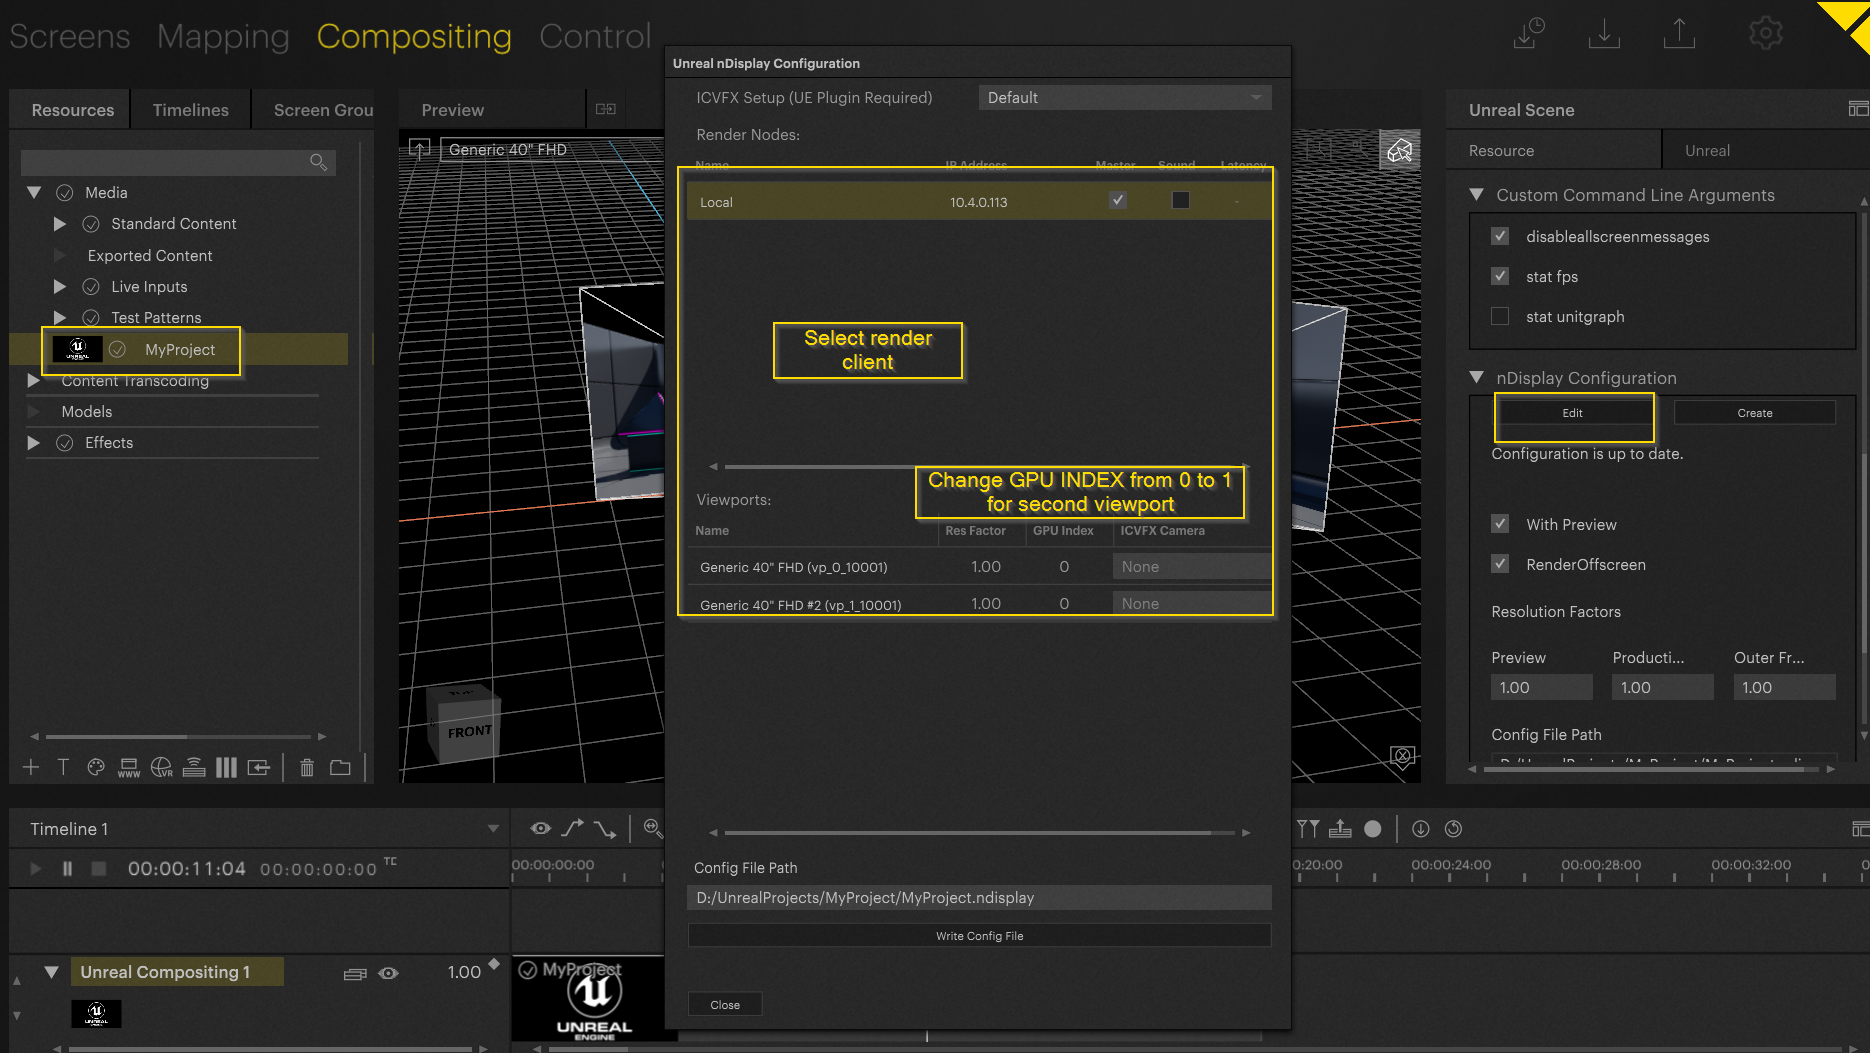
Viewport one is now rendered on the first GPU. Viewport two is rendered on the second GPU. The load has been distributed:
Warning
To be able to distribute the load Maximum GPU Topology must be activated in Nvidia Control Panel.
This can either be done by using SLI/NVLink or by creating a Mosaic.
Curved LED Setup
By default, the content mapping onto a curved LED is flat.
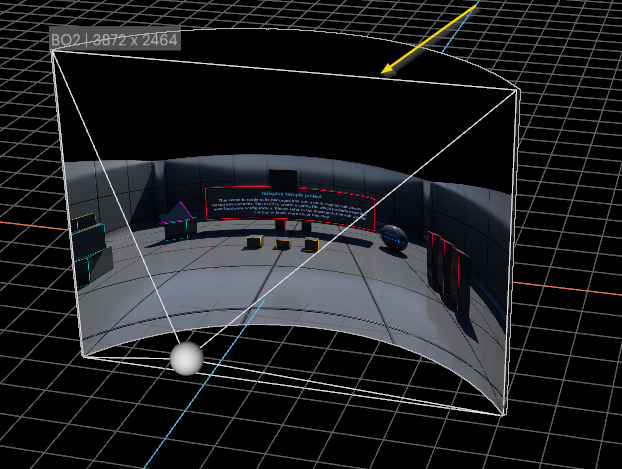
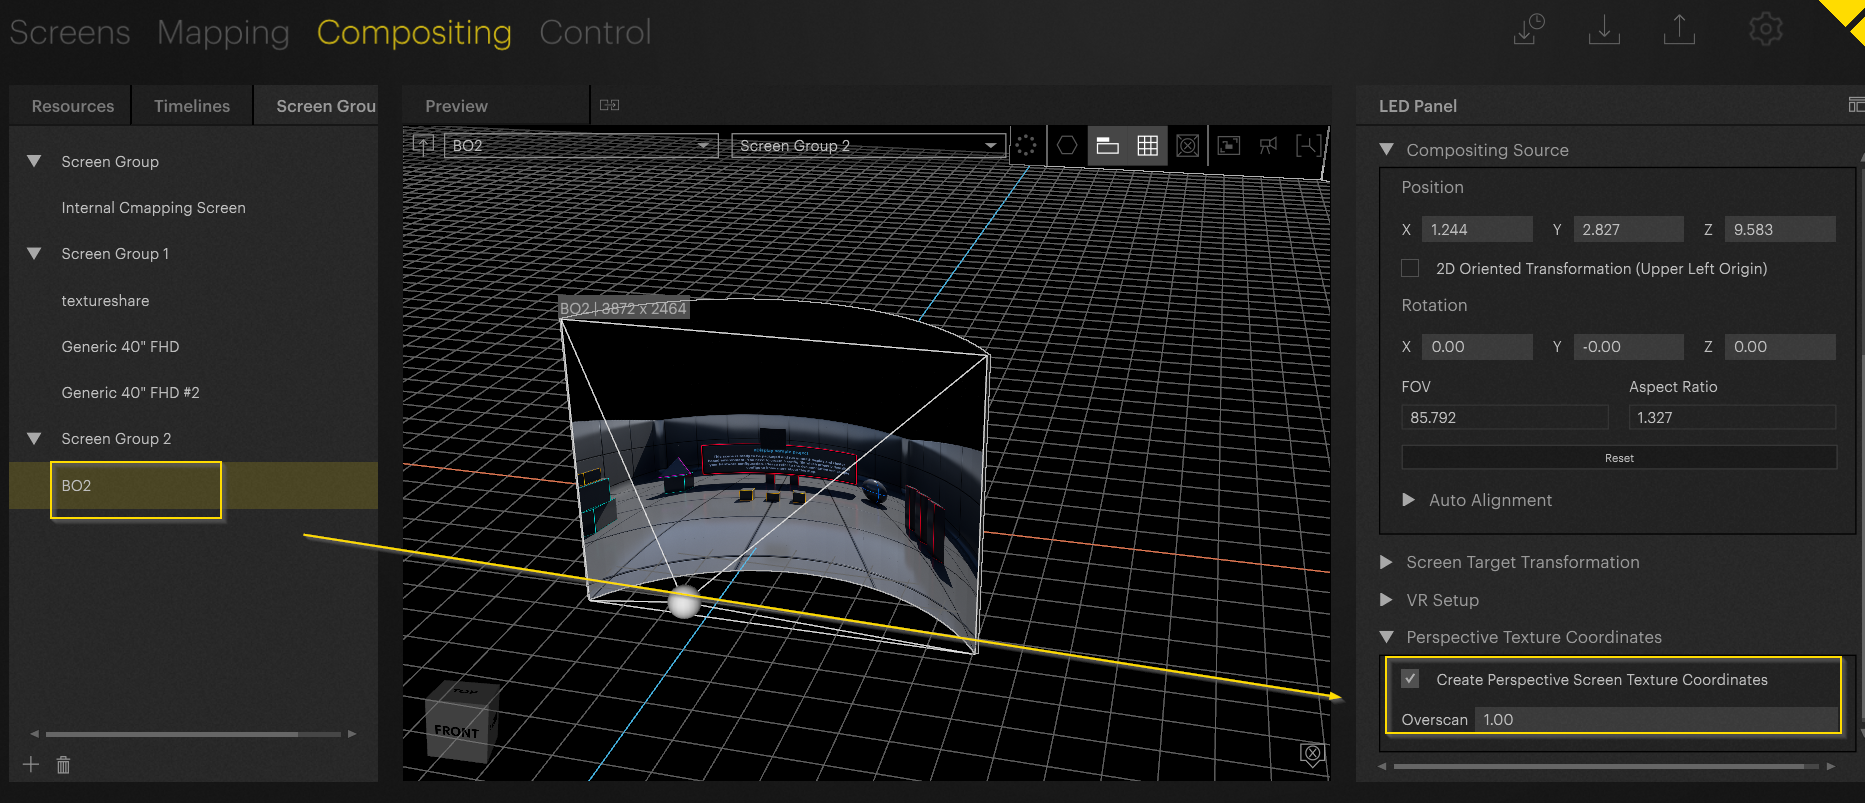
Change setting by selecting the LED (in screen group). Activate “Create Perspective Screen Texture Coordinates”.
Now pixels are mapped correct onto the curved LED wall from the eyepoint:
Overscan
If the eyepoint is below the physical boundary of the used screen, you can utilize overscan to help. By using overscan, the perspective viewport size can be increased. Therefore, more content can be displayed without changing the setup. Without changing this option on some setups, there will be a black rendering shown when moving the eyepoint out of the render viewport.
Changing the overscan increases the viewport to catch more of the Unreal scene.
Warning
There is no visual representation for the overscan in the preview.
Multiclient Setup
Up until now, only single client setups were displayed. To distribute the setup to multiple Clients, please follow the following steps:
- Create Multi-Client setup. Refer to Manager - Client Setup / Multi - Client Setup
- Create nDisplay config as described earlier
- Distribute settings to additional Clients:
Warning
The root Unreal project directory (D:/UnrealProjects/…. -→ refer to screenshot) must exist as well on the client. Pixera will copy the project folder from the director to the clients used. For example, if a D: drive is not available to the client the project will not be copied, and the playout will not work!
For more detailed information on Interop setup please refer to:
Unreal Engine (5.2.1) Setup
Pixera 2.0.65 | 12 July 2024