 Contact Us


Disclaimer
Virtual Production is a complex topic. It is mandatory to understand the basic setup to be able to advance to the advanced techniques (For example, Set Extension and Multi-Pos warp).
Furthermore, it is mandatory to understand all the basic principles of PIXERA.
Here is a list of the essential VP related documentation in chronological order:
Unreal 5.2.1 Tips and Tricks (Performance and Testing)
PIXERA Connect, an Unreal Plugin - General Usage
PIXERA Texture Sharing to Unreal
Studio Camera (Virtual Production)
Set Extension (Virtual Production)
Set Extension is a unique feature used in Virtual Production environments. It allows rendering bits of the Unreal Scene into the camera's viewport. This enables setups where cameras can move their viewport beyond the available led volume.
Technical Setup Set Extension - Camera Object
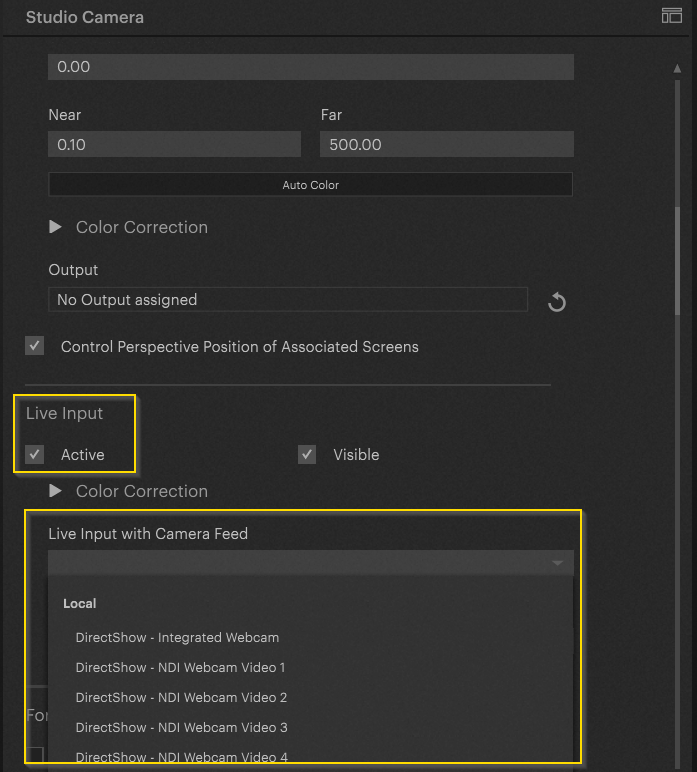
Activate the Live Input on the Studio Camera and select the correct input stream. Their input can be located on any Client. In our demonstration, the input is in the local system for demo purposes.
Scroll down to activate the Virtual Set Extension.
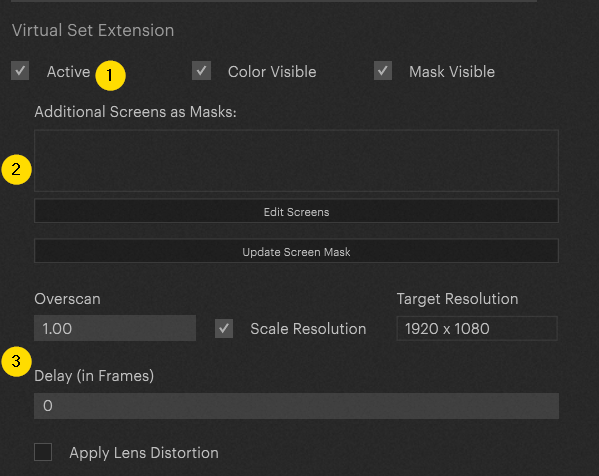
- Activate set extension
- Explanation via example:
In the VP scene, there are objects inside the VP setup. Those must be masked out somehow to not get disturbed by the set extension. You can create screens or import 3D models (which are technically screens as well) and utilize those as masks. - Overscan for the set extension.
“Mask Softness” are the settings to set up the bleed between the camera and set extension.
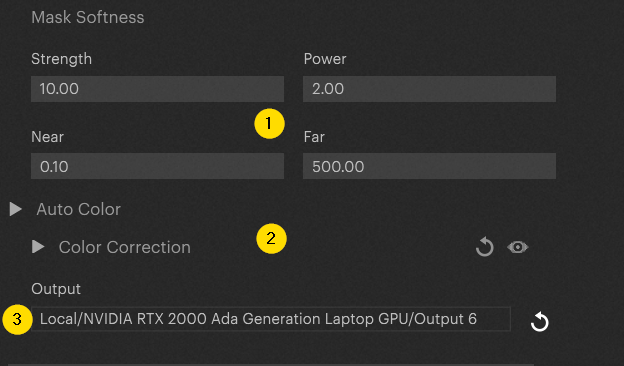
- Strength of the bleed (width), Power is the power of the gradient
“Near” and “Far” is like the render settings in the other options (render distance in unreal) - Color Correction options for set extension
- Output setup. Select your output on the compositor server that has the live input connected.
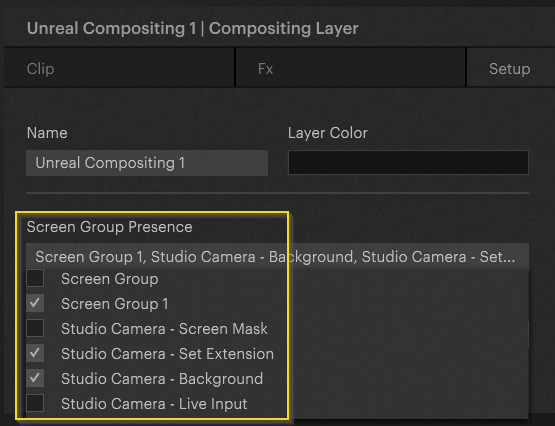
Adding the Set Extension to the Layer (Activate Rendering)
Select the layer and add the correct screen group to your layer (Set Extension). It is important to activate the set extension prior to this step. Otherwise, PIXERA won't create the needed Screen Group. Therefore, it won't be selectable here.
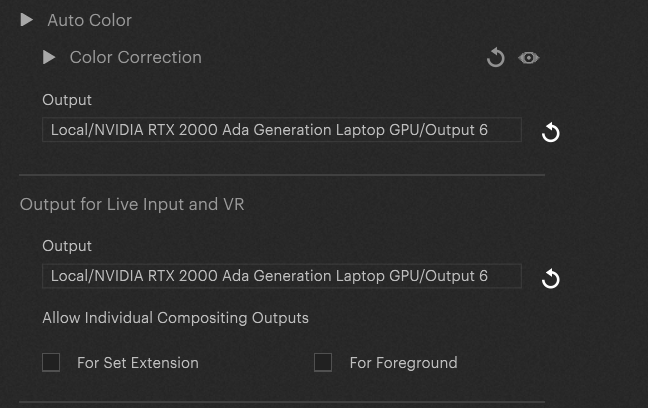
Configuring the Outputs
Select the Camera in the workspace and scroll down the inspector. Add the correct outputs to your camera:
Adding Delay
The rendered viewport in PIXERA´s Camera is not provided by Unreal but by our own render engine. The engine follows the direct tracking data, which is always ahead of Unreal’s rendering. To compensate for this offset, there are different delay options available.
Note: These settings are different from setup to setup. It is always going to be a trial-and-error approach to find the correct delay settings.
Live input delay (tracking delay). This delay is for the live input chain. The camera, live input card and tracking all create delays. This setting is used for compensation:

Delay Options:
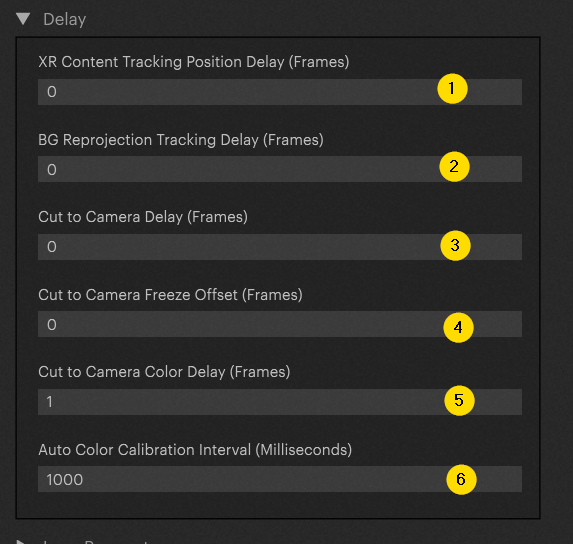
- Delay from PIXERA Render to Unreal and back for set Extension. It is the delay that Unreal needs to render the frame and send it back to PIXERA. This is typically a delay of 2 frames.
- Delay from PIXERA Render to Unreal and back for Back Projection of inner frustum. It is the delay that Unreal needs to render the frame and send it back to PIXERA. This is typically a delay of 2 frames.
- The total frame delay in the complete video signal processing chain
- Is used when Cameras have different delays. Add delay to “faster” camera to set them at same delay level.
- If you have multiple color corrections for multiple cameras, this is the delay that is needed to apply the color correction for the inner frustum.
- Autovall for auto color calibration
nDisplay Delay
To compensate for the delay of the signal chain, a delay on nDisplay itself can be set. This is helpful when moving objects in an Unreal scene is used. By setting this option, the delay between the rendering of the backdrop and the rendering of the set extension in the camera can be adjusted:
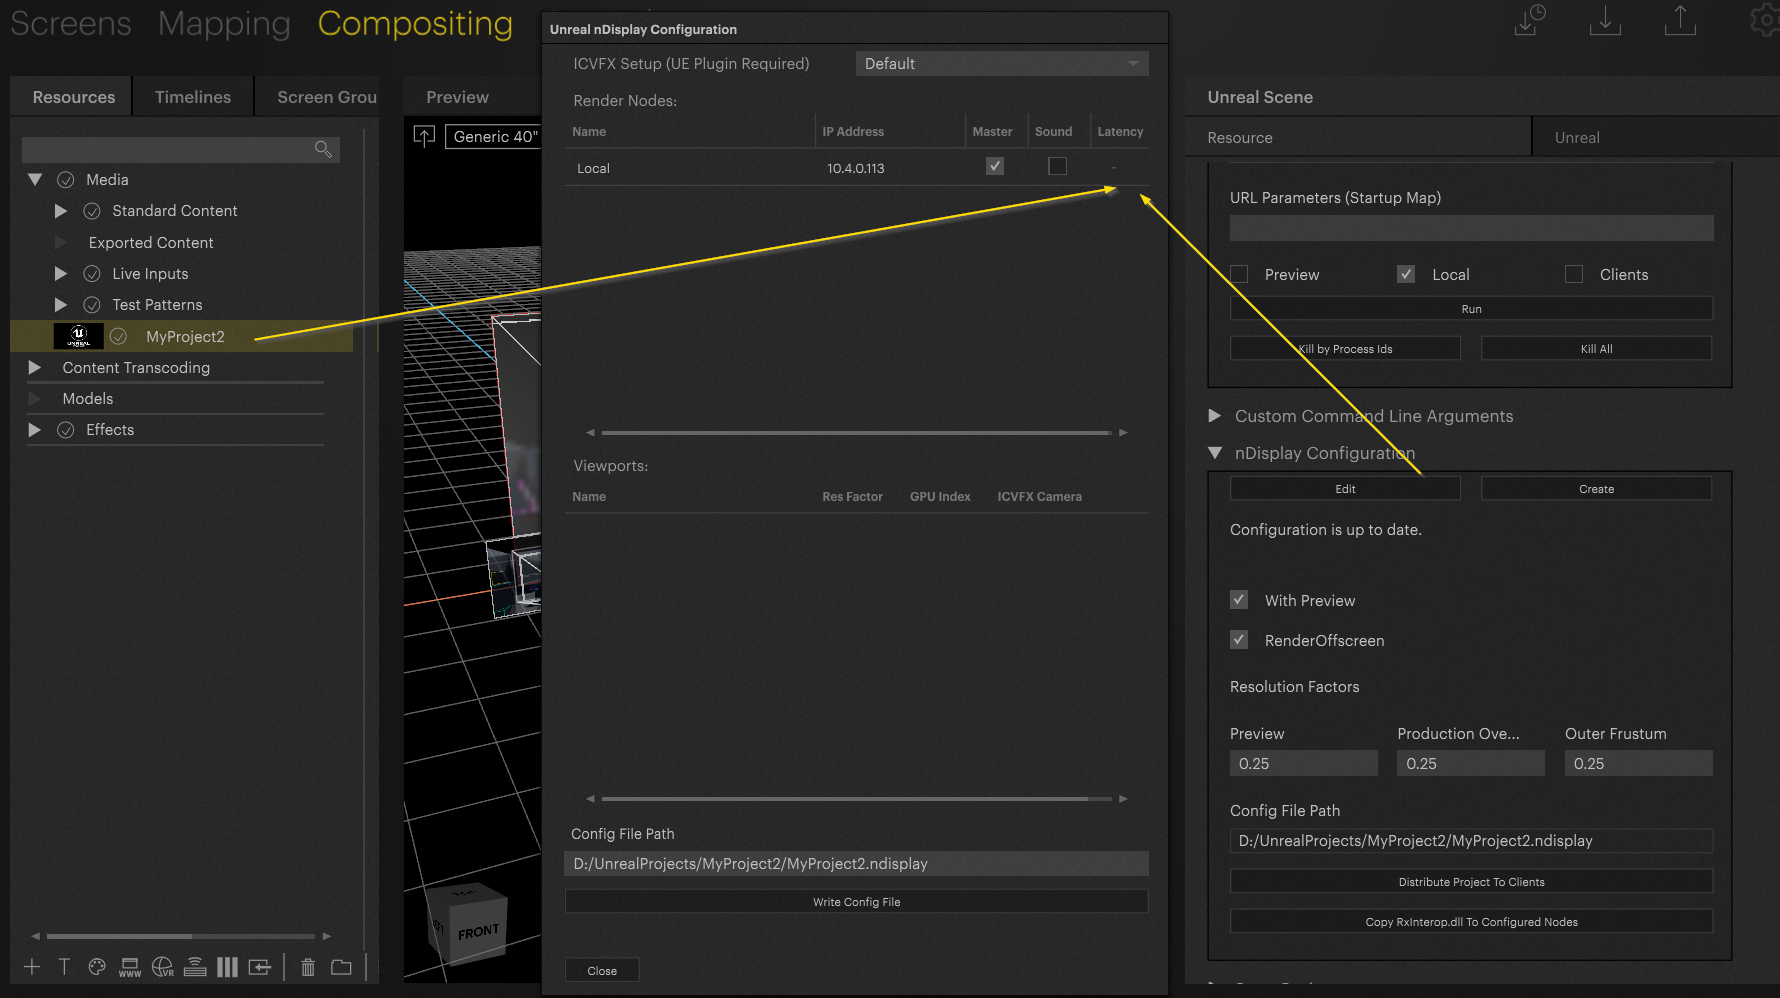
Warning
Latency cannot be set when only working locally.
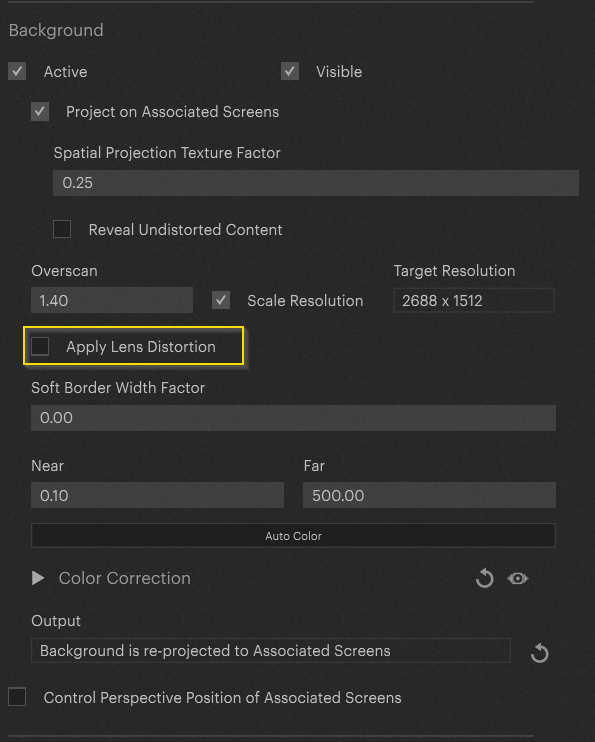
Lens Distortion
Every camera lens is distorted on its boundaries. By default, the background is a sharp image. To match the background to the camera image, lens distortion can be activated.
Normally, the lens distortion parameter is received via the tracking system. If not, scroll down and set up the lens settings manually.
PIXERA 2.0.65 | 24 July 2024 | CL