 Contact Us


We offer the possibility to send Variable values from Unreal onto a PIXERA Timeline. From there, the values can be watched or used in Control.
Warning
The PIXERA Connect Plugin is required for the following features in this article to work. Follow this article to install and learn about the Connect Plugin: PIXERA Connect (Unreal Engine Plugin).
Setup Unreal
First, you will need to have the PIXERA Connect Plugin installed and restart the Unreal Engine for the following Actions to show up in Blueprints.

To enable access, the variables must be specified via the respective “Send Data” Action in the Unreal Level's Level Blueprint.
Color, Float, Int, Vector and Vector 2D are possible data types that can be sent, these will be sent in an array format.

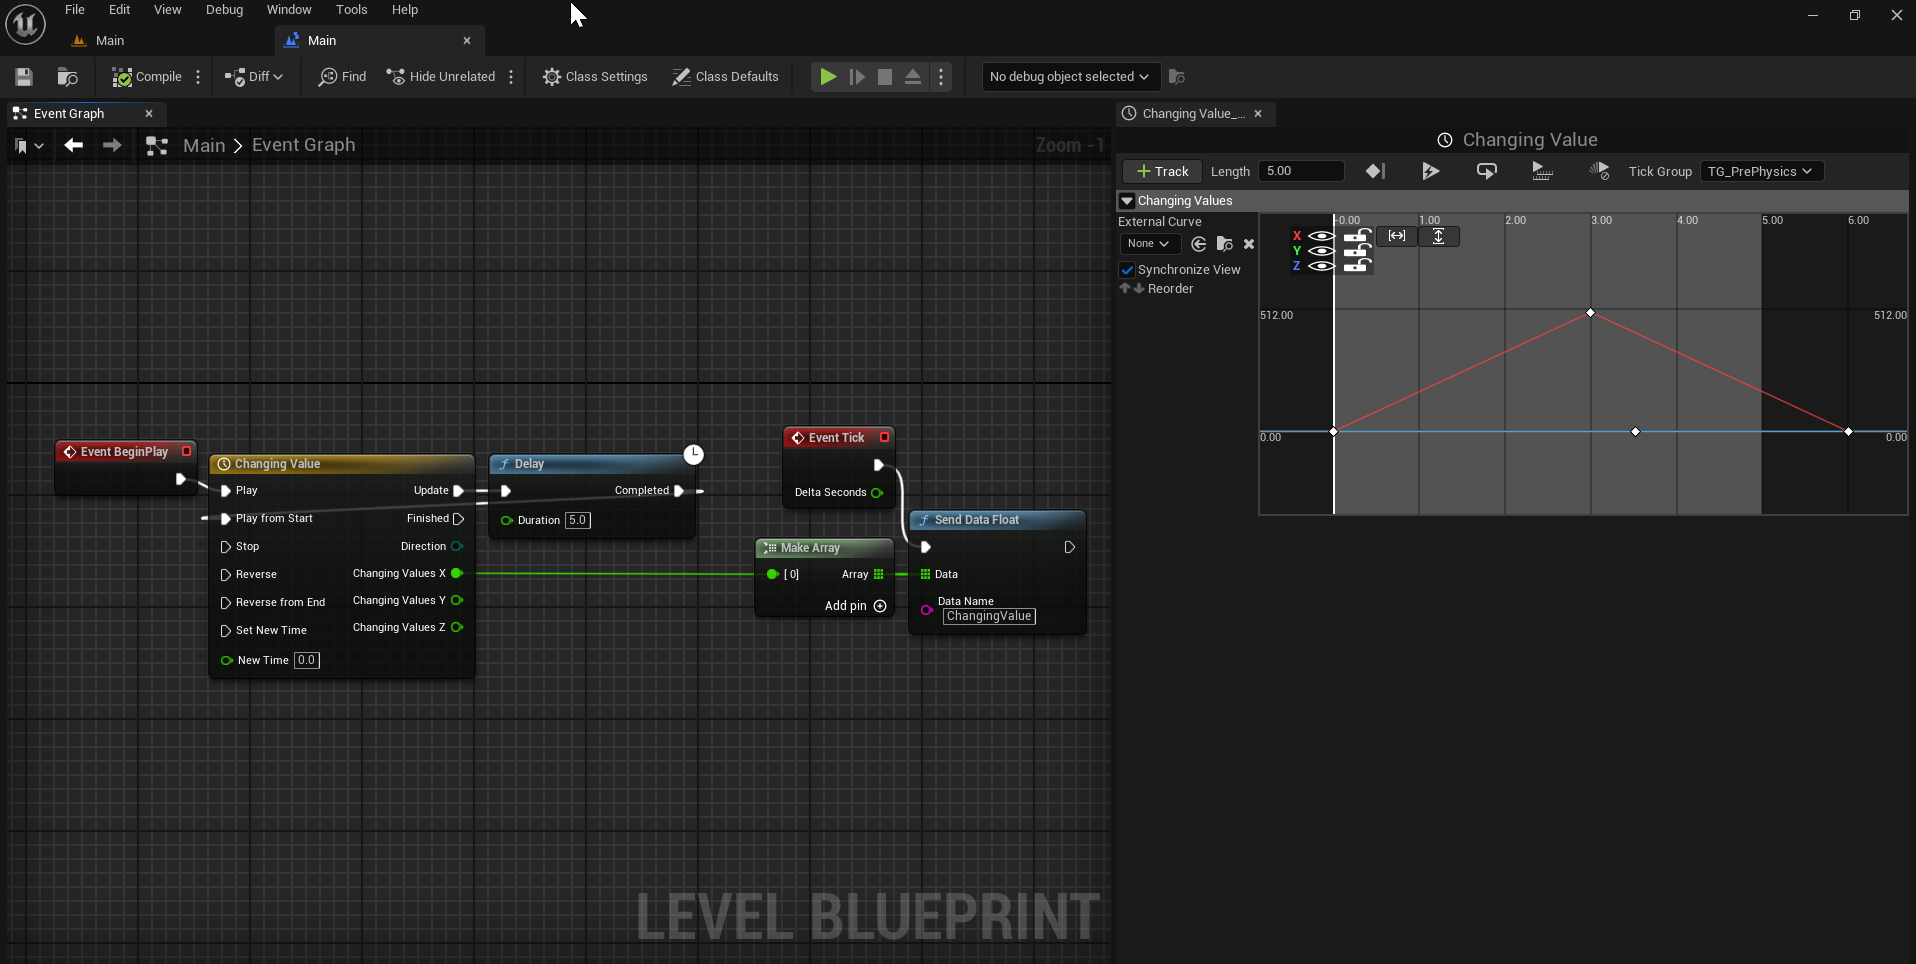
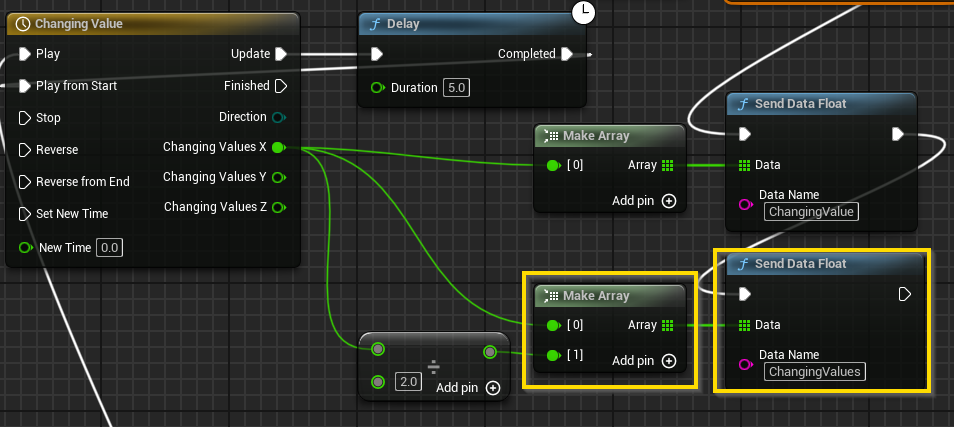
In this example, we are using a timeline to create a linear increasing and decreasing value from 0 to 500.
“Event Begin Play” for this example is connected into the Timeline to start it look using the Delay attached. From there the “Event Tick” must be connected to the “Send Data” Action you want to use, in this case it's the “Send Data Float” Action. Now every frame, the Blueprint will send a float that PIXERA can access.
You will then need to set the Data Name which will be used in the PDTF to be created later. You will also need to connect the values you want to send to the Data section of the Action, in this case the “Make Array” action is used, and only one value is placed inside.
Setup PIXERA
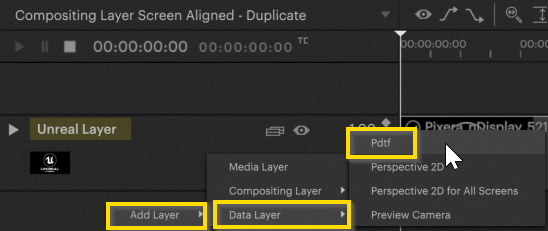
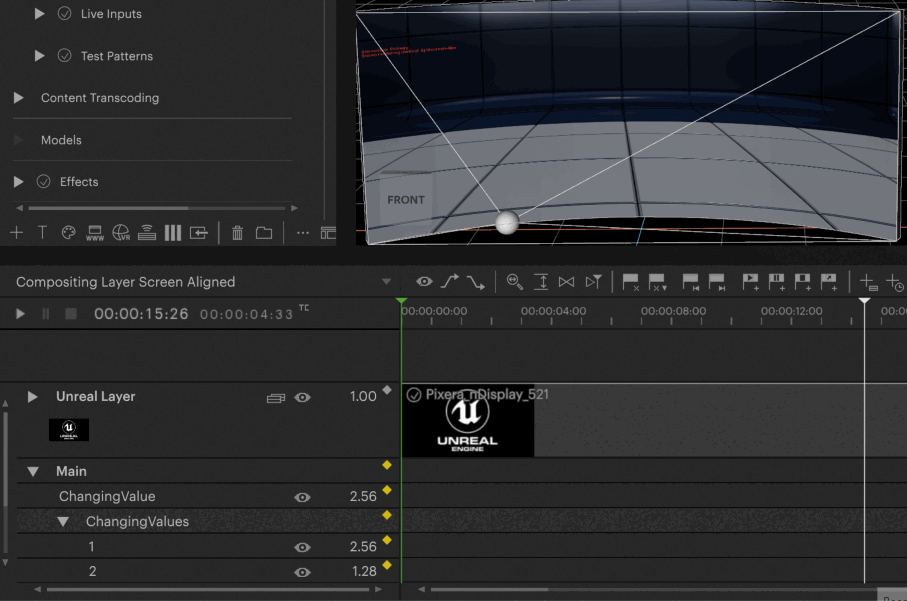
In PIXERA you have to create a Pdtf layer on the Timeline with the Unreal Layer.
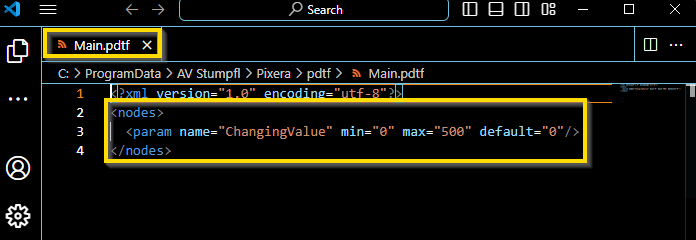
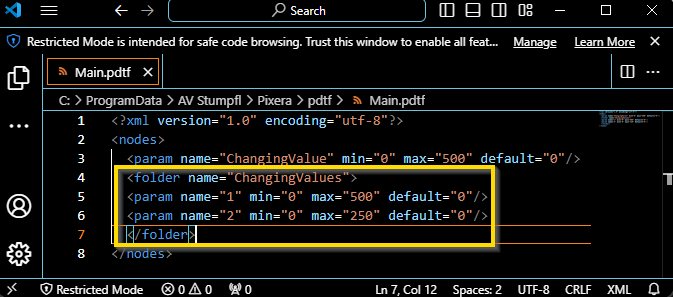
The PDTF you want to select will need to be custom-made. You can copy one of the default PDTFs and modify it from there. In this case, for every PDTF, you will want to have the name of the file be the name of the level being used in PIXERA.
Since the example project's level is called Main, we named the PDTF file “Main.pdtf”.
From there you will want the information on lines 1, 2, and 4 as this creates the basic structure of the PDTF file. Inside the “node” section, you will want to create the “param” section for each individual Action you created in Unreal.
Since we only had one Action, we only add one “param”. This param needs a “name” which will be the name you set in the Unreal Action mentioned earlier, a “min” value to show on the Timeline, a “max” value to show on the Timeline, and a “default” value the param will appear as on the Timeline.
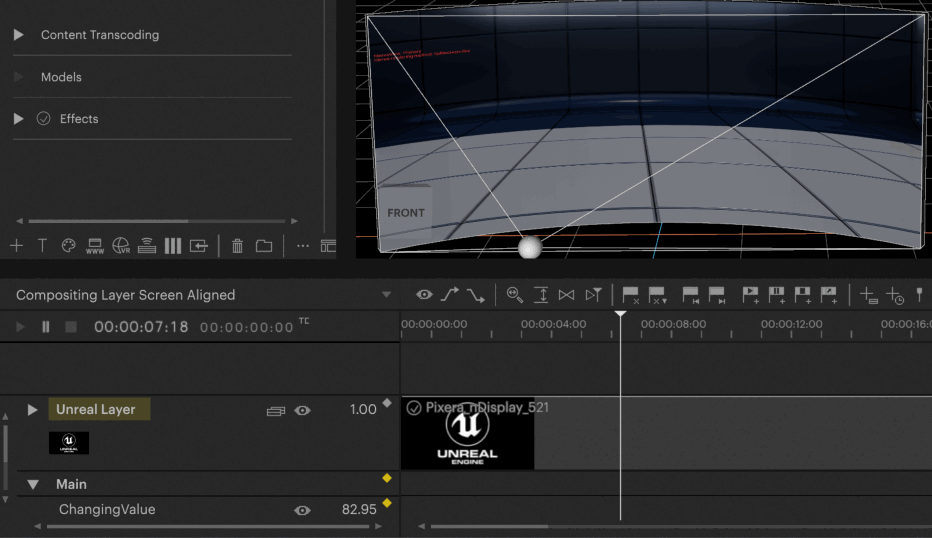
A new Layer will be created after selecting this PDTF, make sure to rename the Layer to the level name as well. Once you run the Unreal Project, you should see the value changing on the Timeline based on what you set in the Unreal Blueprint.
Multi-Value Setup
Here is a workflow example involving multiple values instead of just one. The main difference being the PDTF file as you will need to add a new “folder” beginning and end set as the name of the Action you created, from there the “param”s inside can be called whatever you like.
Continue With PIXERA Connect
The PIXERA Connect Plugin allows a variety of workflows with an opened Unreal Project. Follow the links below to learn more:
PIXERA Connect, an Unreal Plugin - General Usage
PIXERA Connect, an Unreal Plugin - Trigger Events in Unreal from PIXERA
PIXERA Connect, an Unreal Plugin - Unreal Level Streaming and Loading In Pixera
PIXERA Connect, an Unreal Plugin - Send Variable Data from PIXERA to Unreal
PIXERA Connect, an Unreal Plugin - Send Variable Data from Unreal to PIXERA
PIXERA 2.0.65 | 10 July 2024 | CL