 Contact Us


Disclaimer
Virtual Production is a complex topic. It is mandatory to understand the basic setup to be able to advance to the advanced techniques (For example, Set Extension and Multi-Pos warp).
Furthermore, it is mandatory to understand all the basic principles of PIXERA.
Here is a list of the essential VP related documentation in chronological order:
Unreal 5.2.1 Tips and Tricks (Performance and Testing)
PIXERA Connect, an Unreal Plugin - General Usage
PIXERA Texture Sharing to Unreal
Studio Camera (Virtual Production)
Set Extension (Virtual Production)
Introduction
A major challenge in virtual production environment is the color matching of led volumes and cameras. This part is crucial for a believable result for the viewer. There is a new auto color calibration introduced in PIXERA 2.0 which is covered in this article.
Technical Setup
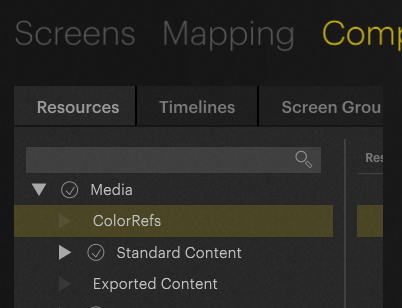
Start in the compositing tab. Create a new folder in the Resources called ColorRefs:
Warning
The folder and the upcoming resources are case-sensitive. They must be named as stated in this article. Otherwise, the calibration will not work.
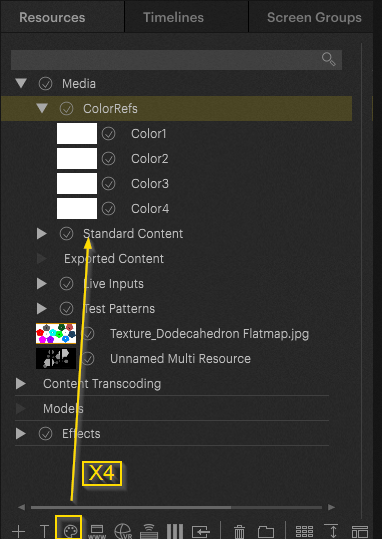
Add four “Color Resources”. They must be named Color1, Color2, Color3, Color4:
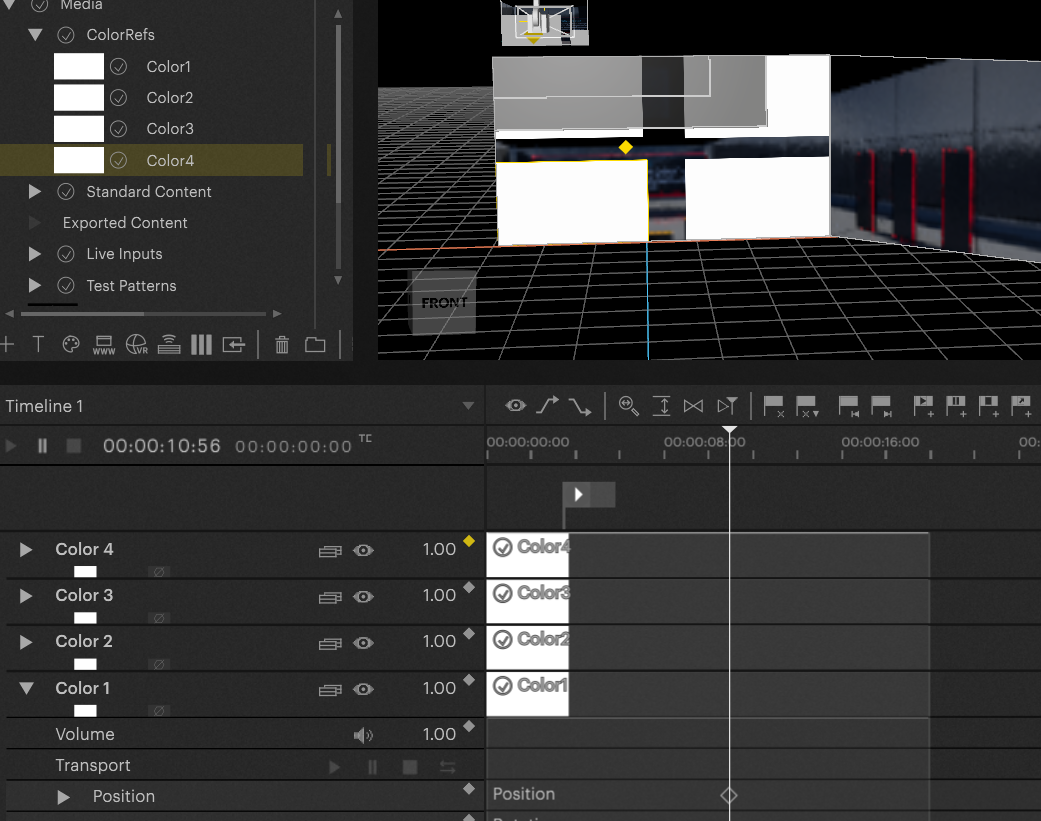
Add them to your volume. Place them in every quarter of the volume. They must not cover the whole screen. Rename the layers (just for reference and easier navigation).
Note:
This process must be repeated for each individual screen element in PIXERA.
Calibration Process
After finishing the prerequisites, we can now execute the calibration.
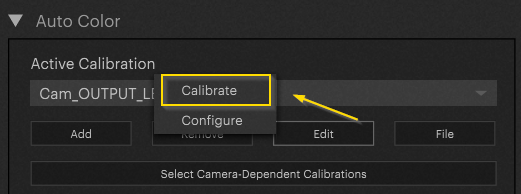
In the Mapping tab, you have to select your display and scroll down to “Auto Color”.
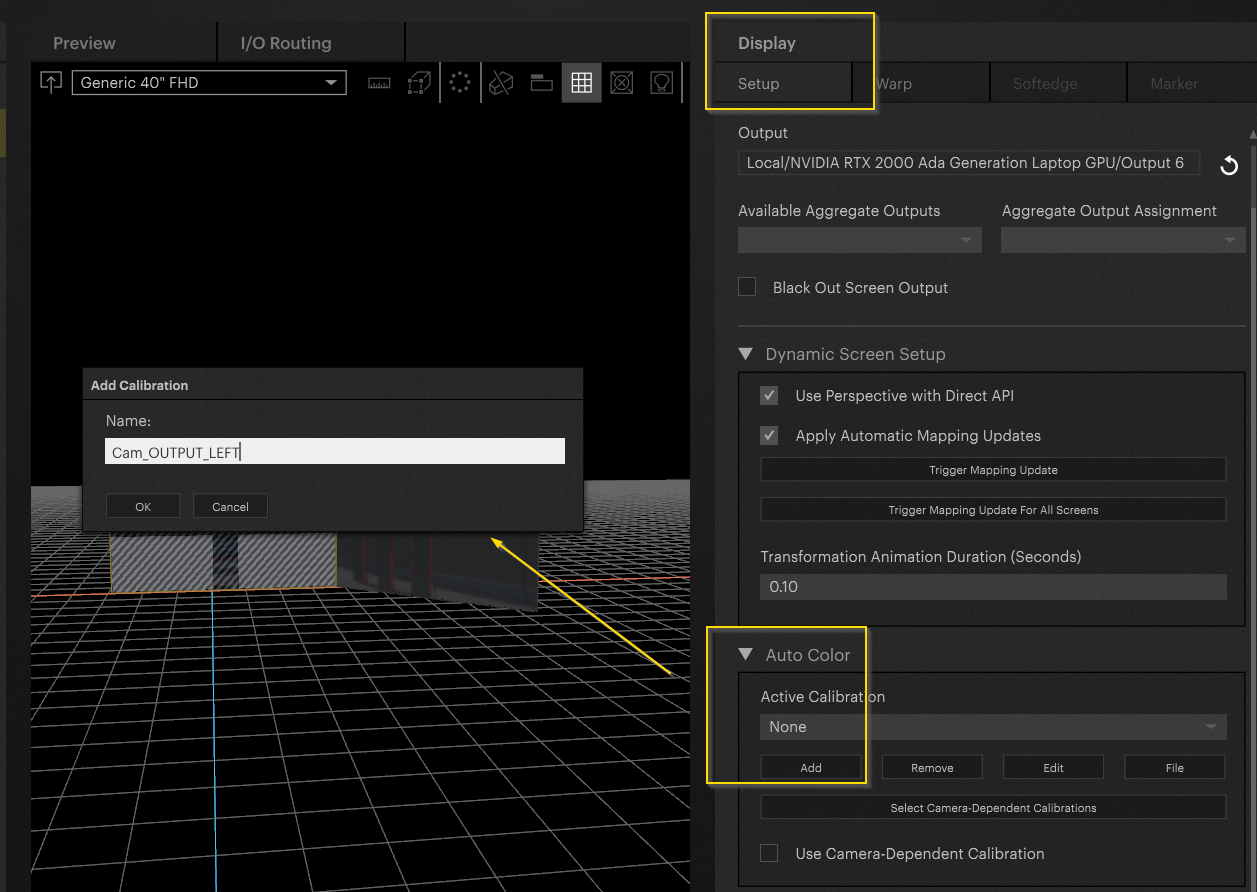
Click on the “Add” button and name your calibration.
Warning
An output must be assigned to execute a calibration. If there is no output connected, the following error message will be displayed: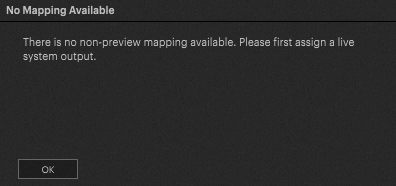
In case back projection is activated for the camera: deactivate the back projection in case the calibration is executed with the same camera!
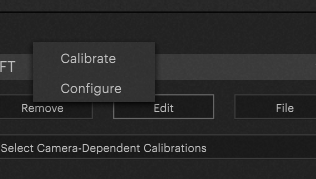
Following the assignment of the calibration name, we can now hit the “Edit” and “Calibrate” button.
Warning
To achieve satisfactory results, the camera must be color calibrated. Furthermore, it is advised not to run the calibration with ultra sharp cameras as this can lead to the moiré effect.
In the calibration options window, the color refs placed on the screen must be matched with the ones visible on the camera's feed.
On the left side of the window, you see the representation of the screen. You must move the four squares with the numbers to match the corresponding color refs. Down at Reference Camera, please select the Studio Camera you want to use for Color Correction.
After selecting the camera, you should see the output signal on the right-hand side. Your camera should point at a right angle to your LED screen and the four-color refs should be visible. You must move the four squares with the numbers to match the corresponding color refs here as well.
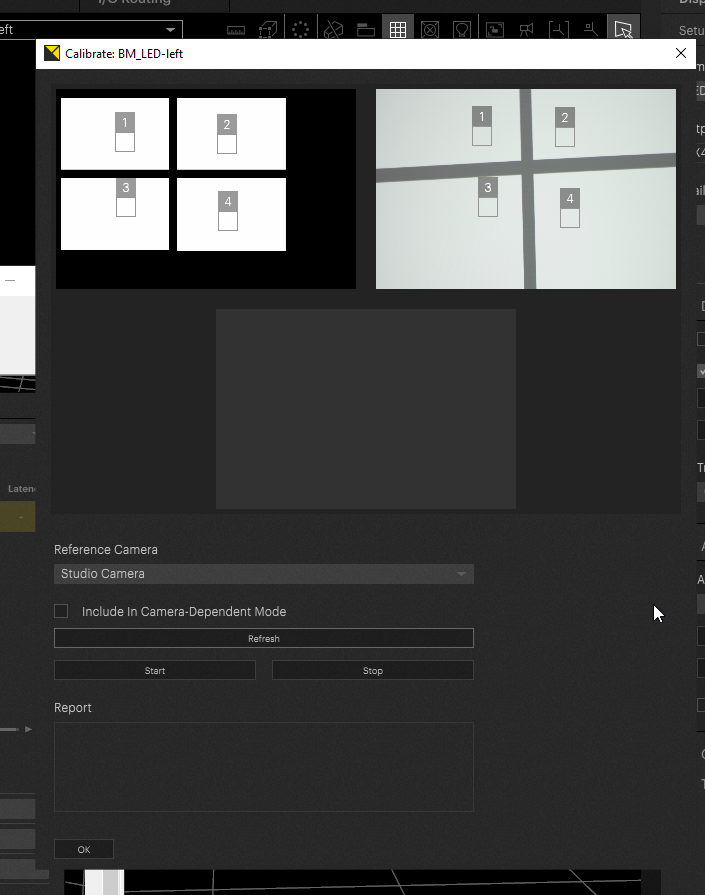
Following the start of the process, PIXERA will display different colored content and match the color to the received image from the camera for each of the quarters.

As soon as the process has been finished, you have multiple options for where to use this calibration.
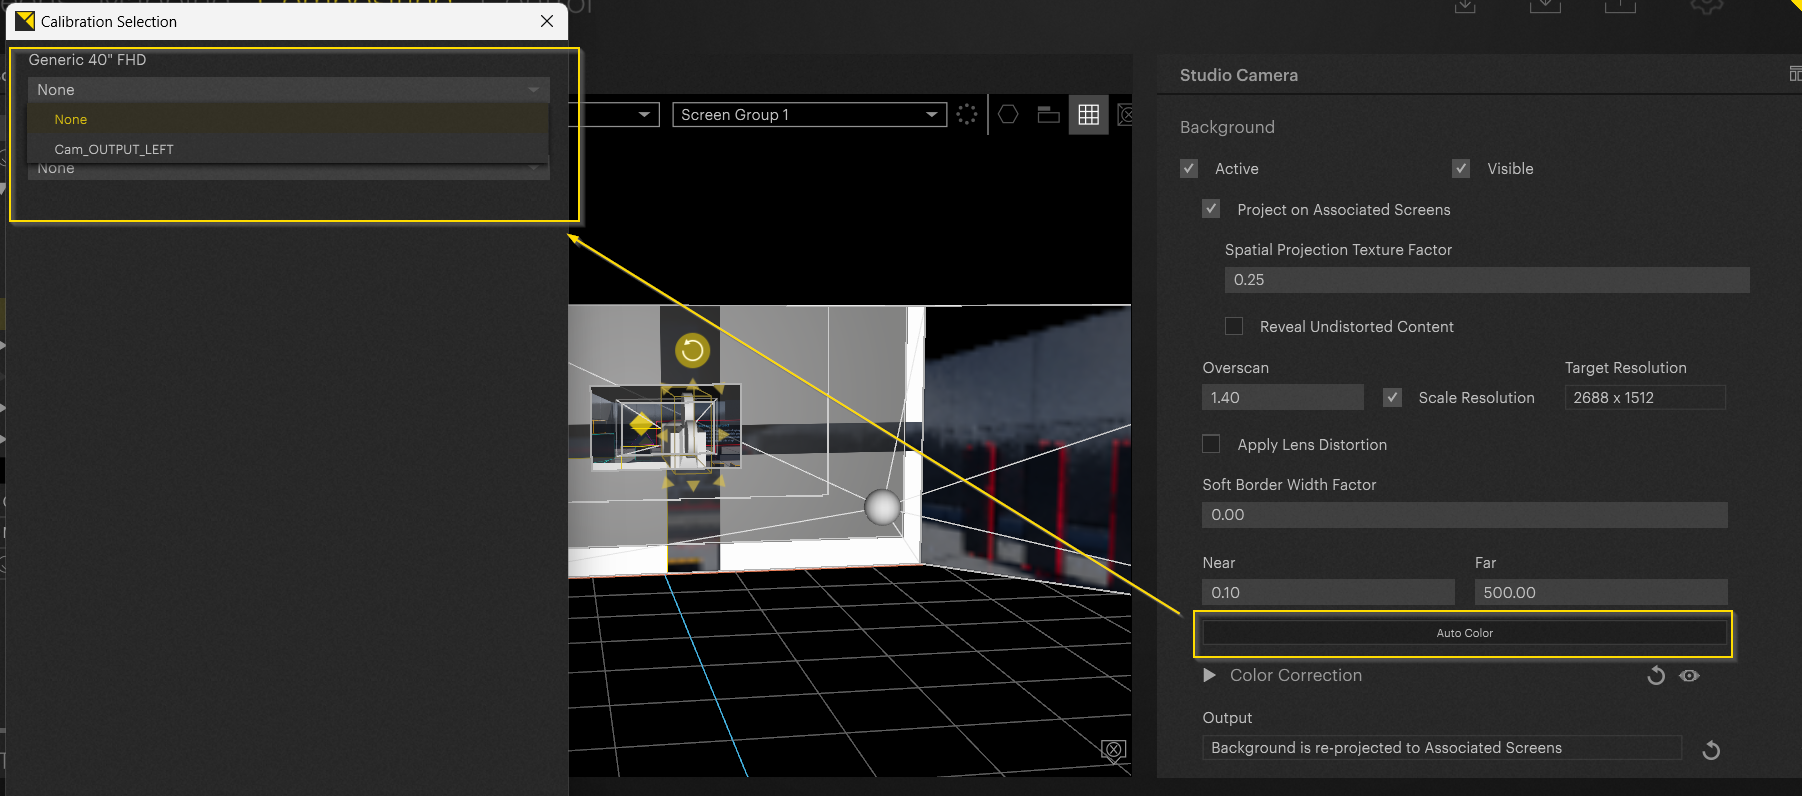
You can either use it for the entire LED screen or just for the inner frustum.
If you want to use it for the entire screen, you are already done.
If you want to use it just for inner frustum, please set the “Auto Calibration” back to “none”. Switch to the Compositing tab and select the Studio Camera. Scroll down to the “Auto Color” option and select the correct calibration profile.
Warning
Calibration must be executed for each camera and output individually.
Luma Offset
This feature behaves like the multi-pos warp feature. Depending on the viewing angle, the “Rotation-Based Luma Modification” is applied. Hit the “Edit” button and select “Configure”. This will bring up the Luma Offset options:
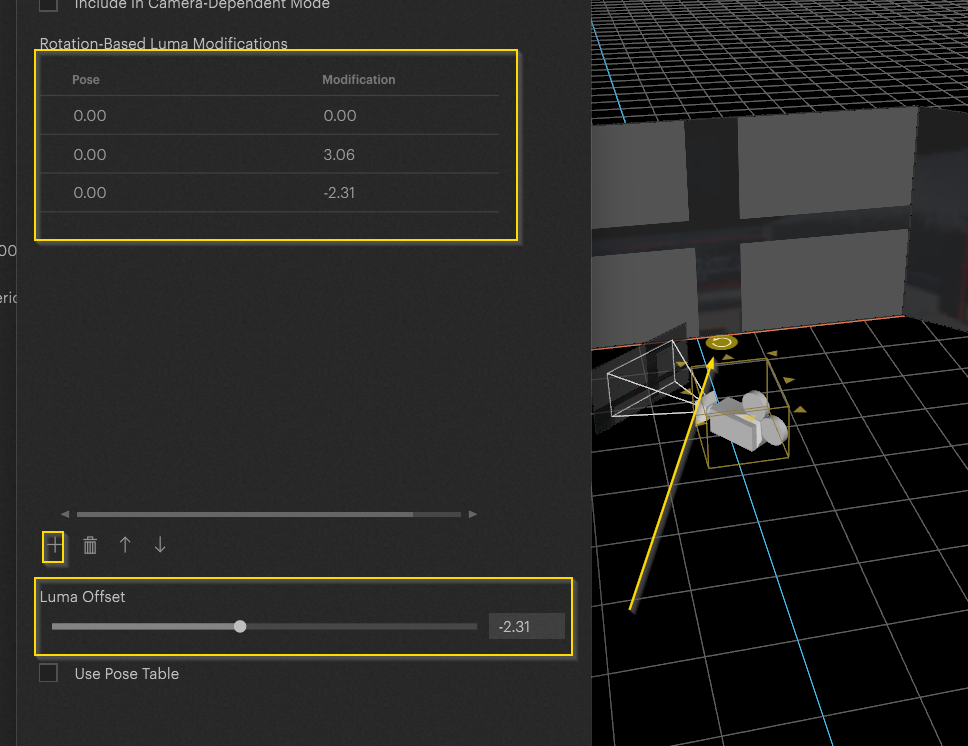
Rotate your camera slightly via the Y axis and adjust the Luma offset with the slider underneath for this position. By pressing the plus button, you can now rotate the position of the value in the list. Please make sure that the values in the table are sorted in ascending order by Y rotation. You can reorder them with the arrow keys.
You must activate “Use Pose Table” to make a smooth fade between those values when rotating your camera after finishing the adjustments.
PIXERA 2.0.65 | 24 July 2024 | CL