 Contact Us


Warning
Pixera Connect only works with an active network connection. The loopback adapter does not work!
Disclaimer
Virtual Production is a complex topic. It is mandatory to understand the basic setup to be able to advance to the advanced techniques (for example, set extension and multi-pos warp).
Furthermore, it is mandatory to understand all the basic principles of Pixera.
Here is a list of the essential VP related documentation in chronological order:
Unreal 5.2.1 Tips and Tricks (Performance and Testing)
Pixera Connect, an Unreal Plugin - General Usage
Pixera Texture Sharing to Unreal
Studio Camera (Virtual Production)
Set Extension (Virtual Production)
Installing Pixera Connect
To access the Pixera Connect Unreal Plugin, please download it here: Downloads (pixera.one)
Navigate to the Unreal Project Folder (IMPORTANT: not the installation path!). Create a “plugins” folder in here:
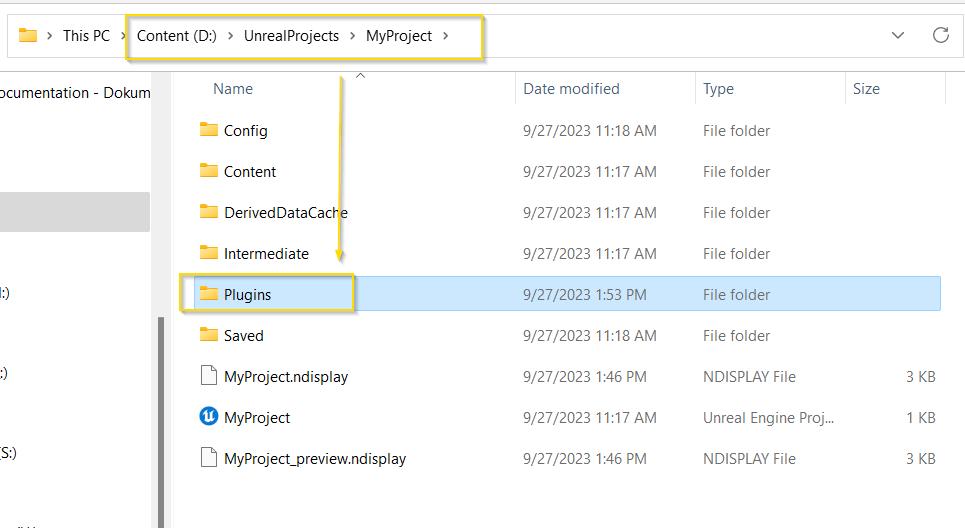
Unzip the download into this folder. It will look like this:

Pixera Connect in Compositing
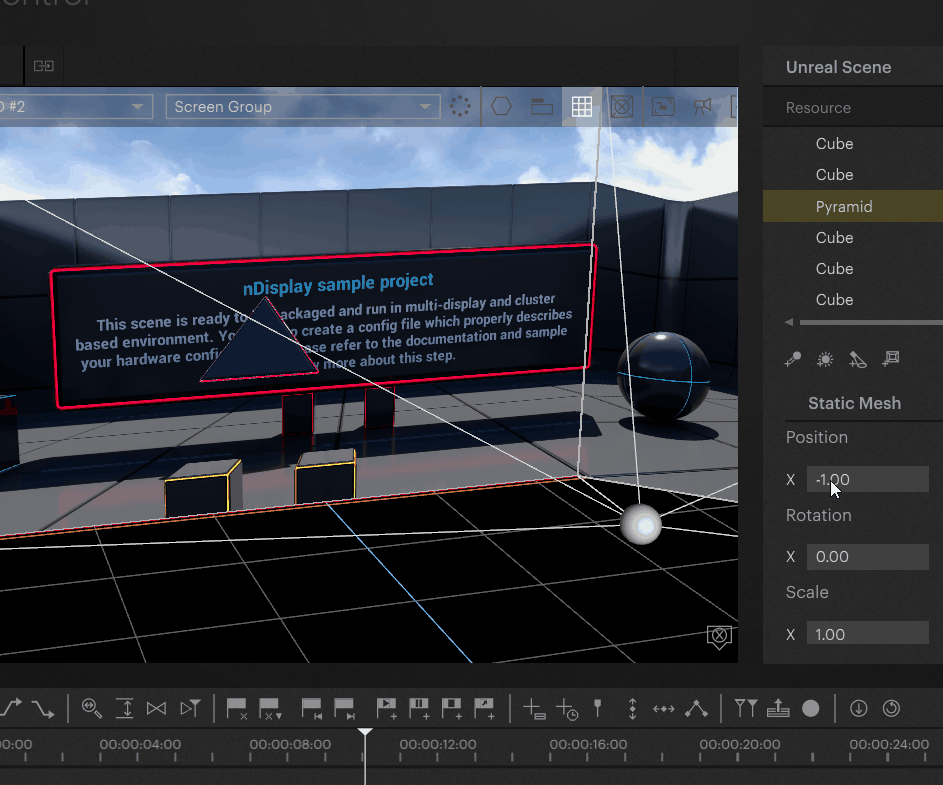
Once the plugin is placed, you can now go into Pixera and by killing, creating, and running the Unreal resource you can go into the tab beside the “Resource” tab called “Pixera Connect” and should see your Level's name and a list of objects in a dropdown:

Certain objects are now editable. These must be set to “Movable” inside Unreal, otherwise they can't be controlled and will not show up.
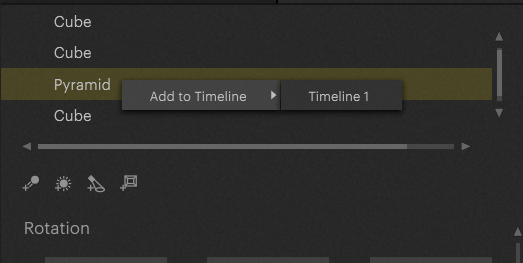
These parameters can be exposed to the Timeline by right-clicking on the item and adding to the selected Timeline (You can select multiple objects at once):
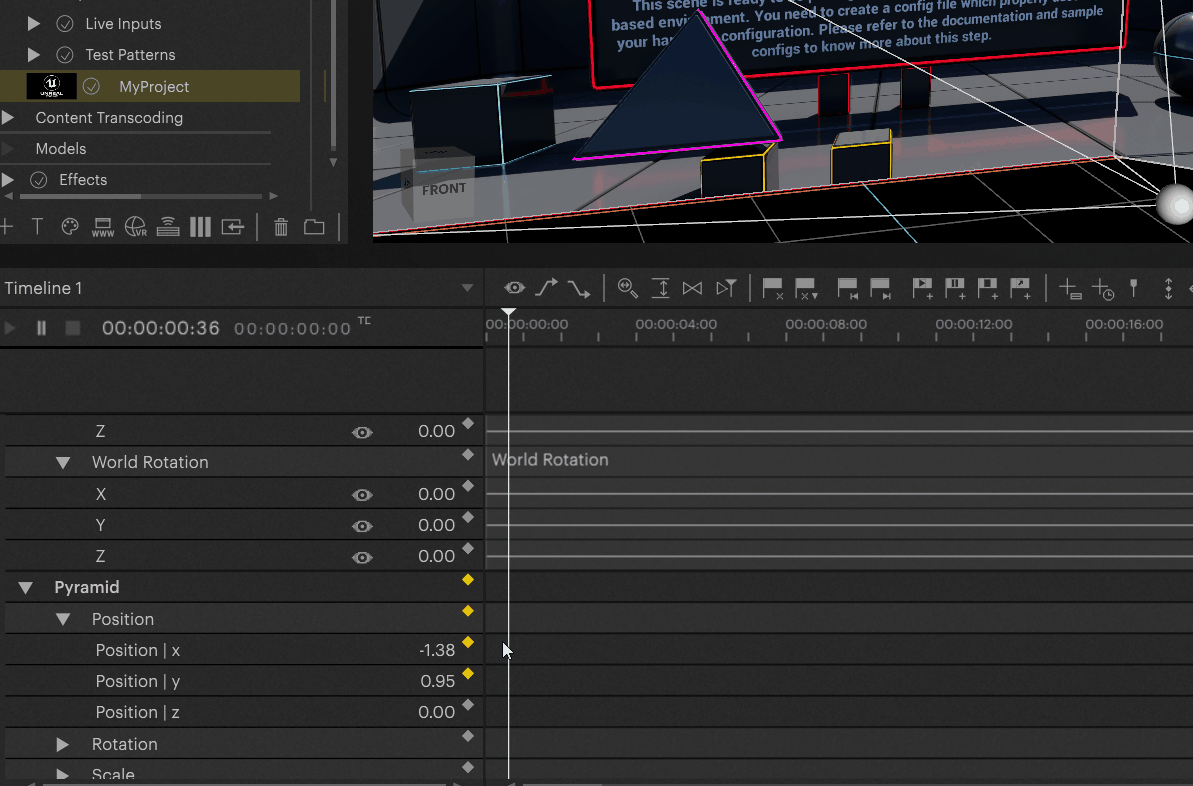
Save the key frames once with the “s key” or by clicking the yellow diamond to create a Timeline container. Afterward, the key frames are editable, and animations can be created:
Continue With Pixera Connect
The Pixera Connect Plugin allows a variety of workflows with an opened Unreal Project. Follow the links below to learn more:
Pixera Connect, an Unreal Plugin - General Usage
Pixera Connect, an Unreal Plugin - Trigger Events in Unreal from Pixera
Pixera Connect, an Unreal Plugin - Unreal Level Streaming and Loading In Pixera
Pixera Connect, an Unreal Plugin - Send Variable Data from Pixera to Unreal
Pixera Connect, an Unreal Plugin - Send Variable Data from Unreal to Pixera
Pixera 2.0.65 | 10. July 2024