 Contact Us


Disclaimer
Virtual Production is a complex topic. It is mandatory to understand the basic setup to be able to advance to the advanced techniques (For example, Set Extension and Multi-Pos Warp).
Furthermore, it is mandatory to understand all the basic principles of PIXERA.
Here is a list of the essential VP related documentation in chronological order:
Unreal 5.2.1 Tips and Tricks (Performance and Testing)
PIXERA Connect, an Unreal Plugin - General Usage
PIXERA Texture Sharing to Unreal
Studio Camera (Virtual Production)
Set Extension (Virtual Production)
Texture Sharing PIXERA to Unreal
In this article, we will go over how to share textures from PIXERA to Unreal using the RXInterop installer. To begin, please, set up Unreal with PIXERA using this article: Unreal Engine PIXERA Setup.
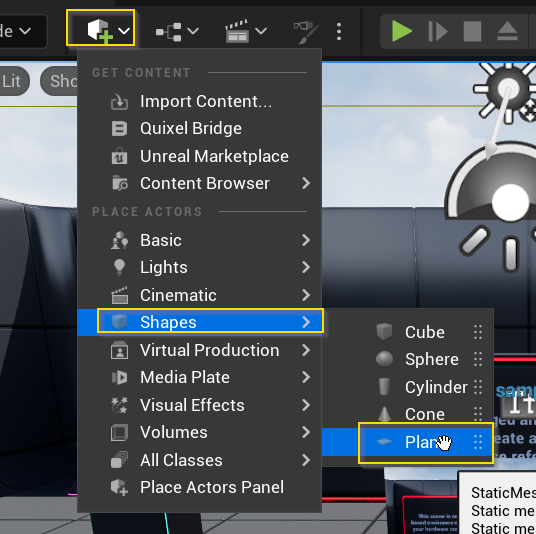
Next, in your Unreal Project, add a plane (or any other shape):
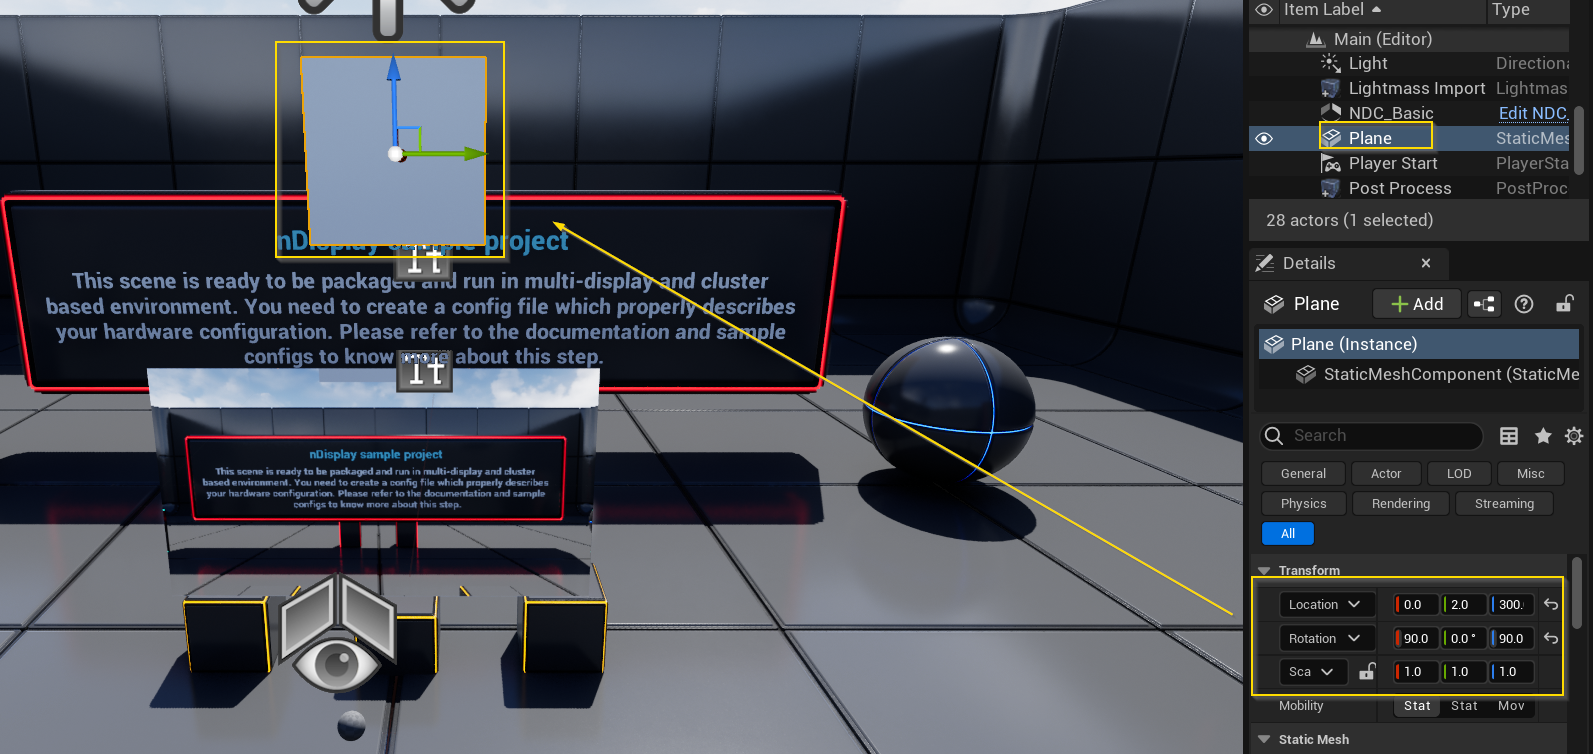
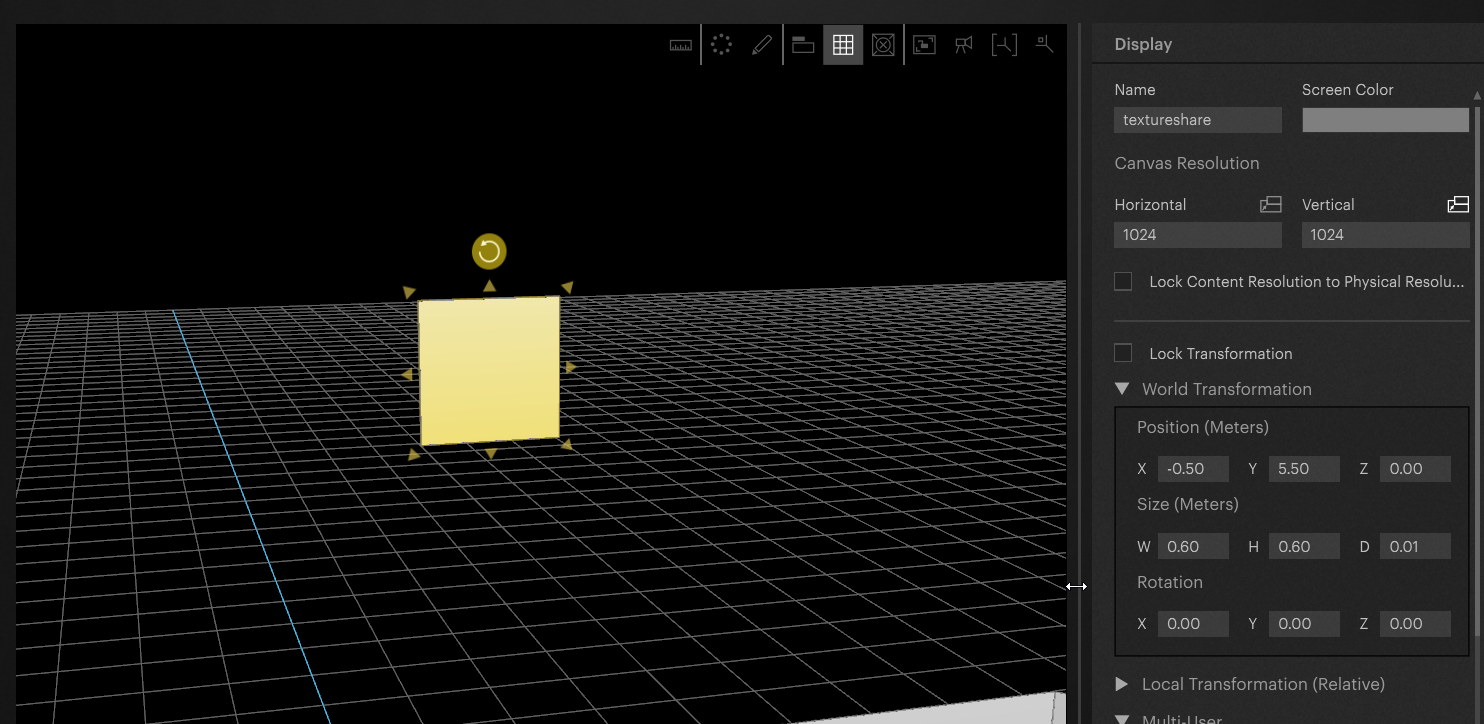
Select the plane and set the desired settings:
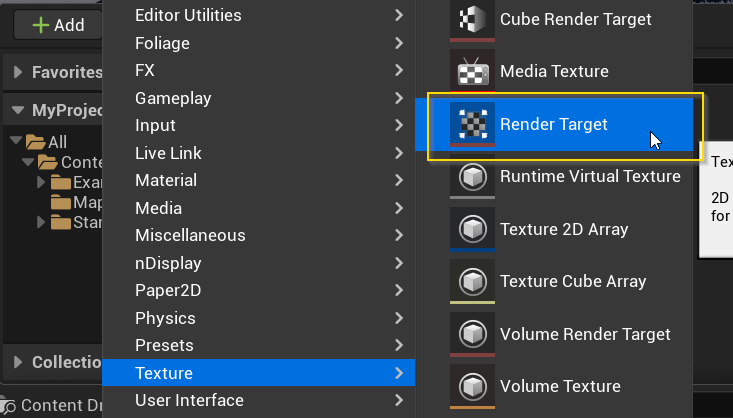
Add a Render Target texture to the project's resources:
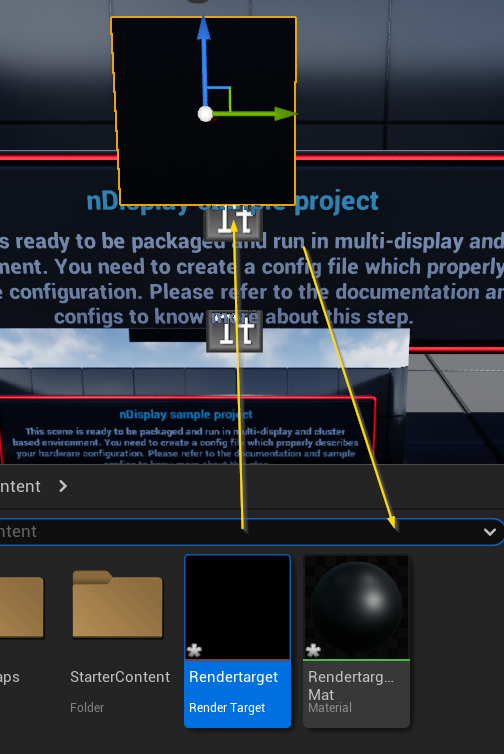
Drag and drop the Render Target onto the plane. Unreal will automatically create a new material for this plane using the Render Target as an input:
Double-click the Render Target to open the Texture Editor, set the Texture's X and Y to be the same as the media you will send from PIXERA:

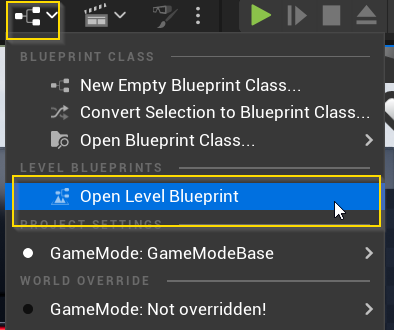
Inside the Level Blueprint is where you will set the ID and Render Target for PIXERA to interact with:
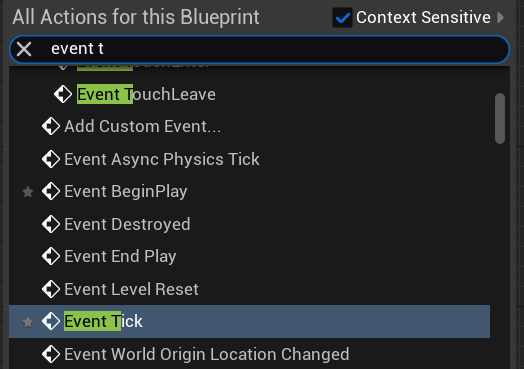
Right click to add an "Event Tick” Action:
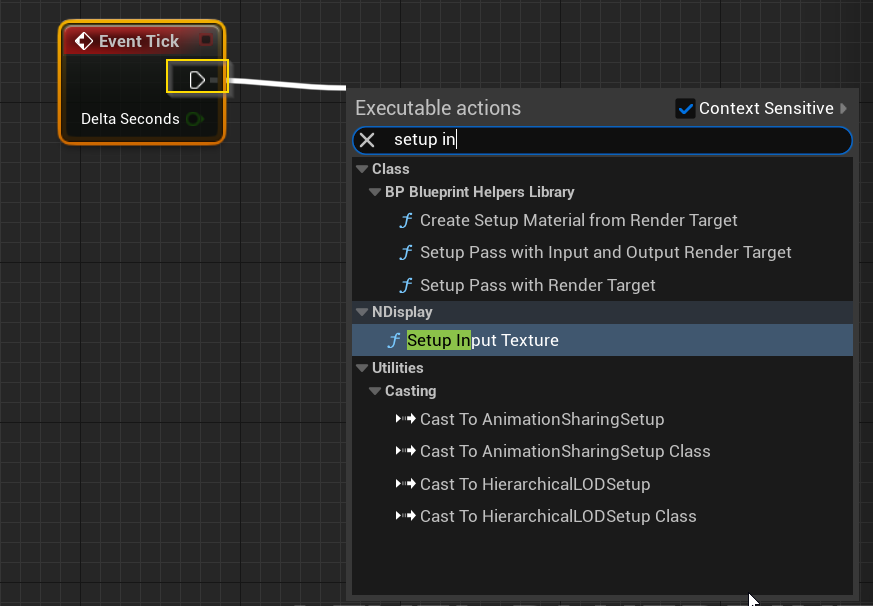
Add the “Setup Input Texture” Action, this appears when the RX Interop is installed in the Unreal Engine's location:
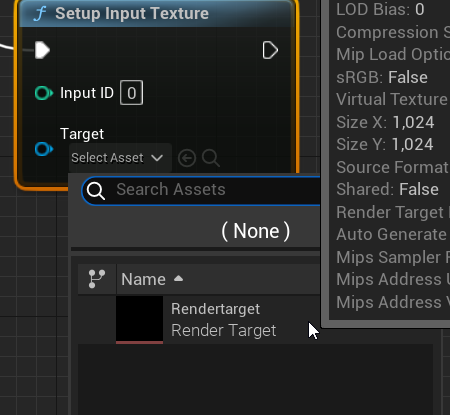
The Input ID refers to the index in PIXERA (described later) and the Target must be set to the “Render Target” you have created:
Save and close your Blueprint. Save the project file and close Unreal.
Texture Output from PIXERA to Unreal
Inside PIXERA, create a new screen to output content to Unreal (a dummy screen). The imported screen must have the same output resolution and aspect ratio as the plane and Render Target set inside Unreal:
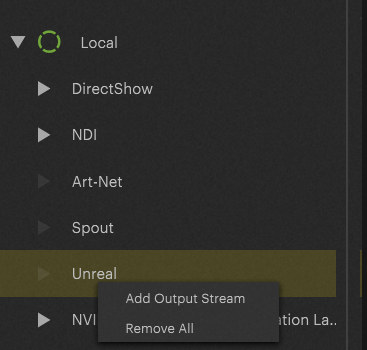
Add an Output Stream for Unreal on your Render Client in the Mapping tab:
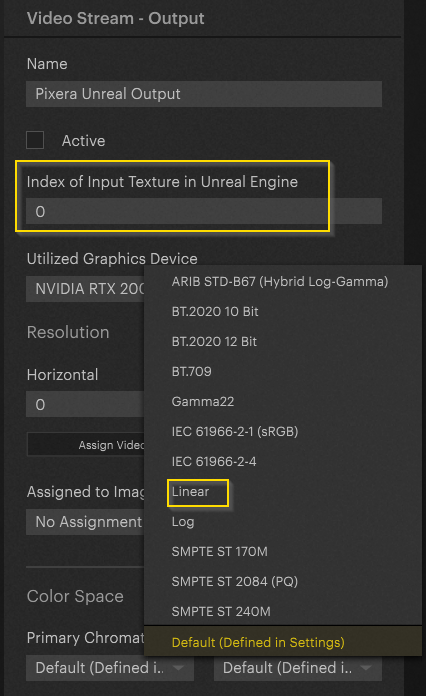
Here we must set up the correct index (the index that was assigned previously in the Blueprint node, the value called “Input ID” in Unreal). Furthermore, the “Color Space Transfer Characteristic" must be set to “Linear”:
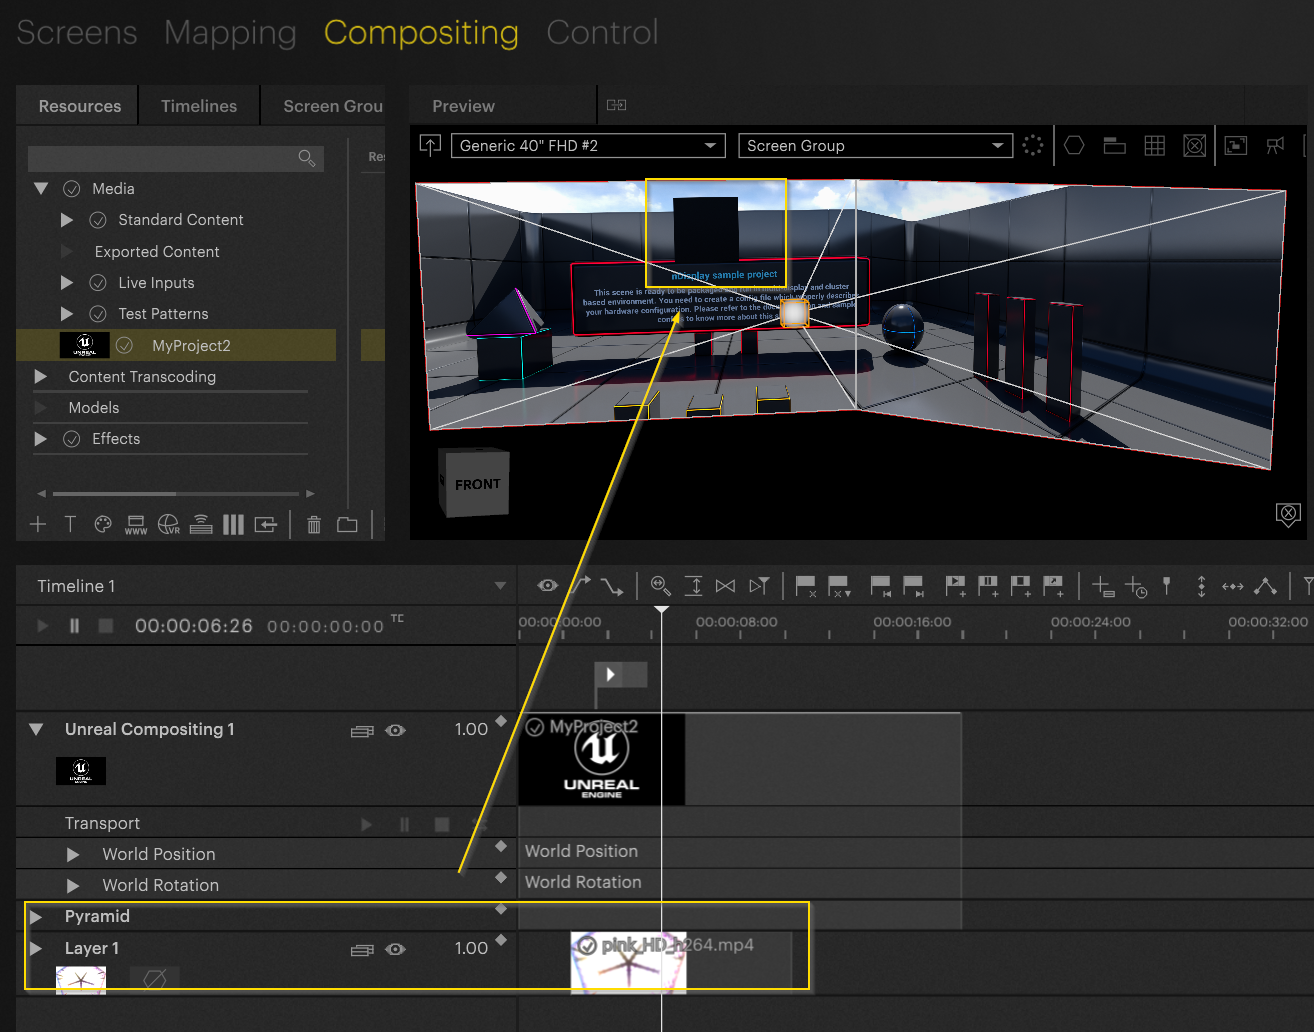
Activate the Unreal Output, and once Unreal is launched inside PIXERA, content should now be rendered on the created plane inside the Unreal scene, by default being a black visual:
Warning
The Preview will always show black on the screen, as the Texture Sharing is only for outputs on the Local or Client servers.
Once media is placed on the dummy screen in PIXERA, the content will be rendered into Unreal with its reflections inside the Unreal scene (Screenshot taken from output rendering):

Sending Alpha to Unreal
If media being sent to Unreal has alpha, you will need to turn on the “Target with Alpha Channel” setting for the dummy screen in PIXERA for this information to be sent over.

You will also need to make sure the Material's Blend Mode in Unreal is set to be either “Masked” or “Translucent” for the alpha to then be used correctly by Unreal:
PIXERA 2.0.172 | 30 September 2024 | CL