 Contact Us


In the following article, you will find a compact summary of all the important updates and also the changelog at the bottom of this article.
26.1 Features & Improvements
Gizmo
Gizmo
PIXERA 25.3 introduces a Gizmo tool within the Workspace to manipulate the Translation, Rotation, and Scale your 3D objects. To utilize the Gizmo first left click to select the mesh you would like to actively transform.
Basic Transformations
Translate
Press Q on your keyboard to activate the Translate mode of the Gizmo. The three different colored arrows that make up the Gizmo represent the three available axes of transformation. Click on one of the axis arrow handles and your transformation will be locked to that axis. If you select a small square that floats between two of the three axis arrows, then the transformation is locked to those two planes.
Rotate
Press W on your keyboard to activate the Rotation mode of the Gizmo. Select one of the colorful hoops to rotate your object's Pitch, Yaw, or Roll.

When changing between World Space and Local Space (using B to do so) note that the Rotation mode of the Gizmo changes slightly. For Local rotation the Gizmo doesn't turn with the object. For World Space rotation the Gizmo does rotate with the object.
Scale
Press E on your keyboard to activate the Scale mode of the Gizmo. When you select the floating plane that is between two of the three axes, the scaling transformation will only affect those two axes.

World Space / Local Space
By default the Gizmo will be in World Space transformation. To swap the Gizmo to Local Space translation press B on your keyboard. To return to World Space transformation press B again on your keyboard.
The Gizmo works for single meshes as well as group-selected meshes.
If you want to deactivate / disable the Gizmo and return to the original Pixera transformation handles press “P” on your keyboard to swap between the mechanisms.
Axis Lock
As of 26.1 the Gizmo has Axis Locking mechanisms. Start by dragging in any Display or Screen in the Workspace.

Next, select the Screen or Display in the Workspace

Press Q to engage the Translate mode of the Gizmo. When you do this a small box near the bottom of the Workspace will appear. It has a ">" symbol on the furthest left edge of the box.

When you move your object left and right not only will you see it's position changing under the World Transform in the Inspector on the right hand side, but you'll also see that information reflected below in this box at the bottom of the Workspace.
Example
If you want to lock the Gizmo to only Translate your object on the X axis simply press “X” on your keyboard after selecting your Screen or Display object in the Workspace. As you move your mouse left and right you'll notice the object is locked to only horizontal transformations. Similarly, if you want to lock the Translation to the Y-axis then pressing “Y” on your keyboard will move the object on the Y-axis. Same goes for the Z-axis as well by pressing “Z” on your keyboard.
Note that when selecting your Axis a thin colorful line that is aligned with your selected axis will appear and center around your target object:

To commit your changes to the position of the object simply left click your mouse button. If you want to cancel out of this axis lock mechanism press Esc on your keyboard.
This axis-locking mechanism also works on Rotation ("W") and Scale ("E")
Every Axis But One
Now let's say you're looking to move an object on two of the three axes, for example, you want to move an object on only the X and Y axes. This can be achieved by selecting your target object and pressing SHIFT + “Z”

Snapping
Snapping is supported with the Gizmo feature as well. To use snapping follow the same steps under the Axis Lock section of this article.
After selecting your target object you'd like to snap to the alignment of another object, and then pressing either “X”, “Y”, or “Z” to lock it to an axis, next press and hold SHIFT while moving your target object around with the mouse. When you mouse over another object your target object will snap to the closest vertice of it's neighbor object.

To get the Gizmo to return back to the centroid of the your 3D object shift + left click on the grey box of the Gizmo. It will automatically snap to the center.
Known issues and current limitations
- Duplicate LED screens inherit transformation from original mesh
Pixera 25.3 INTER 70 | 18. December 2025 | TM
Clip/Layer/Timeline Lock for Editing
Clip / Timeline / Layer Lock
The intention of this feature is to lock elements of the timeline/clips/layers so that they cannot be accidentally changed during timeline compositing.
This can also be locked during playback without affecting the playback functionality, it should only lock the compositing features.
Timeline-Lock

With this feature, entire timelines or individual layers can be locked to prevent accidental changes during programming or playback.
Even when locked, the timeline remains fully accessible: all effects, keyframes, and parameters can be opened and reviewed, but not edited. This allows users to safely inspect the current state of a project without the risk of unintended modifications.
Not possible when the timeline is locked:
- Creating or deleting layers, cues, or clips
- Changing layer or clip settings
Layer-Lock

Individual layers can also be locked. Locked layers cannot be edited but remain fully visible for inspection. The same applies to layer groups — entire groups can be locked, or only specific layers within a group, depending on the desired level of control.
In multiuser setups, the lock status is not transferred immediately, but only when the first user pushes the timeline to the other systems. This ensures that the editing state remains clearly defined and consistent across all connected users.
Not possible when the layer is locked:
- Creating or deleting keyframes
- Editing in inner-compositing
Clip-Lock

You can lock individual clips so they can’t be selected or edited anymore — perfect when you want to make sure nothing gets changed by accident.
Locking or unlocking a clip is as simple as a right-click, so you can quickly switch things on or off while you work.
Even when a clip is locked, it still reacts to all layer and timeline adjustments. Global changes continue to apply — the clip just stays safely protected from direct editing.
Warning
Dominant Value are still applied to locked clips
PIXERA 25.3 Inter 61 | 03. December 2025 | S.H
Audio Brushes
Audio Playback
PIXERA's Audio Engine offers many features for the playback of audio files. In addition to "dynamic resampling", the audio engine also supports "micro-pitching" to ensure synchronicity between video and audio.
Supported audio file formats
Currently PIXERA supports the following audio file formats:
- MP3
- FLAC
- WAV
- M4A
- AAC
- WMA
- AC3
Adding audio files
Audio files can be imported to the Resouces Tab in PIXERA exactly the same way as video files. Either via dragging and dropping them from the file explorer or by hitting the plus icon. For further information on how to add media files to PIXERA please have a look at Media Management
By dragging and dropping audio files from the Resources Tab to the Timeline, audio can be placed on Layers. This automatically triggers the preview file creation so the waveform can be displayed inside the clip contrainer.
By selecting the Clip on the Timeline, the Inspector on the right hand side shows information about the audio file in the Audio Settings section. In here the original duration, sample rate, bit rate and the number of audio channels are listed. You can also rename the file, and access File Versioning from here.

Embedded Audio
Video files can also contain audio channels. In general PIXERA supports these types of media files and is able to playback video and audio of such files. To find out if a video file contains audio as well, just select it in the resources tab - the Inspector then shows the available audio channels on the right.

Video files with embedded audio can be used on the timeline like any other media file. Audio is simply displayed as a separated Volume track within the Container where you can add keyframes.

If you want to be able to use an embedded audio track independently of the video track, there is the "Extract Audio" function. This separates the audio track from the video and adds it to the resources tab as a separate file.

Audio Interface | Sound Card assignment
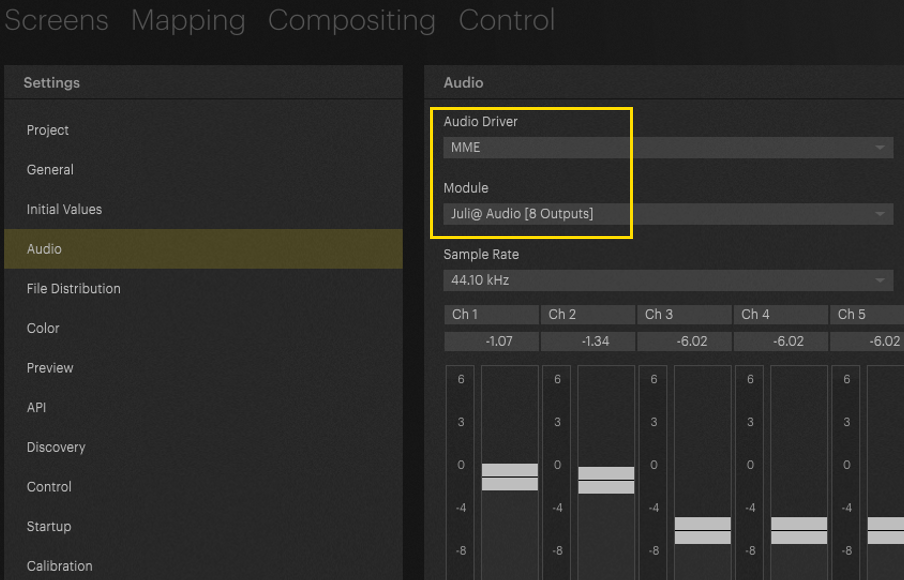
You can set which audio device you'd like PIXERA to use to play back audio in Settings > Audio. Here you can select the Audio Driver, Audio Device (Module), Sample rate and output levels.
The supported drivers are:
- ASIO
- WDM
- WASAPI
- MME (for Dolby Digital)
NOTE
Depending on the connected devices, their availability and support, different modules and sample rates are displayed in the drop-down menus.

The number of channels and level meters displayed depends on the Audio Device you have selected and the number of available outputs it has. Level can be set independently on each channel. When the audio file is played, a level meter shows the activity on each channel and whether the audio is clipping.
NOTE
Only one audio device can be used at a time in PIXERA, even if several are connected to the same server.
Dolby Digital audio playback
In addition to the mentioned audio file formats, PIXERA supports Dolby Digital and Dolby Atmos audio as well. Selecting such a file in the resources tab, you will be able to see the channel count in the inspector - for example, video file with 5.1 audio will show as having 6 audio channels.
To be able to play back Dolby Digital files, the option "Use Digital Audio Output" must be selected in the file's Inspector in the resources tab. Digital Audio Output works via DisplayPort out or via S/PDIF.

In addition, the driver "MME" and the correct Module must be selected in the Audio Settings of PIXERA.
Afterwards the file can be dragged onto the layer for playback in the usual way.
NOTE
It is not possible to mix Dolby Digital and normal audio files in one project
Defining Audio Channels
Audio output is defined on a per-layer basis and by setting the Audio Channel field in the Inspector. You can set the initial output channel here.
Example:
Entering ‘3’ in the Audio Channel field for a layer, and placing a clip with two channels of audio on that layer, will play audio on output 3 and output 4.
Only Available in 25.3 and On
If you need to make specific audio channel assignments, you can do so here by typing your desired audio channel order separated by commas. This could be useful for swapping the left and right channels of a stereo audio file. For this, you would type ‘2,1’ in the Audio Channel field.
Example:
If you had a 5.1 surround sound audio file and ‘1’ set in the Audio Channel field, it would output on channels 1 to 6 in this order: Left, Right, Centre, LFE, Left surround Right surround. This is the 'SMPTE' surround channel order, but maybe your playback system uses ‘Film’ channel order. In the Audio Channel Field, you would enter 1, 3, 2, 5, 6, 4 to achieve the correct output order of Left, Centre, Right, Left surround, Right surround, LFE.
The setting for Audio Channel can be found by selecting a Layer and navigating to the Setup tab in the Inspector. From here, you can select the Server you want to output this layer's audio from and enter the Audio Channel configuration.
If you want to disable audio output for a layer ‘0’ or ‘None’ can be entered into this field. If you specify fewer audio channels than are contained in the file, the unspecified channels will be auto-assigned following the last channel that was assigned manually.

These settings can be defined in the Initial Values area of PIXERA settings, in the Timelines dropdown:


Limitations
At present, duplicating audio channels is not supported. As a result, it is not possible to route a single input channel (e.g., Video Audio Channel 1) simultaneously to multiple output channels (e.g., Output Channels 1, 2, 3, and 4).
PIXERA 25.3 INTER 73 | 08 January 2026 | C.L, B.C, and F.E.
Pitched Timecode (BETA)
Pitched LTC Time code
Working with DJ style pitched TC
Pitched LTC Time code
WARNING: Experimental Feature
This is a fairly new feature that needs deep investigation upon the settings. Additional performance needs still need to be evaluated, but do expect your system to experience serious performance drop. Use on your own risk, but please feed back your experience.
WARNING: Pitch Range
Pitching the TC to below -10% will not work with analog SMPTE TC into an audio interface! Incoming analog TC that is pitched below -10% will result in disconnect of TC and Pixera will not recognize the incoming TC permanently. This is the same behavior we experience with all TC readers we have in the company. We are investigating on this matter.
TC via Dante: this may work up to a range of -18%
Increase in speed has been tested to up to 50% with no issues currently experienced.
WARNING: Only SMPTE TC via audio input currently supported
Incoming TC via ArtNet or any other means will not be affected by the adaptive drift correction
There are use cases in which time code needs to be pitched in a greater range than a usual broadcast environment would experience. This includes working with synced audio coming from a DJ booth. To cater for this, we have extended the LTC time code settings in the drift correction drop down.
Pitched Time code in UI
The most important settings are available in the UI of PIXERA. The “Adaptive Drift Correction” can be found in the SMPTE Settings in the Inspector of a Timeline.
1. Select your timeline
2. navigate to your timeline inspector
3. navigate to your SMPTE settings
4. set Mode to receive
5. set Drift Correction to Adaptive (Beta)

Parameters in Timeline inspector:
Drift Correction:
None: The timeline will be initially triggered upon TC, no drift correction will be applied during runtime.
Standard: PIXERA's default drift correction behavior.
Adaptive (Beta): new drift correction featuring a broader drift range
Correction Rate:
Set at 3 by default. This is the frequency (in Hz) at which the controller updates its correction. A higher rate means faster responsiveness.
The maximum setting should not exceed 7! Please use carefully!
Currently, only LTC via audio can correctly implement values larger than 1. So when using the mechanism with other forms of time code input this should be set to 1 (correction will still be applied but will tend to be less effective than if the rate is correctly set to match the capabilities of the input device).
Speed Smoothing:
Set at 10% by default. Filter factor applied to the computed speed to avoid abrupt changes. Higher values favor smoother but slower responses.
Tweak Config
Besides the parameters that are offered in the GUI, there is an extended parameter set that is hidden underneath. If you need further refinement of the pitched TC behaviour, you will need to place a tweak_config.json into the following directory in the main/director PIXERA server:
C:\ProgramData\AV Stumpfl\Pixera
Please note: ProgramData is a hidden folder
Once you have placed the tweak_config.json into the directory, you must restart PIXERA in order to initiate the settings.
Changing the settings
To change the settings, open the tweak_config.json in Notepad, Notepad++ or any other suitable editor. Change settings as needed, store the file. Restart Pixera to initiate the new setting.
Restart Pixera after changing settings to initiate the new settings
These are the parameters insidethe tweak_config.json:
"smpteTimecodeInputPitching":
 {
	"isActive": true,
	"rate": 3,
	"positionSensitivity": 0.4,
	"speedSensitivity": 0.8,
	"speedSmoothing": 0.3,
	"maxSpeed": 20.0,
	"atSafetyFactor": 0.5
 }
isActive:
Enables or disables the PD controller mechanism. When false (or if no config is present at all) the original, completely unchanged drift correction code is used.
rate:
Frequency (in Hz) at which the controller updates its correction. A higher rate means quicker responsiveness. Currently, only LTC via audio can correctly implement values larget than 1. So when using the mechanism with other forms of timecode input this should be set to 1 (correction will still be applied but will tend to be less effective than if the rate is correctly set to match the capabilities of the input device).
positionSensitivity:
Proportional gain. Determines how strongly the difference between target and current position affects the speed correction. Higher values mean faster convergence but risk overshoot. Corresponds to kP in the standard PD controller model.
ATTENTION: setting above 0.9 may result in overshoot
speedSensitivity:
Derivative gain. Determines how strongly the difference between target and current speed affects corrections. Helps dampen oscillations. Corresponds to kD in the standard PD controller model.
ATTENTION: setting above > 0.9 may result in overshoot
speedSmoothing:
Low-pass filter factor (0–1) applied to the computed speed to avoid abrupt changes. Higher values favour smoother but slower responses.
maxSpeed:
Caps the maximum playback speed to prevent unrealistic or destabilizing speed adjustments.
atSafetyFactor:
Fraction of the inter-update interval used to project time slightly into the future. This helps ensure that threads besides the update thread that access the timeline state do not see non-monotonic or outdated values due to timing jitter.
PIXERA 26.1 INTER 31 | 03. March 2026 | OK./BC
Ping Pong for Clips
Clip Play Modes
In a real-time environment, a Timeline may be set to actively play back or be paused.
However, unlike video editing applications, in PIXERA the Resource of a Clip can act independently of the Timeline transport controls (i.e. Play or Pause). PIXERA offers seven Play Modes for how a Clip can behave.
To change the Play Mode of a Clip, you have to select the Clip in the Timeline. Then inside the Inspector on the right side, a dropdown of Modes can be found.

Lock to Time
Lock to Time is the standard setting of a Clip. In this setting, playback of a Clip is synchronized with Timeline playback. When Timeline playback is paused, the content of the Clip is also paused.
If the duration of a Clip on the Layer was extended, or an Inpoint/Outpoint is made on the Clip, the video is automatically looped from the beginning until the Clip is left. The light gray line in the container shows the original length and thus when the video will start over when hitting that point.
Lock to Time|No Loop
When set to Lock to Time | No Loop, the Clip will play its Resource to the Outpoint while playing back with the nowpointer.
When it reaches this end, it will continue to show the last frame only and not loop from the beginning again. This occurs over the entire rest of the Clip, no matter how long it is made.
Free Play Once
Free Play Once has the Clip play its Resource to the Outpoint independent of the Timeline playback (i.e. it will playback whether the Timeline is playing or paused), as long as the Nowpointer is inside the Clip.
When the Resource reaches its end, it will continue to show the last frame, and will only playback from the beginning again when the Nowpointer leaves and re-enters the Clip.
Free Loop
Similar to Free Play Once, in Free Loop mode the Resource will be played back independently of Timeline playback. However, in this case the Resource will loop indefinitely between the Inpoint and Outpoint for as long the Nowpointer is inside the Clip.
Moving the Nowpointer out of and back into the Clip will reset the Resource playback to its beginning.
Show Inpoint
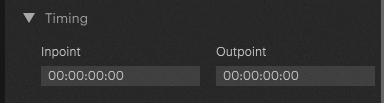
Show Inpoint will only render the frame set as the Resources Inpoint for as long the Nowpointer is inside the Clip. The option to change the Inpoint and Outpoint can be found in the Inspector after selecting the Clip, under Timing.
Inpoint with a timecode of 00:00:00:00 is the default value to display the first frame of the Resource (start frame of Clip).
Outpoint with a timecode 00:00:00:00 is the default value to display the last frame of the Resource (the end frame of the Resource duration).
NOTE
The Inpoint and Output can be set via Keyframes, so these can be changed over time on a Clip.
Free Play Once|Ping Pong
Ping Pong is a type of Play Mode which will play the content forward and then backwards before completing. Free Play Once|Ping Pong acts the same as Free Play Once in that it will only play the Resource through once, then freeze on its final frame.
In the case of Ping Pong, this means the final frame will be its first frame, since the Resource will play forward and then backward ending where it started.
Warning
Ping Pong plays the Resource used backwards. This works the same way as setting a Clip's Speed to -1, in that the Codec is decoded by the Engine in reverse
As with Clip Speed, not all Codecs support negative speed. For example, Codecs like H264 and H265 perform very poorly when this is attempted.
The Standard Content is H264 content, so in this case it is not recommended to test the Ping Pong modes with the Standard Content as you will have stuttering playback on the Output.
Instead, it is recommended to use NotchLC/Transcode the Standard Content to NotchLC when wanting to test Ping Pong. For other Codecs, it is recommended to test with it to make sure playback remains smooth.
Free Loop|Ping Pong
Free Loop|Ping Pong acts the same as Free Loop in that it will continuously play the Resource in a loop until the Nowpointer leaves the Clip.
In the case of Ping Pong, this means the Resource will play forward, then backwards, and forwards again continuously in a loop.
Warning
Ping Pong plays the Resource used backwards. This works the same way as setting a Clip's Speed to -1, in that the Codec is decoded by the Engine in reverse
As with Clip Speed, not all Codecs support negative speed. For example, Codecs like H264 and H265 perform very poorly when this is attempted.
The Standard Content is H264 content, so in this case it is not recommended to test the Ping Pong modes with the Standard Content as you will have stuttering playback on the Output.
Instead, it is recommended to use NotchLC/Transcode the Standard Content to NotchLC when wanting to test Ping Pong. For other Codecs, it is recommended to test with it to make sure playback remains smooth.
Youtube
Also checkout our video tutorial on Youtube for a visual on some of the different Play Modes.
PIXERA 25.2 R 12 | 15 December 2025 | CL
Trigger Cues & Multiple Cue Layers
Trigger Cues and Cue Layers
In PIXERA 25.3/26.1 we have added a new Cue type: Trigger Cues, as well as the ability to create new layers for cues to be on called Cue Layers in the Timeline.
Trigger Cues
Trigger Cues can be used to trigger some Network Command, or another timeline and are useful for triggering an action in control or an API command that you are sending out. Importantly, Trigger cues do not change the transport mode. They function like a play cue without the attached ‘play’ functionality for the timeline.
They are located here and signified by the lightning bolt on the flag in the timeline toolbar:

Trigger Cues can also be created by changing the Operation on a Transport cue (play, pause, stop, jump) to Trigger:

Here is the Trigger Cue Inspector:

NOTE
There are very few parameters here other than the ability to trigger something else since the Trigger cue is mainly for trigger actions within or via control.
A new Parameter in the inspector is the ability to Change Layers using the drop down.
Cue Layers
Cue Layers are a new type of layer that can be added by right clicking in the Layer header and adding a Cue Layer:

Cue Layers are a new place to add cues to so that you can organize and structure your timeline to group certain types of cues. For example you could have one Cue Layer that is your Projector dousing and another Cue Layer that includes all of your PIXERA Control cues.

Clicking on this icon will mute the Cue layer and won't execute any of the cues on it:

Other Features of Cue Layers
You can now stack cue flags visually:

NOTE
These cues will still be 1 frame off set from each other automatically (see same set of cues zoomed in)

Cues can be moved between Cue Layers using the Inspector:

PIXERA 25.3 | 10. DEC 2025 | MB
Touch Designer Integration (BETA)
TouchDesigner Integration (Part 1)
Intro

This Article is split into two sections:
- TouchDesigner integration (Part 1) - TouchDesigner Setup
- TouchDesigner integration (Part 2) - PIXERA Setup
Beta Feature
BETA FEATURE STATUS
As of September 2025 the TouchDesigner integration is in Beta status.
This feature is in beta and so it's list of capabilities are as such as of September 2025:
- Only TOPs and CHOPs are supported. DATs are not.
- Multi-server sync is not possible. This means that if you're relying on a Director managing one or multiple Clients to render a TouchDesigner asset across multiple displays these displays will not be in sync. Currently the implementation only works with a single local server.
Requirements
In order to run TouchDesigner files within PIXERA the following items must be installed on each machine intended to either control or render the TouchDesigner output:
- TouchDesigner 099 with a valid license key loaded onto the same machine that PIXERA runs on. For more information on licensing needs in conjunction with TouchEngine refer to Derivative's TouchEngine page.
- PIXERA license version 26.1 or onward
- A .tox file
Installing PIXERA alone will not install TouchDesigner nor TouchEngine. You need to download and install it yourself per machine where it is required.
TouchDesigner Driver Recommendations
From TouchDesigner's System Requirements page it states that NVIDIA GPUs require driver 530.00 or newer with driver 581.00 or later recommended. PIXERA's driver recommendations vary from GPU to GPU, however the drivers listed on our website are those which are verified and tested.
If you choose to proceed with a driver update that is outside of the range of our recommended drivers do so at your own risk. Test and verify your workflow is suitable for your hardware well in advance of any official production deployment.
Example .tox & .toe
| Name | What it is | Version Created With |
| HUD.tox | The file you import into PIXERA | TouchDesigner 099 2023.12230 |
| HUD.toe | The editable TouchDesigner file (includes bookmarks) | TouchDesigner 099 2023.12230 |
Importing

Be Nice. Import Twice.
You must add a .tox file twice to your display object or Timeline if you want access to both Texture information and Custom Parameters. You import once for texture information and another time for the Control Parameters.


HUD.tox Layer Parameters

Video Input Parameters (In TOPs)
| Label | inSampler1 | inSampler2 |
| Parameter | inTOP: inSampler1 | inTOP: inSampler2 |
| Data Type | PIXERA Sampler | PIXERA Sampler |
| Range | One input only | One input only |
Colors Parameters
| Label | UI Primary R | UI Primary G | UI Primary B | UI Primary A | UI Secondary R | UI Secondary G | UI Secondary B | UI Secondary A |
| Parameter | Uiprim | R | Uiprim | G | Uiprim | B | Uiprim | A | Uisec | R | Uisec | G | Uisec | B | Uisec | A |
| Data Type | Float | Float | Float | Float | Float | Float | Float | Float |
| Range | 0.0 - 1.0 | 0.0 - 1.0 | 0.0 - 1.0 | 0.0 - 1.0 | 0.0 - 1.0 | 0.0 - 1.0 | 0.0 - 1.0 | 0.0 - 1.0 |
Misc Parameters
| Label | Intensity | Param 1 | Param 2 | Param 3 | Param 4 | Move Waveform | Rotate Banana |
| Parameter | Intensity | Param1 | Param2 | Param3 | Param4 | Movewaveform | Rotatebanana |
| Data Type | Float | Float | Float | Float | Float | Float | Float |
| Range | 0.0 - 1.0 | 0.0 - 1.0 | 0.0 - 1.0 | 0.0 - 1.0 | 0.0 - 1.0 | -1.0 - 1.0 | 0.0 - 360.0 |
Driver, Switch, & Query Toggles
| Label | Time Driver | Switch BG | Switch Video Input | Web Query | Reset Storage |
| Parameter | Timedriver | Switchbg | Switchvideoinput | Webquery | Resetstorage |
| Data Type | Boole/Toggle | Boole/Toggle | Boole/Toggle | Int | Int |
| Range | 0 or 1 | 0 or 1 | 0 or 1 | 0 or 1 | 0 or 1 |
Loading Textures into the .tox
Within HUD.tox's PIXERA Parameters there are two used to pass video data into the hosted .tox file. Select your video file from the Resources tab, then drag and drop one Resource into the inTOP: Sampler1 and inTOP: inSampler2 parameter slots of HUD's Control Layer. While the Timeline plays so do the videos put into the Parameter slots.

Multi-Monitor Output
If your .tox file has multiple Out TOPs that need to be applied to multiple Displays, the mechanism to support this would be use of Screen Groups.
First add two Displays to your Workspace by navigating to the Screens tab > Library tab > twirl down the Displays group and select any two Displays you want.

Using HUD.tox from the example project folder drag and drop it from the Resource pane onto your Displays. Once out_HUD and out_banana and Control are placed on the Timeline you may notice that only one of the texture layers renders across all of the Displays. Select out_HUD and look at the Big Four, located in the right hand side of the PIXERA interface under the Setup tab > Presence parameters. Under Home Screen it should say “Compositing can server multiple screens”. You cannot specify which Display for the .tox outputs to display here. Instead we turn to Screen Groups.

Navigate to the Compositing tab > Screen Groups. If you're working in a new project file you will see only Screen Group 1 here. To add another Screen Group 2 select the + button at the bottom. It is recommended to rename your Screen Groups in a way that makes it easier to discern later.
Twirling down the original Screen Group 1 you'll notice that there are two Displays within it. We want to split these two Displays into different Screen Groups. To do this right click on the name of the new Screen Group 2 you made and then select Add or Remove Screens and then uncheck the name of the Display you want to move to the new Screen Group 2. Afterward select Apply Changes.
Next perform the same steps, but instead of adding a Display we'll remove a Display from the original Screen Group 1. Right click on the original Screen Group 1 > Add or Remove Screens. Then uncheck the Display you moved to the new Screen Group 2 and choose Apply Changes. Now both of your Screen Groups should look something like this:

Next look to the Layers on your Timeline. Select out_HUD and in the Inspector on the right hand side select the Setup tab and then navigate to the Presence parameter group. Under Screen Group Presence select the drop down menu. Within it is a list of available Screen Groups. For out_HUD we'll select Screen Group 1 and unselect Screen Group 2. Once that's set select the Layer out_banana and in it's Screen Group Presence select Screen Group 2 and unselect Screen Group 1.


Your preview will now show the Out TOPs separated by display.
Layer Reference Resource
Using Layer Reference Resources is an powerful optimization and compositing tool when working with TouchDesigner .tox files in PIXERA. A Layer Reference Resource is a PIXERA specific tool found at the bottom of the Resource pane.

Once created, select the Layer Reference Resource and in the inspector on the right hand side you use the dropdown options for Timeline and Layer to select the specific .tox Extension Stream you want to use. Select out_HUD from the Timeline it's been placed on.

After that drag the configured Layer Reference Resource onto a Timeline. Use the Big Four in the inspector to configure the Layer Reference Resource to your liking for your project
Using a Layer Reference Resource saves you on GPU processing power, as it acts as an instance of the original source file which can be copied many times and used in different Compositing methods.
Pixera 25.2 | 17. September 2025 | T.M.
New Mapping Multi-View
New Mapping Multi-View
Beginning in 25.3 there is a new way to view your Mappings and Feeds in the Mapping Tab. This new view allows you to view all screens at the same time when mapping which makes it easier and more efficient to create your feeds without adding extra clicks to your workflow. This new view is shown when you Dive in to All Screens in the drop down menu in the Workspace.
Note
You must assign outputs to your Screen Objects in order for the Feeds to appear in the new All Screens Mapping


New Mapping View in Mapping Tab: note we can see two different displays (Screen A and Screen B) at the same time!
Warp Engine
As part of this new feature you can now move the Warp Engine (sometimes called the Mapping Engine or AUX Engine) into the main workspace to view your two workspaces.
Use Window Pane Management to add a new panel to your workspace. It is typical to view these with both of the views centered, but you can place them wherever you would like.
https://help.pixera.one/en_US/window-pane-management
Then right click in the new panel and “Move Warp Engine”

Once that is complete, reset your workspace view (R hot key) or zoom out in order to see all of your outputs. Here, the “Show Labels” button in the workspace toolbar is selected to make the outputs easier to see.

We can then move and resize out Feeds using the Inspector and the workspace.

Inspector Multi Mapping View

With the introduction of the Multi Mapping View, the Inspector has changed slightly. A new icon has been added to the toolbar that allows you to insert a gutter between the outputs. This icon is available in the Warp, Softedge, and Marker tabs.

If you want to warp your outputs, apply a soft edge, or perform a marker calibration, it is no longer necessary to select the projector each time you switch between outputs. Instead, you can use the “Select Screen Mapping” drop-down menu.

Known issues and current limitations
- At the moment, there's no possibility to move a feed from one output to another.
PIXERA 25.3 | 18. DEC 2025 | MB
UAP - Update Access Package
UAP Update Access Package
Starting January 1, 2025, PIXERA software licenses will include an Update Access Pack (UAP), ensuring our customers always have access to the latest features and updates. This new system guarantees that your PIXERA experience stays cutting-edge and aligned with industry advancements.
By moving away from the major version (1.0, 2.0, 3.0) model, we will improve the reliability and stability of our software. This approach normalizes the cadence at which features are added and allows us to release new features as soon as they are ready.
Why the Update Access Package?
We are introducing the UAP system to speed up the development of new features and improve our responsiveness to user needs.
- Faster Feature Development and Customer-Centric Updates: By moving away from the major version (1.0, 2.0, 3.0) model, we will improve the reliability and stability of our software. This approach normalizes the cadence at which features are added and allows us to release new features as soon as they are ready.
- Enhanced Support and Documentation: By regulating the workload of our development and support teams and removing the pressure of major release deadlines, we can provide a better product, improved documentation, and superior support.
How Does the UAP Work?
- 1-Year and 3-Year Access: New software licenses include access to PIXERA updates. After this period, your UAP will need to be renewed to access new versions.
- Optional Renewal: If you choose not to renew your UAP, you can continue using any PIXERA version released before your UAP expiration date. However, updates and new features released afterward will not be available.
UAP for PIXERA Hardware Users
PIXERA hardware dongles will continue to receive updates as long as the original PIXERA hardware is supported. If the dongle is removed and used with third-party hardware, a warning message will be displayed, and the dongle will convert to a software dongle. At that point, a UAP package must be purchased to regain update access.
Important Information for All PIXERA Software Customers with a Purchase Date Before January 1, 2025
All customers who purchased their PIXERA software license before January 1, 2025, will receive free access to all software updates until December 31, 2025.
Starting January 1, 2026, a valid Update Access Package (UAP) will be required to receive further updates.
We recommend securing a UAP in advance to continue benefiting from new features, optimizations, and ongoing developments of the PIXERA software beyond 2025.
UAP and PIXERA Control
PIXERA Control is currently excluded from the UAP and does not require a UAP for updates.
How to Renew Your UAP
Renewing your UAP is straightforward and ensures uninterrupted access to PIXERA updates:
Contact Your Distributor: Our distribution partners are ready to assist with UAP renewals. They can extend your UAP expiration date for 1 or 3 years.
Seamless Transition: If there’s a gap between your UAP expiration and the renewal date, a prorated fee will apply to cover the time gap, ensuring you don’t miss a beat.
Example Scenario:
License Purchase Date: July 1, 2025
Updates Included Until: June 30, 2026
Renewal Date: October 1, 2026
New UAP Validity Period: Until September 30, 2027
Prorated Fee: Covers the gap from July 1, 2026, to September 30, 2026.
Update Access Package FAQ
Licensing Scope & Versions
Which versions do I have access to within a valid UAP?
With a valid UAP (Update Access Plan), you have access to all Pixera software versions released during or before your active UAP period. This includes both major and minor releases, as well as bugfix updates.
Which versions do I have access to outside of my valid UAP?
If your UAP has expired, you can continue to use any Pixera version that was released before your UAP expiration date. Versions released after your UAP expired will not be accessible until you renew your UAP.
Maintenance Versions like updates of an already realeased version will still work as well (they only contain bugfixes and no new features)
What happens if I try to open a Pixera version that was released outside my UAP period?
The software will prompt you to renew your UAP to access newer versions. The Software will fall back to a creator license which allows you to use the software but with the limitations of a Creator License.
What happens if I try to open a Presence version that was released outside my UAP period?
The same rules apply as with Pixera: The Software will fall back to a creator license which allows you to use the software but with the limitations of a Creator License.
Can I access Pixera bugfix versions that were released outside my UAP?
Bugfix Versions are accessible as long as the major release was within your UAP period.
Can I still open Pixera if my UAP has expired?
Yes, you can continue to use any version released before your UAP expired. All other versions are in a "Creator license" mode.
Which Pixera versions can I use with an expired UAP?
You can use all versions released up to your UAP expiration date. Later versions will be started as Creator license.
How does UAP handle access to major vs. minor Pixera/Presence releases during an active term?
All releases—major, minor, and bugfix—are included during your active UAP period. There is no distinction; you always have access to the latest available version.
Can I still open projects created under an active UAP after my UAP expires (is there a grace period)?
You can open and work with projects using any version released before your UAP expired. Newer versions can only be opened with the limitations of a Creator License.
Does UAP allow downgrading to older versions for compatibility, and are there any limits?
Yes, you can use any version released before your UAP expiration, allowing you to downgrade for compatibility if needed.
Are beta or release‑candidate builds covered by UAP, and what support level applies?
Beta and release-candidate builds are generally available to UAP customers, but support is limited in a sense that these versions are officially beta versions.
Are intermediate versions affected by the UAP?
Yes, all versions—including intermediate builds—are only fully accessible if released during your active UAP period.
UAP becomes active on January 1, 2026 – does this affect 25.3/26.1 intermediate versions?
Yes, only versions released before your UAP expiration date (e.g., January 1, 2026) are accessible. Later versions require a renewed UAP. All Dongles bought in 2025 have UAP access for 365 days from date of purchase (eg. Bought 2.April 2025, access to Updates till 1.April 2026).
Is UAP a subscription?
UAP is not a traditional subscription but an annual or multi-year update access plan. It gives you access to all updates and new features released during the active period.
Does the UAP renew every year? Can I opt out of some years/periods of time?
Yes the UAP renews yearly, you can also opt out of renewing every year or during periods of time, this can be done as many times as desired.
Note that if you do skip a period of time, when you go back on the UAP, you must pay for the period of time you were opted out to gain access to the updates released during that time.
Dongles & Fleet Management
I am borrowing a dongle from a rental company – but this license has expired. Who should I contact and how long does the update process take?
Contact the rental company . Once payment is received, UAP renewals are Online immediately.
What if I have lost my dongle?
Contact Pixera support or your distributor for replacement options. Proof of purchase and/or registration may be required.
How can I add my dongles in the Hub if I bought them on the open market?
By plugging the dongle into a computer and downloading the lic file, it is automatically recognised in the hub.
What should I do if I bought a dongle on the open market, want to update it, but don’t know the distributor?
Contact Pixera Sales Team directly with your dongle details. They can help you identify the distributor and guide you through the update process.
Is Hardware also affected by the UAP?
As long as the Hardware is original it is not influenced by UAP restrictions
What happens to UAP entitlements if a dongle is transferred during a company acquisition or asset sale?
UAP entitlements can be transferred with the dongle, but you should notify Pixera Sales to update ownership records.
Are there PIXERA Hub tools for UAP management?
Currently, PIXERA Hub reads available license information and is not able to perform any changes to Update Access Packages. Visit PIXERA Platform for UAP management.
The licenses can be found in HUB - Manage - Licenses.
All available license files on this system are displayed in here.

If a licence is selected from this list, further information about it will be displayed.

Where can I centrally manage my serial numbers/dongles without first having the licence file?
Licences can be managed centrally in the Pixera Platform. Here, you can also establish contact with the respective distributor.
https://platform.pixera.one
How can I manage and view my licences in the PIXERA Platform?
1. Open https://platform.pixera.one
2. If you are not yet registered, please create a new account.

3. During the registration process, it is possible to register as a company.
You can select the respective distributor via the country selection.
Once this has been done, your company will appear at the distributor, who can then also assign the licences.

4. After registering and logging in, the respective organisation can be selected via the account.

5. In the ‘Licences’ tab, it is now possible to view your licences and add more.
Managed Licences
These licences are added by the distributor for their customers.
For example, customer A purchases a licence from distributor A. Customer A registers on the platform with company A and selects distributor A as their seller.
The distributor can now see this customer in their portal and can add the serial number sold to their distributor portal.
This licence is then automatically displayed in the portal of customer A with company A.
Unmanaged Licences:
In this area, the end customer/end user can manually add their licences to their portal in order to view the status of their licences centrally in one place, without a dongle or licence file.

Purchasing, Billing & Discounts
Who should I contact if I want to extend my UAP?
Contact your local PIXERA distributor or authorized reseller. Provide your dongle serial number(s) and desired UAP term (1 or 3 years).
What billing options exist (annual, multi‑year) and can I switch mid‑term?
Annual and multi-year (typically 1 or 3 years) UAP options are available. Switching mid-term may require a pro-rated adjustment.
Are volume, educational, or nonprofit discounts available for UAP, and how are they applied?
Yes, discounts are available for volume purchases, educational institutions, and nonprofits. Contact your distributor for eligibility and application details.
Can resellers/integrators manage UAP on behalf of end customers, and what permissions are required?
Yes, resellers and integrators can manage UAPs for customers with appropriate authorization. Permissions are typically set during the purchase or registration process.
Deployment & Operations
Where can I see my licenses and their UAP status?
You can view all licenses and UAP status in the Pixera Hub or by contacting your distributor.
Is Pixera Control affected by the UAP?
No, Pixera Control is not affected by UAP
How do offline or air‑gapped systems handle activation, renewal, and proof‑of‑entitlement under UAP?
Offline systems can be updated via manual file transfer. Documentation about workflow.
What happens to third‑party integrations or control modules when UAP expires?
Existing integrations continue to work, but you will not receive updates or new features for third-party modules after UAP expiration.
Which versions do I have access to outside of my valid UAP?
If your UAP has expired, you can continue to use any Pixera version that was released before your UAP expiration date. Versions released after your UAP expired will not be accessible until you renew your UAP.
Maintenance Versions like updates of an already realeased version will still work as well (they only contain bugfixes and no new features)
How are security fixes and critical bug patches delivered near UAP boundary dates?
Security and critical bug fixes are included for all users with an active UAP. If your UAP expires, you will not receive further patches until you renew.
Compliance & Notifications
What documentation does PIXERA Hub provide for licensing compliance reviews?
Contact support for detailed reporting options.
Link to Support System
How will I be notified of an upcoming UAP expiry?
You can always track the current UAP state in PIXERA, PIXERA Hub and PIXERA Platform. Reminders are planned in the future.
General & Support
Is the support service affected by the UAP?
Standard support is available to all users, but access to new support features and updates requires an active UAP.
Where can I download my license code?
License codes can be downloaded from the Pixera Hub or requested from your distributor.
Why is there a switch to UAP at all?
The UAP model allows Pixera to deliver new features and updates more regularly, improves cost transparency, and provides better planning and support for customers.
PIXERA 25.3/26.1 | 15. December 2025 | FE
Further Features & Improvements
- Projector Heat Maps Respect Geometry and show Shadows
- Lua Syntax highlighting
- UI Builder drag and drop improvements UI Builder - Drag and Drop
- UI Builder Actions allow manual text assignment
- Scheduler improvements, local mode added, daylight saving time improvements. (Eventscheduler, UI Builder Calendar)
- Added ViosoRecalibration Module
- Added Subtitle Creator Module (SRT Files)
25.3/26.1 Changelog
Pixera 26.1 R26
6 July 2026
Features
*Feature: Engine: Improved detection and reinitialization of failed extension processes.
*Feature: Engine: Optionally skipping Notch frames when rendering takes too long.
Fixes
*Fix: Timeline: Stabilized cue playback when pause and trigger actions occur at the same time on separate cue layers.
*Fix: Timeline: Drag of cues on main cue layer did not always work.
*Fix: Timeline: Do not send continuous timecode updates when timecode is paused.
*Fix: Timeline: Notch: Clips at time 0 render while timeline is stopped when Preload Effects Permanently is enabled
*Fix: Timeline: Timeline lock problems fixed.
*Fix: Timeline: Handle events in correct order when adding time. Handle events the same way when subtracting time.
*Fix: Timeline: Timeline structure corrected when replacing existing Notch blocks.
*Fix: Timeline: Trigger Cues: No preload when trigger cue is a play cue without finite wait duration.
*Fix: Timeline: Timeline Inspector: Not updating after layer switch and color correction open.
*Fix: Timeline: Jump cue to time: fails when another jump or trigger cue is at goal time.
*Fix: Timeline: Key frame multi selection snaps.
*Fix: Engine: Added LTC input correction frame
*Fix: Engine: Fixed disappearing quadrants of aggregate outputs with lens correction
*Fix: Engine: Never allocating/generating mip maps for compressed format
*Fix: Engine: Fixed excessive error reporting of conversion task when file was missing
*Fix: Engine: Fixed potential incorrect colors with Prores decoding
*Fix: Engine: Fixed closing outputs with Blackwell GPUs
*Fix: Engine: Fixed potential crash after "WARNING resynchronizing audio output"
*Fix: Engine: Enabled Notch double buffering by default
*Fix: Mapping: Polygonal warp: Selection for all screens fixed. Wrong scaling of bounding box on source side fixed.
*Fix: Mapping: Positioning and scaling of output feeds in preview and on output corrected if aggregate output count is 1 in one dimension.
*Fix: Mapping: Reduce warp engine reloads when currently selected object is updated.
*Fix: Mapping: Scaling in warp engine fixed for feeds across whole output with aggregate outputs.
*Fix: Mapping: Set mpcdi region in mapping after scale factor has been updated.
*Fix: Mapping: Ensure that external configuration is correctly applied on reload.
*Fix: Multi User: New perspectives due to screen group changes are distributed correctly.
*Fix: Multi User: Live input resource placeholder change is distributed with incremental updates.
*Fix: Content Mapping: Content mapping: rounding error fixed.
*Fix: Engine: Improved performance of Notch rendering (fixes Blackwell GPUs).
*Fix: Timecode: Audio timecode input signal reception shown in GUI.
Brushes
*Brush: Mapping: Limit softedge resolution to target resolution for projector using feed area.
*Brush: Mapping: Avoid modifier updates when no control point was affected by user input.
*Brush: Mapping: Multiple GUI performance improvements for high resolution screens in mapping.
*Brush: Mapping: Try to avoid overlaps of signature labels in aux engine.
*Brush: Mapping: Cross selection of different objects in mapping improved.
*Brush: Timeline: Performance improvements for many cues and many events inside a single clip.
*Brush: Timeline: Flawed performance optimisations for layer reference resources reverted.
*Brush: Service: Outputs: Synchronize display checkbox always enabled.
*Brush: Workspace: Performance improvements for large screens.
*Brush: Live Systems: Number of allowed unacknowledged presence heartbeats can be set in TweakConfig.
*Brush: Live Input: Live input preview resolution and fps can be set in tweak config.
Known Issues
Issue Description:
Studio camera fills entire screen after restarting PIXERA; the Studio camera now occupies the entire outer frustum on the output. Outer frustum is not visible.
Workaround
The problem goes away when toggling the “Active” or the “Project on Associated Screens” field on the camera’s “Background” inspector section or remove and re-add the associated screen
Pixera 26.1 R1
25 Mar 2026
Fixes
*Fix: Content Mapping: Content mapping is displayed correctly after first assignment.
*Fix: Content Mapping: Ensure content mapping output for destination editing.
*Fix: Control: Timeline playback works again in Control Standalone version.
*Fix: DMX: Random openess state of elements in list
*Fix: Gizmo: Screens can no longer be transformed in compositing app mode using gizmo.
*Fix: Gizmo: Handling change of constrained axis while keyboard input is active correctly.
*Fix: License: Correct version build date shown in manage license dialog for systems in Mapping/Live Systems (not just in About settings).
*Fix: Mapping: Destination feed editing with correctly aligned bounding box.
*Fix: Mapping: Heatmap calculation fixed.
*Fix: Mapping: Mapping feed transformation for screens with aspect ration less than 1 fixed.
*Fix: Resources: Fileversions no longer lost after refreshing resource
*Fix: Resources: Search for file version suffix from behind instead of from the front avoiding accidental hits.
*Fix: Screens: VWF files will be included in bundle
*Fix: SMPTE Timecode: Timelines in projects created when adaptive drift correction was not yet an available are set to drift correction "None" if drift correction was previously disabled.
*Fix: Timeline: Clip lock fixed for selection in workspace and store dominant values.
*Fix: Timeline: Cue Layer. Jumps are preloaded even when layer is muted. Fixed.
*Fix: Timeline: Cue layer: jump cue offers no label or number selection. Fixed.
*Fix: Timeline: Cues. Play cues incorrectly influence transport and cause wrong pause-cue timing. Fixed.
*Fix: Timeline: Jump not executed when target is on a different cue layer. Fixed.
*Fix: Timeline: Timeline: Transport keyframes and pause cues causing incorrect playback in 26.1. Fixed.
*Fix: Timeline: Transport Keyframes: Keys at Same Time as Pause Cues Not Applying When Starting Transport. Fixed.
*Fix: Timeline: Trigger Cues. Running through trigger cues results in timeline miscalculation that hides clips at intended playback times. Fixed.
*Fix: Timeline: Undoing clip drag deletes all keyframes. Fixed.
*Fix: Timeline: Transport keyframes and pause cues causing incorrect playback in 26.1. Fixed.
Pixera 26.1 RC5
5 Mar 2026
Fixes
*Fix: API: Changing Notch parameters via DirectAPI fixed.
*Fix: API: Ensure getCues() returns cues in chronological order when cues are distributed across multiple layers.
*Fix: API: Trigger cues are now handled correctly by API when blend duration is 0.
*Fix: Cue List: Fix Cue list filter resets when adding a new Cue.
*Fix: Cue List: Fix wrong Cue selected after applying filter in Cue List.
*Fix: Cue List: Prevent adding selection to Timeline from Cue List.
*Fix: DMX Recording: Direct transfer of data from input to output ensured if thinning window set to zero.
*Fix: Engine: Fixed 8k projector signal quadrant processing.
*Fix: Engine: Fixed potentially rendering at 1Hz when binding to swap barrier.
*Fix: Engine: Fixed switching between multiple studio cameras with lens correction.
*Fix: Engine: Fixed web resource only visible on first screen.
*Fix: GUI: Corrected display when switching to Real Time Clock to avoid showing previous time briefly.
*Fix: GUI: Improved Clock View performance to prevent lag after first timeline addition.
*Fix: GUI: Reveal content in library loads content if ancestor is available as tree node.
*Fix: Multi User: Pushing of newly created screengroups
*Fix: Mapping: Selecting 'None' as assigned image device clears all existing assignments (also to aggregate output sub regions).
*Fix: Mapping: Load content mapping destination in warp engine again.
*Fix: Notch: Direct API: Notch block replacement resulted in connection loss.
*Fix: Resource: Notch: dfxdll can be dragged into resource tree.
*Fix: Resources: Audio resources will be distributed when output device changes
*Fix: Resources: File watcher: wrong handling of umlauts in file path fixed.
*Fix: Resources: Notch files will get distributed to needed services when option is turned on and dropped onto timeline
*Fix: Screens: Issues with setting curvature of led panel the first time remedied.
*Fix: Screens: When replacing led module, brand and model name will be shown correctly
*Fix: Settings: Possible duplication of transcoding presets fixed when settings are transferred via multi user.
*Fix: Studio Camera: Direct API 'cut to camera' fixed for multiple studio cameras which share the same compositing output.
*Fix: Timeline: Clip copy preserves color lut.
*Fix: Timeline: Corrected an issue where Shift-Resize did not work on layers within groups.
*Fix: Timeline: Corrected cue stacking order during inter-layer drag operations.
*Fix: Timeline: Ensure full cue selection rollback when a move is rejected because the target transport cue position is already occupied.
*Fix: Timeline: Ensure layer groups created from multiple layers are no longer displayed as muted automatically.
*Fix: Timeline: Ensure layers are removed from the current selection when locked so they cannot be moved in subsequent multi-selections.
*Fix: Timeline: Ensure resource thumbnails appear when a resource is dragged into the timeline and the first hit is a cue layer or a group.
*Fix: Timeline: Enhanced "Ignore Next Cue" functionality to handle all cues scheduled at the same time across multiple layers.
*Fix: Timeline: Fixed glitches on cue selection indicator painting during inter-layer drags.
*Fix: Timeline: Fixed inability to create cues on the main cue layer when the first layer was locked.
*Fix: Timeline: Improved cue layerfunctionality and added better validation to detect duplicate times.
*Fix: Timeline: Include cue layers in rename and navigation actions.
*Fix: Timeline: Prevent keyframes from being pasted to locked clips.
*Fix: Timeline: Prevent layers from becoming hidden when moving selected layers into a group while the target group is also selected.
*Fix: Timeline: Prevented a crash occurring when dragging a cue from the Main Cue Layer into a timeline without layers.
*Fix: Timeline: Prevented playback commands from being skipped when multiple cues overlap.
*Fix: Timeline: Resolved an issue causing an endless reparent loop when dragging a group onto itself.
*Fix: Timeline: Updated countdown to include cues on cue layers and added an option to hide entire cue layers in the cue browser and countdown.
*Fix: Timeline: Do not reset layer settings on layer mapping effect removal if other layer mapping effects remain on layer.
*Fix: Timeline: Ensure full cue selection rollback when a move is rejected because the target transport cue position is already occupied.
*Fix: Timeline: Ensure resource thumbnails appear when a resource is dragged into the timeline and the first hit is a cue layer or a group
*Fix: Timeline: Do not reset layer settings on layer mapping effect removal if other layer mapping effects remain on layer.
*Fix: Timeline: Keyframe shift after undoing left side clip resizing. Fixed.
*Fix: Timeline: Bezier keyframe handles. Unselectable when positioned close to their keyframes, even when clicking directly on the handle. Fixed.
*Fix: Timeline: Layer groups. Ignore next jump cue will not show next content. Fixed.
*Fix: Timeline: Render order fixed if order is changed by drag and drop of multiple timelines.
*Fix: UI Layout: Fix disappearing Detached Control Window when a new project file is loaded.
*Fix: UI Layout: Rename option from "Add Avio Log" to "Add Control Log".
*Fix: UIB: Alignment of some control elements was not affected by global css.
*Fix: UIB: Copy paste inside calendar element duplicated all existing elements.
*Fix: UIB: Cuelist element displayed cues from cue layers incorrectly.
*Fix: UIB: Fixed issue where playlist editor created extra clips when executed through trigger() api command.
*Fix: UIB: Fixed playlist editor jump cue sometimes disappearing.
*Fix: UIB: GoToPage no longer shows up as an option for the action lasso selection when there is only one page.
*Fix: UIB: Label element did not have hover option and hover effects were overwritten by background color.
*Fix: UIB: Layout control element 'none' options did not work.
*Fix: UIB: Recurring calendar entries were displayed incorrectly in day/week view.
*Fix: UIB: Some key combinations broke the dimensions of the selected element.
*Fix: UIB: Timezone bug affecting the start and end date inside the calendar control element.
*Fix: UIB: Toggle actions of button elements were ignored when a main action was set.
*Fix: Unreal Engine: Fixed flickerig when controlling object through plugin/timeline.
*Fix: Workspace: Perspective selection outer compositing fixed.
*Fix: Workspace: Key press for gizmo change is forwarded to screen's selection in outer compositing if content selection mode is active.
*Fix: Workspace: Key press for gizmo change is forwarded to screen's selection in outer compositing if content selection mode is active.
Brushes
*Brush: API: Added API functions for cue handling on cue layers and secured other layers against adding cues.
*Brush: API: Extended API function call for setCueOperation to support trigger cues.
*Brush: Projector: Default max throw ratio set to 12. Generic lens min/max value scan be set in TweakConfig.
*Brush: Projector: Ignore lens limits in set methods to allow more extreme values from external calibration.
*Brush: Settings: New setting to launch Pixera with previous App Mode.
*Brush: Timeline: Added a checkbox to include or ignore locked layers when using Add or Subtract Time.
*Brush: Timeline: Added label to Main Cue Layer to enhance identification.
*Brush: Timeline: Added support for saving the selected display mode in clock view.
*Brush: Timeline: Apply cue stacking on the "Main Cue Layer" when the layer is at its default height.
*Brush: Timeline: Cue Layer. Jumps are preloaded even when layer is muted. Fixed.
*Brush: Timeline: Enhanced interlayer drag behavior for smoother interaction. Improved undo functionality when adding a new layer during a drag operation.
*Brush: Timeline: Keyframe selection range inconsistent. Fixed.
*Brush: Timeline: Keyframe handles are occasionally rendered with incorrect or unexpected colors. Fixed.
*Brush: UIB: Added a setting to calendar element to toggle between UTC and local time.
*Brush: UIB: Adjusted resource browser design and added functionality to send a selected resource handle to an action.
Pixera 25.3 INTER 73
17 Dez 25
Fixes
*Fix: API: Allowlist is not disabled anymore if dialog is closed by pressing 'Cancel'.
*Fix: API: No mapping user interface reloads when transformation is updated from DirectAPI.
*Fix: API: Preview edit: API methods moveToNextCue(.) and moveToPreviousCue(.) unintentionally move main now pointer
*Fix: API: Fixed sACN api output
*Fix: Engine: Fixed alpha when making the output window transparent.
*Fix: Engine: Fixed flashing preview when content is missing.
*Fix: Engine: Fixed loop inputs, causing vanishing output when pressing dominant transport lock to time.
*Fix: Engine: Fixed negative speed when set as layer dominant value.
*Fix: Engine: Fixed Notch block showing old frame on input change
*Fix: Engine: Fixed Notch layers visible on multiple screens, reallocating input textures.
*Fix: Engine: Fixed warp mesh depth sorting for NDI output streams
*Fix: Engine: Fixed web resource texture sharing with preview engine on multi GPU systems
*Fix: Engine: Improved automatic adapter selection for web resource.
*Fix: Engine: Not showing the last frame when loop outro ends.
*Fix: Engine: Rebuilt ffmpeg for compatibility with CPUs before Haswell/Excavator.
*Fix: Engine: Fixed cleanup of transfers when Presence is closed.
*Fix: GUI: DMX fixture visualization limited allocated image size to 512 channels.
*Fix: GUI: Import Cue window no longer appears after canceling cue import.
*Fix: Mapping: DMX output mapping unhandled exception fixed when entering alphabetic characters.
*Fix: Mapping: Load inspector with fallback mapping for marker calibration if external marker is selected.
*Fix: Mapping: Marker calibration stores screen transformation per marker set individually.
*Fix: Mapping: Warp updated correctly when switching from feed mode to original screen object.
*Fix: Multi User: Clip updates used resource on import if resource not found or path mismatched.
*Fix: Multi User: Only process multi user operations for desired types.
*Fix: Resources: DMX controls now available for layer reference resource.
*Fix: Resources: Fixed not respecting suffix end when loading original file.
*Fix: Resources: Fixed replace of resources in custom asset root across multi user members.
*Fix: Resources: Resource transcoding from context menu uses multi selection.
*Fix: Timeline: Cue blend behavior restored if no blend duration is set.
*Fix: Timeline: Free loop clips out of sync with lock-to-time clips. Fixed.
*Fix: Timeline: Improved consistency of clip selection within layer groups.
*Fix: Timeline: Key frames unintentionally moved when clicking. Fixed.
*Fix: Timeline: Layer group shows muted only if all children are muted.
*Fix: Timeline: Layer reference resource output not updated. Fixed.
*Fix: Timeline: Layers can no longer be created when timeline is locked.
*Fix: Timeline: Notch block unloaded incorrectly when timeline stopped. Fixed.
*Fix: Timeline: Notch color parameter dominant values reset issue fixed.
*Fix: Timeline: Paint loop indicator position corrected for non-integral time.
*Fix: Timeline: Possible crash when deleting complex timelines. Fixed.
*Fix: Timeline: Preview edit jump to previous/next cue broken. Fixed.
*Fix: Timeline: Selection of layers possible in collapsed groups. Fixed.
*Fix: Timeline: Snapping not working properly in layer groups. Fixed.
*Fix: Timeline: Timeline settings fade duration set to 0 blocking delay. Fixed.
*Fix: Timeline: Timeline with non-integral framerate adds audio clip with correct duration.
*Fix: Timeline: Timeline-based ping pong mode resets to free loop. Fixed.
*Fix: UI Layout: Broken control layout after applying layout fixed.
*Fix: UI Layout: Detached Timeline after changing layout fixed.
*Fix: UI Layout: Engine stutter when detaching timeline fixed.
*Fix: UIB: Fixed incorrect inspector layout order in Firefox.
*Fix: UIB: Fixed linked actions not clearing correctly.
*Fix: UIB: Fixed slider UI element display issue.
*Fix: UIB: Fixed syntax highlighting for multiline comments.
*Fix: UIB: Fixed textbox control execute on enter not working.
*Fix: UIB: Improved style editor performance and usability.
*Fix: Vioso: Loading Vioso warp files without IP in filename fixed.
*Fix: Screen Groups: Crash fixed when deleted screen group was selected.
*Fix: Services: Manager IP set in utility service startup params.
*Fix: Settings: API Settings displayed IP address wrong in certain situations. Fixed.
*Fix: Studio Camera: Move to top changes render order incorrectly. Fixed.
*Fix: Notch: Notch Block does not render with "Keep Notch Block Preloaded" on. Fixed.
*Fix: Project: Result of renaming the project is checked.
*Fix: Control: Adapter IP aliases guaranteed to be available before module initialization.
*Fix: Cue List: Fix wrong countdown in cue list when using jump cues.
*Fix: DMX: Fixed not being able to set transport mode on layers in groups via DMX
Brushes
*Brush: API: Added function to get cues from cue layers by name.
*Brush: API: DirectAPI live trace can be enabled for screens.
*Brush: API: Do not update layers from DirectAPI if timeline is stopped.
*Brush: API: Exposed getValueMin() and getValueMax() and added to LayerJsonDescription.
*Brush: DMX: Real time color correction of projector mappings controllable from DMX.
*Brush: Engine: Automatically adjust odd resolution when transcoding to HAP.rush: GUI: Added warning when enabling "Refresh Resources On Load".
*Brush: GUI: Display which GPU the GUI is bound to.
*Brush: GUI: Performance improvements with many selected projectors.
*Brush: GUI: Show popup on startup if pixera started with elevated rights.
*Brush: Mapping: Performance improvement when copying many output feeds.
*Brush: Mapping: Quads can be subdivided after warp for smoother interpolation.
*Brush: Resources: Project compatibility improved between versions 25.1 and 25.2.
*Brush: Screens: Panel used for active screen can be replaced.
*Brush: Screens: Transformation applied from DirectAPI to perspective selectable.
*Brush: Timecode: Adaptive pitch correction settings available in GUI.
*Brush: Timeline: Added ability to extend resources forward if not time-locked.
*Brush: Timeline: Media keys can be re-linked based on file name.
*Brush: Timeline: Resource name readability improved with darker background.
*Brush: UIB: Added linked action to image component.
*Brush: UIB: Added pixc.callRefsNc() to auto-completion.
*Brush: UIB: Added pixc.createObject() to auto-completion.
*Brush: UIB: Added pixc.helper functions to auto-completion.
*Brush: UIB: Added syntax highlighting to script editor.
*Brush: UIB: Added vertical text alignment to style editor.
*Brush: UIB: Adjusted auto-completion inside brackets.
*Brush: UIB: Adjusted cue browser entries to show notes under cue name.
*Brush: UIB: Adjusted UI to display component name in inspector.
*Brush: UIB: Drag & drop actions into action input field.
*Brush: UIB: Improved JSON auto-completion in script builder.
*Brush: UIB: Made action input field editable.
*Brush: UIB: Updated build process and dependencies.
*Brush: UIB: Visual representation of linked actions.
*Brush: Unreal Engine: Ignore file usage and add project distribution to API.
*Brush: Unreal Engine: More configuration options for Unreal multi-user.
Pixera 25.3 INTER 72 | 18. December 2025 | LW