 Contact Us


Are you looking for the regular workflow without context to Scalable?
Prerequisites
- A Screen OBJ
- A MPCDI File
- PIXERA version 1.8.325 or later
If multiple devices are used, please reference the article Manager Client Setup.
Setup
Scalable Export Options
On the Export Options screen, you will select the MPCDI 2D, 3D or Shader Lamps option for Scalable Display Manager and the Shader Lamps option for outputting the correct files from Atlas: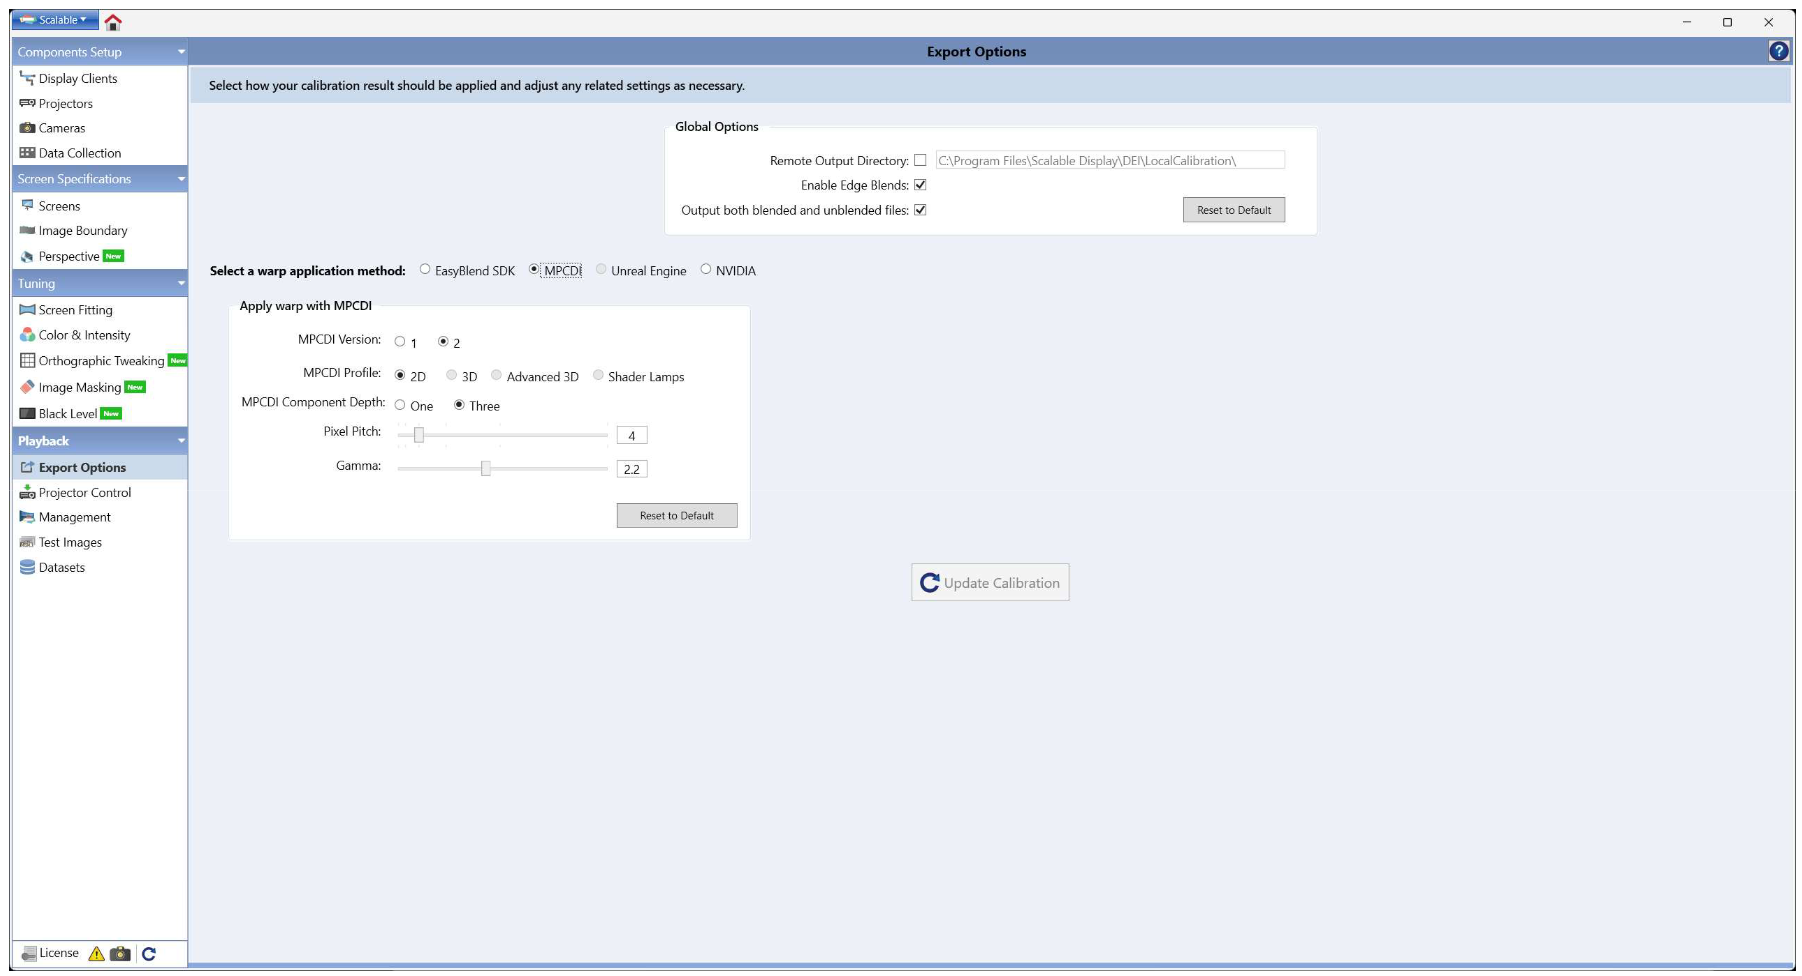
Info
The Advanced Option MPCDICoordinateFrameSelector should be explicitly set to 1 before exporting Shader Lamps MPCDI files from Atlas version 1.5 or Scalable Display Manager 10.0. This will be handled through the UI in a future release.
Screens
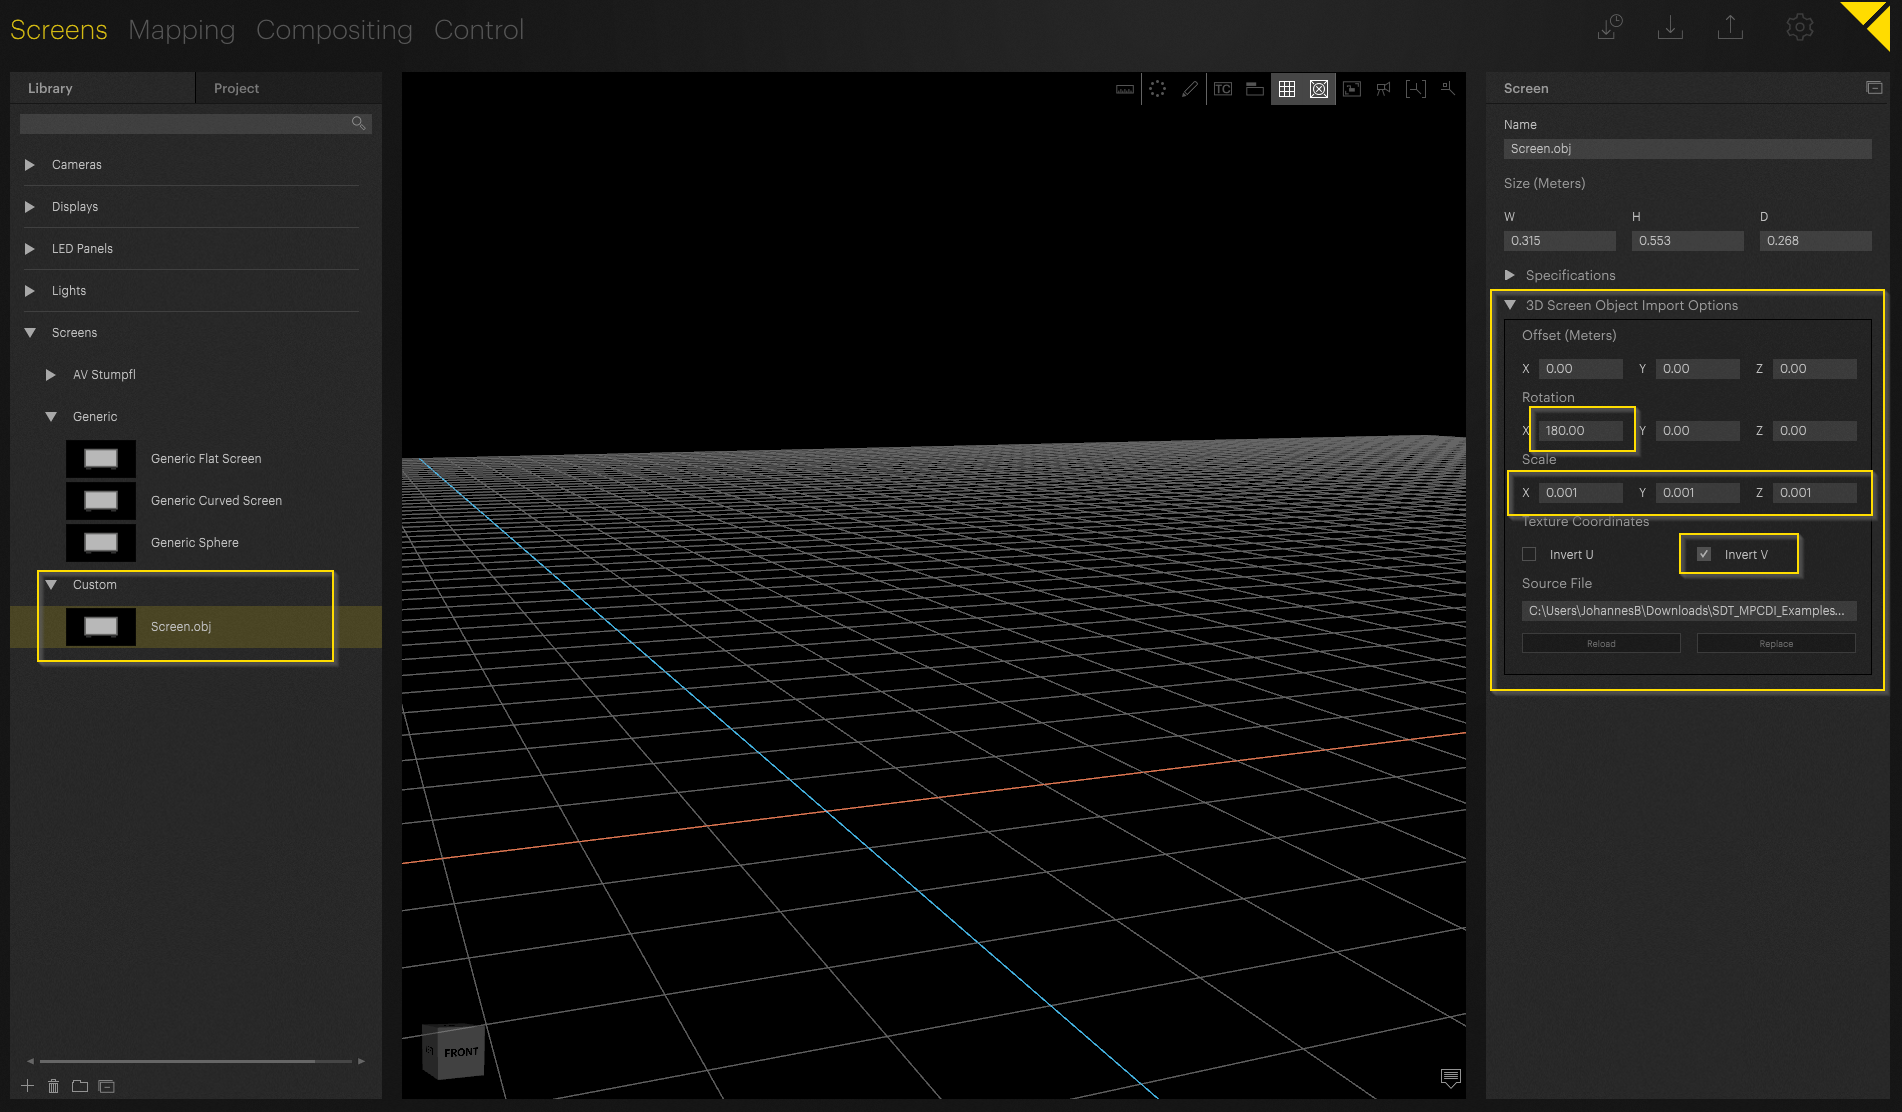
Import the 3D Object into PIXERA as a new Screen.
In the case of Scalable, Scalable-specific settings can already be applied to the import options:
- Set X Rotation to 180 degrees (Optional for some objects, this setting will invert the V Axis of the UV Map) Check on Invert V.
- f needed, set X/Y/Z Scale Factors to convert to the correct size units, this is usually the value 0.001 for all.
Position the 3D Object in the Workspace.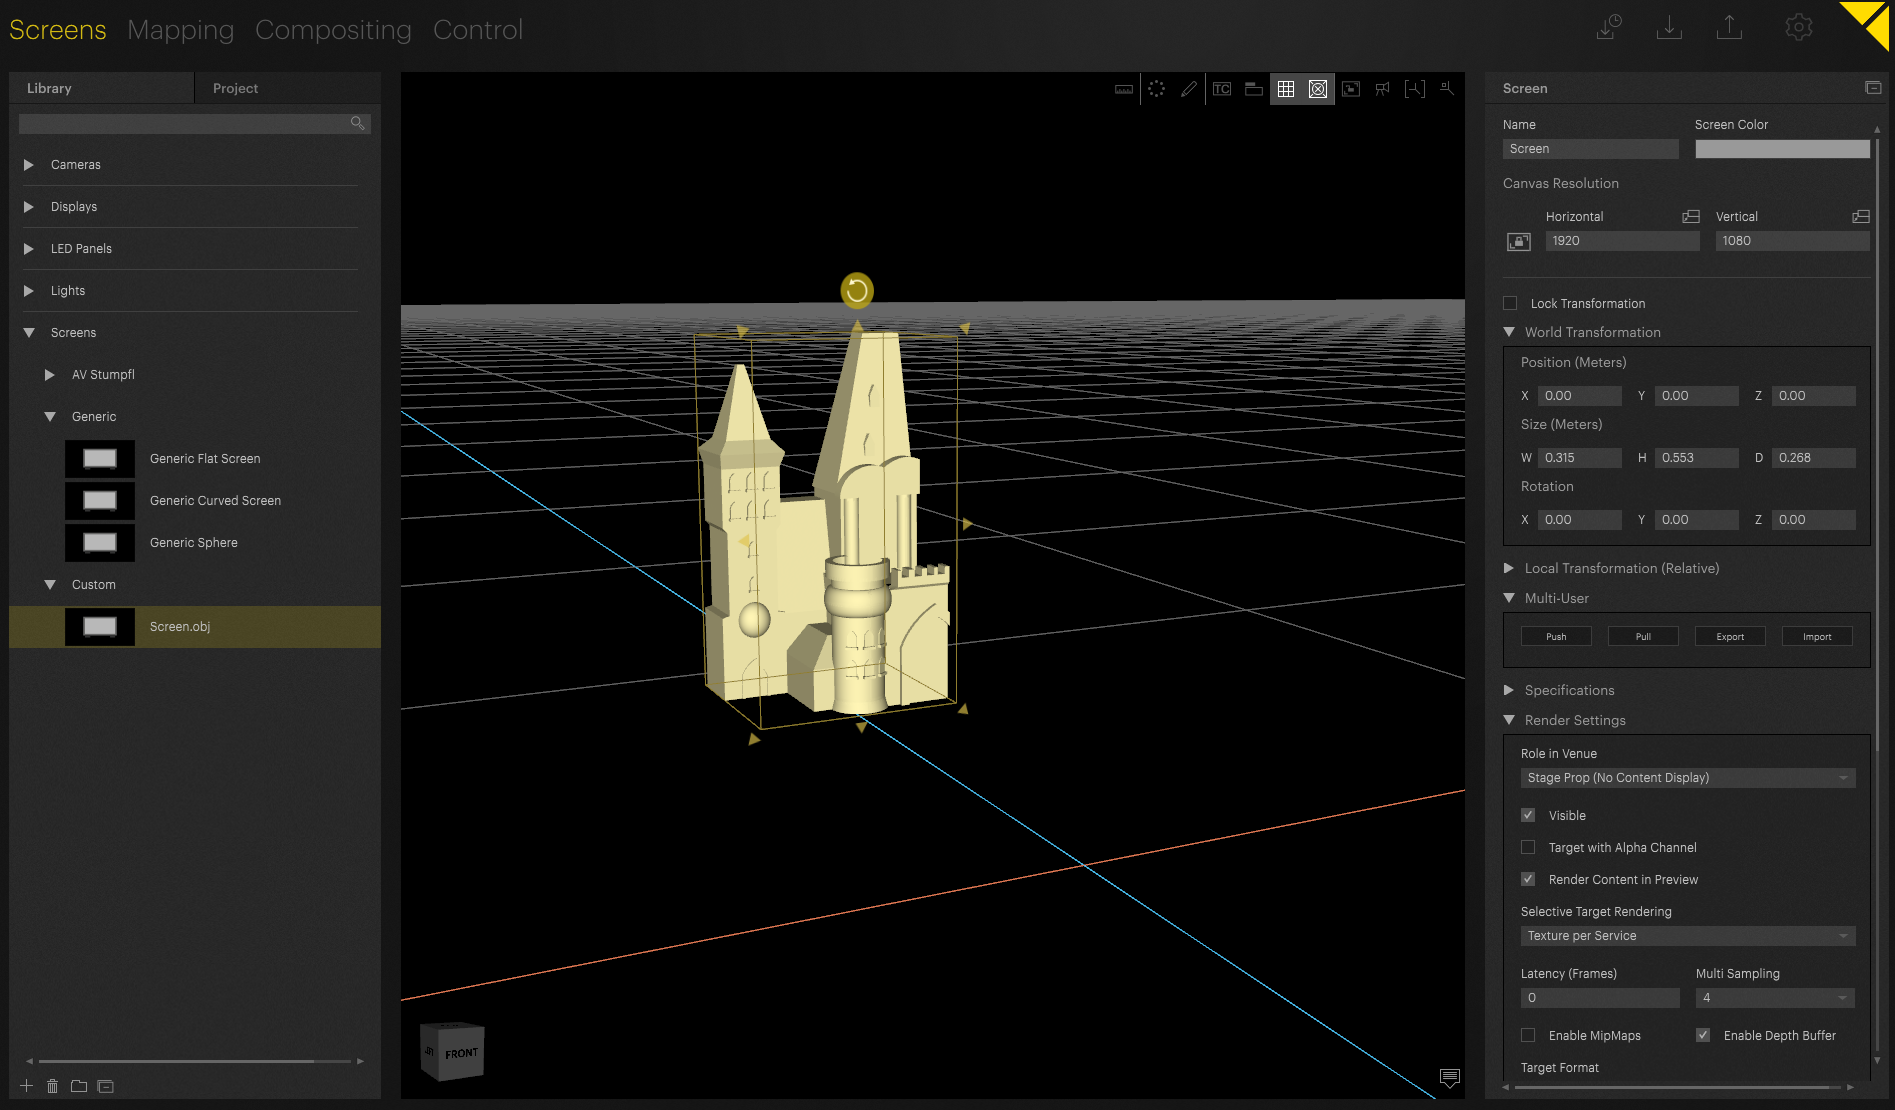
Define the Screen's Canvas Resolution, Screen Position, Role in Venue as Screen and Selective Target Rendering as Texture per Screen.
Mapping
Select the Projector used in the setup, or if not available, use a Generic Projector. In the case of a Generic Projector, its resolution should be specified. then Assign the Outputs.
Deactivate the checkbox Automatic Projector to Screen Mapping Creation to prevent the Projector positions in the 3D Workspace from being misaligned when loading the MPCDI Calibration (Make sure that Selection Mode is set to Projectors when selecting the Projectors). Repeat this step for all Projectors.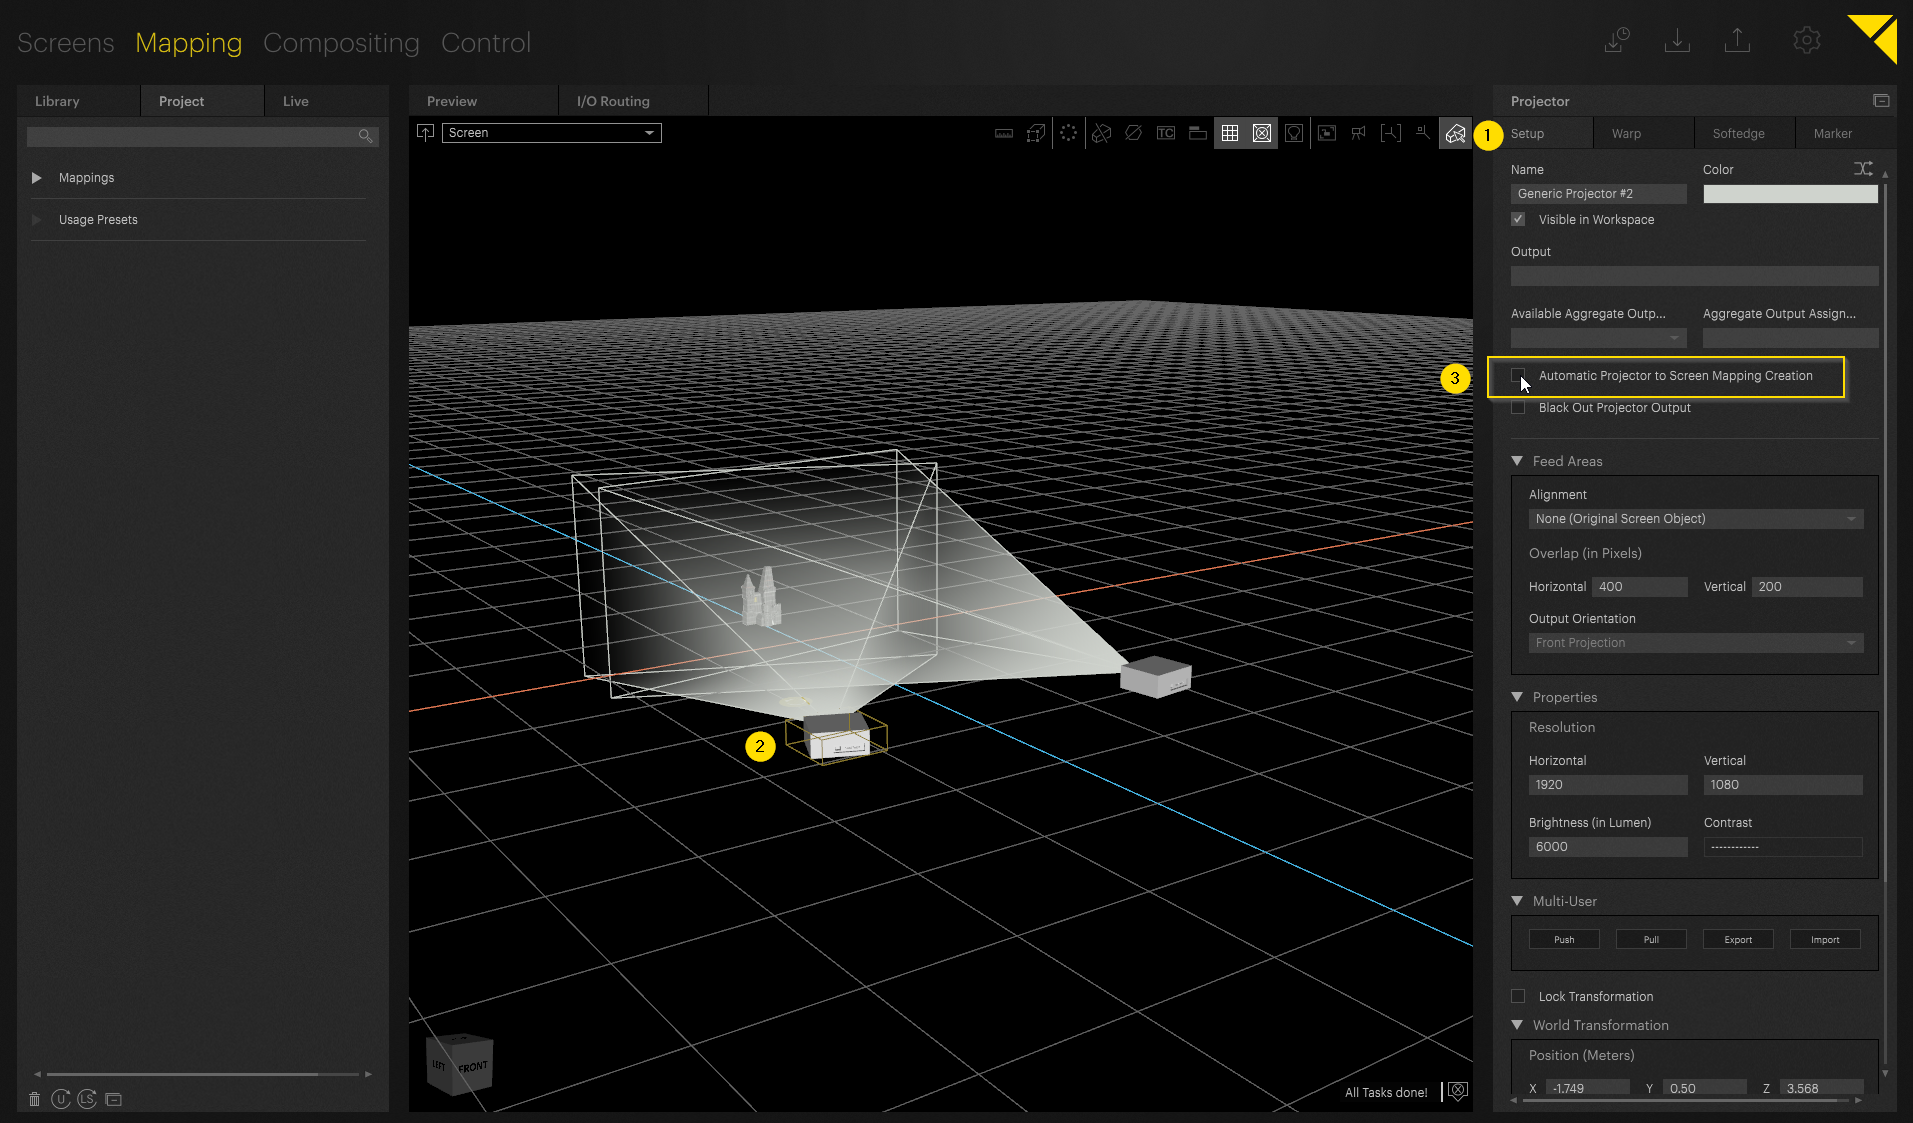
Warning
Not all Feed Modes work with all MPCDI formats. For example, if the format is set to SL, only None (Original Screen Object) works, this is not the case with others, as the warp is not available. Read More About Feed Areas.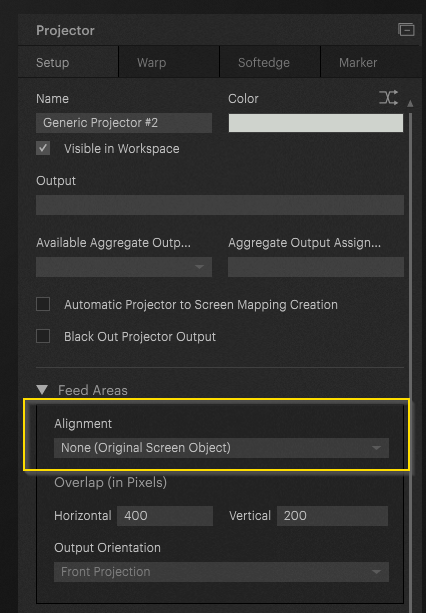
Make sure the Selection Mode is set to Screens and select the Screen.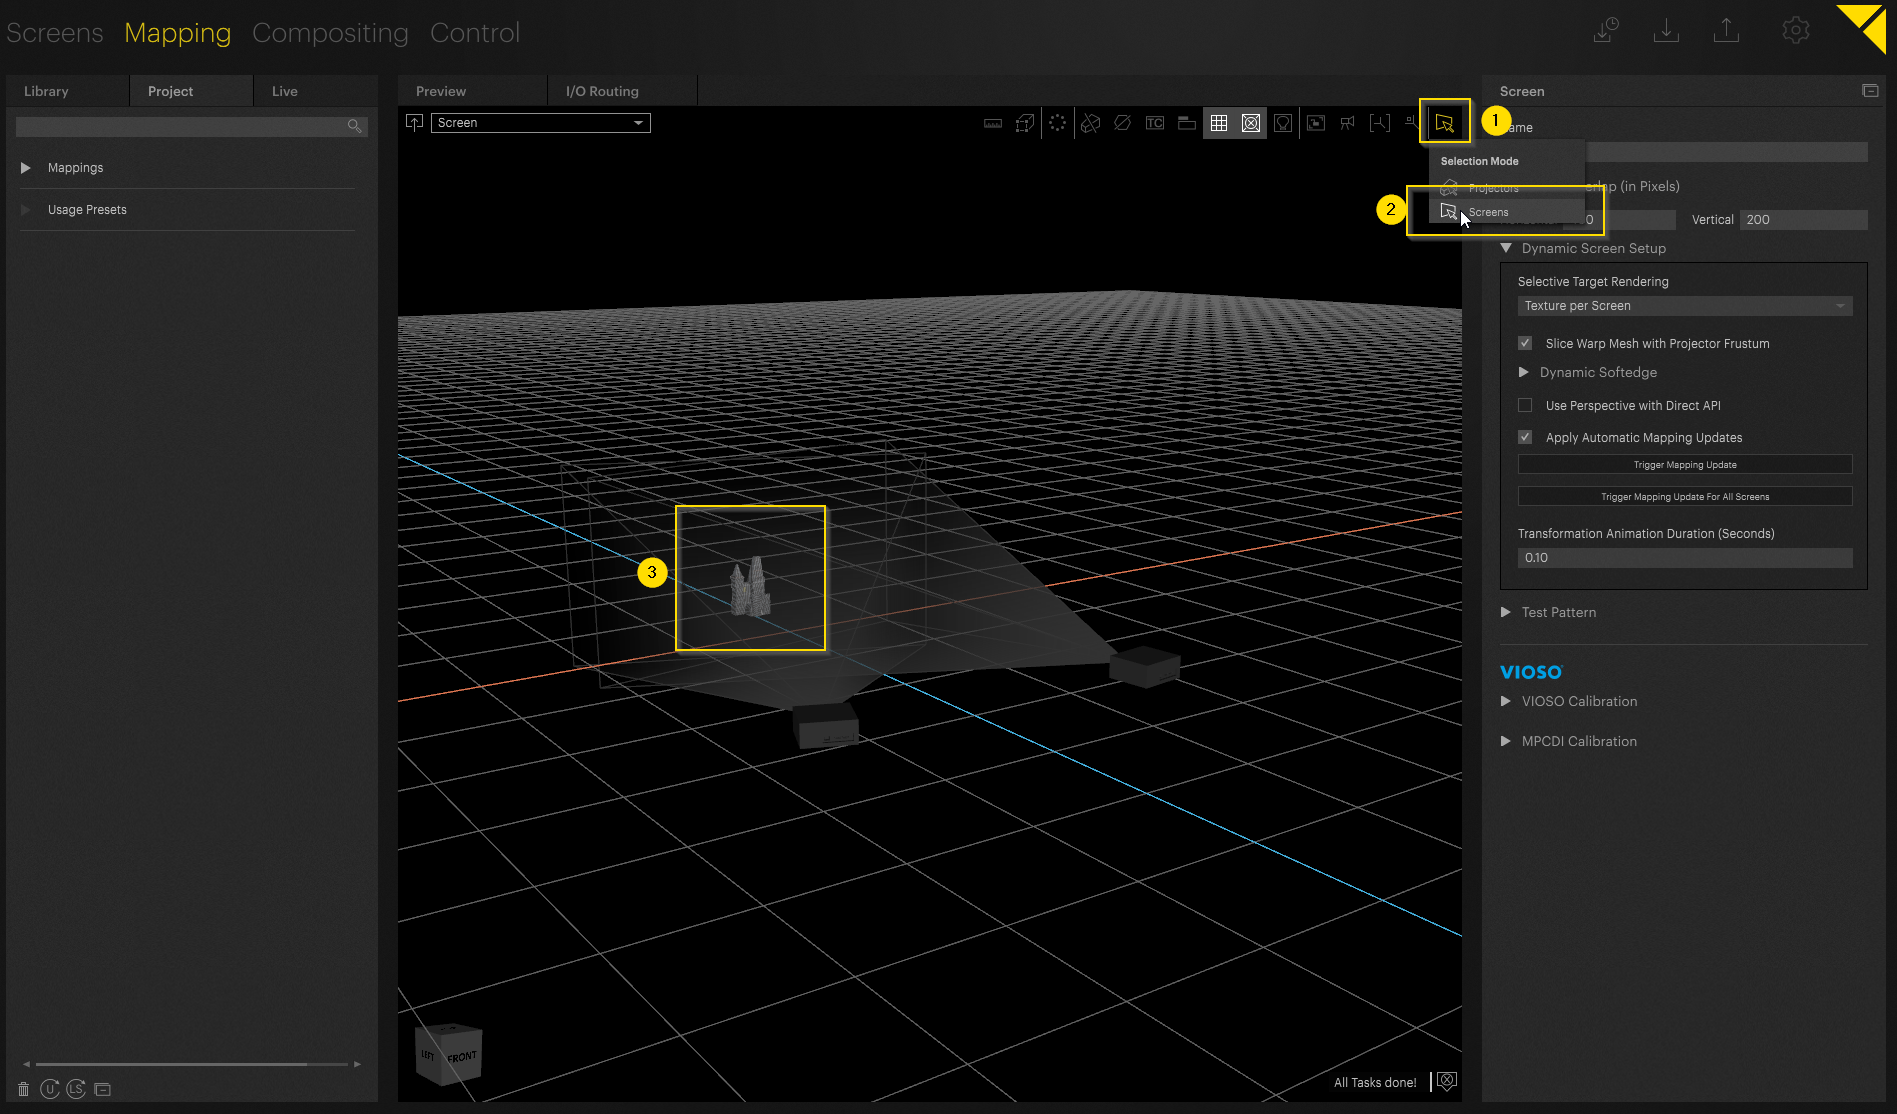
Load the Calibration
Follow the steps below to load the MPCDI Files and assign them to the correct Projectors using the Mapping GUI.
- Select Load Calibration
- Select the path of the MPCDI file
- Assign the region to the individual Projectors
- Set Unit Scale Factor (typically 0.001)
- Apply Changes
- Close the Window
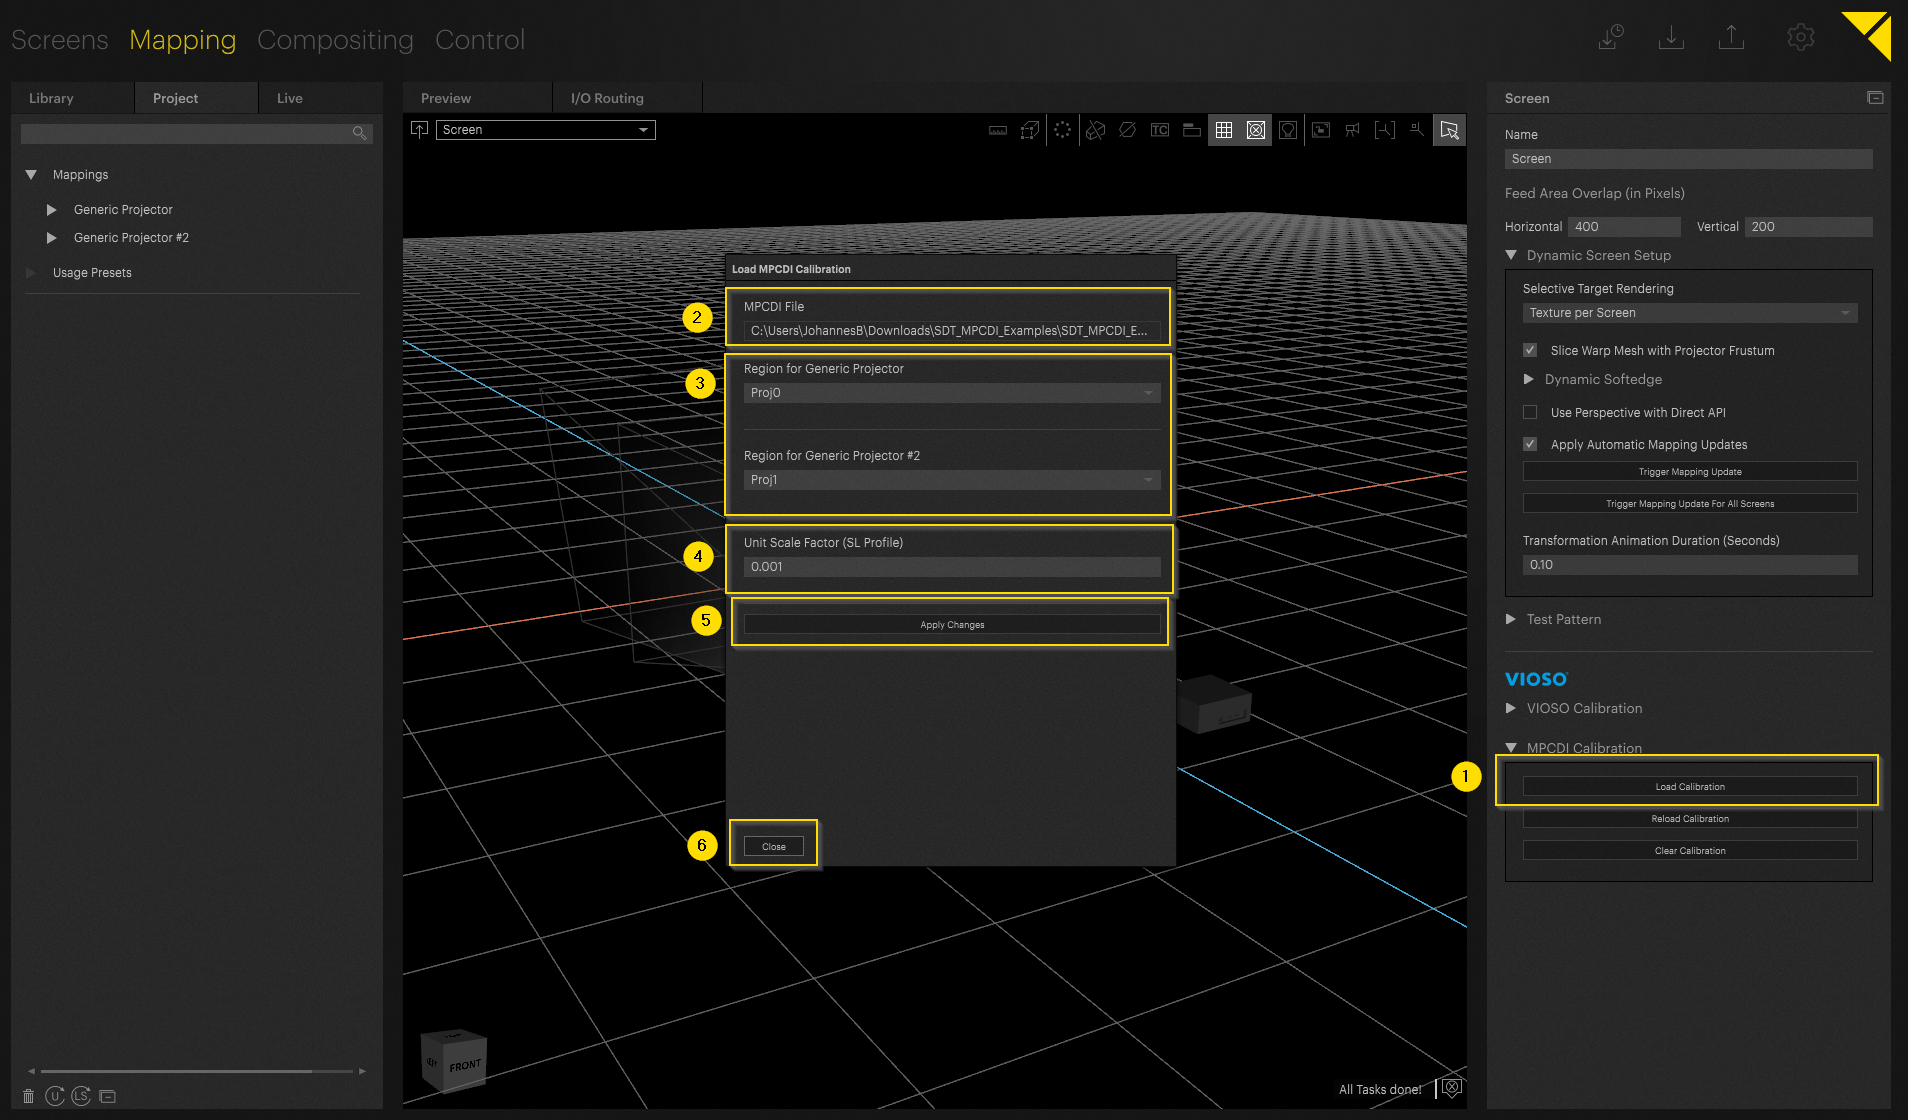
After this step, the positions of the Projectors in the 3D Workspace are adjusted to mirror the Calibration.
Recalibration Using Control
Follow the steps below to load the MPCDI Files and assign them to the correct Projectors using Control/API Calls.
- You must have a Calibration loaded using the GUI steps above. This is because PIXERA needs to know what Projector assignments to use automatically for the replacing files.
- Use the loadWarpFileWithDiff call to load the MPCDI file at the given path to the Screen the call was made under. An example of the two needed inputs include “D:\\mpcdi\\test.mpcdi” for the filePath and "mpcdi" for the diff. Example below
Pixera.Screens.Screen.getInst("Generic Flat Screen").loadWarpFileWithDiff("D:\\mpcdi\\test.mpcdi", "mpcdi")Note for versions before 25.2 R 12
If loading an MPCDI file, you may run into an issue where loading an MPCDI file with the same name as the last loaded one will have it not work. So if needed, have on hand a MPCDI file used to “reset” what is loaded to then load the correct new version of the MPCDI file. This avoids needing to rename the file each time.
Warning
Do not use the resetWarpFile call if wanting to keep the same Projector assignments. Only use when aiming to change the Projector assignments, note this will need to be done in the GUI as mentioned.
Recalibration Without Control
Once the system is correctly set up, any subsequent recalibration will produce a new MPCDI file with the same file path as before. This new file can then be loaded onto the Screen.
Warning
It is important to unload the old MPCDI file with Clear Calibration beforehand. Note that this button will delete the Projector assignments, so these must also be re-selected with the new loaded calibration.

The option removes the old MPCDI data from cache, ensuring that the new file is correctly loaded and not conflicting with the old data.
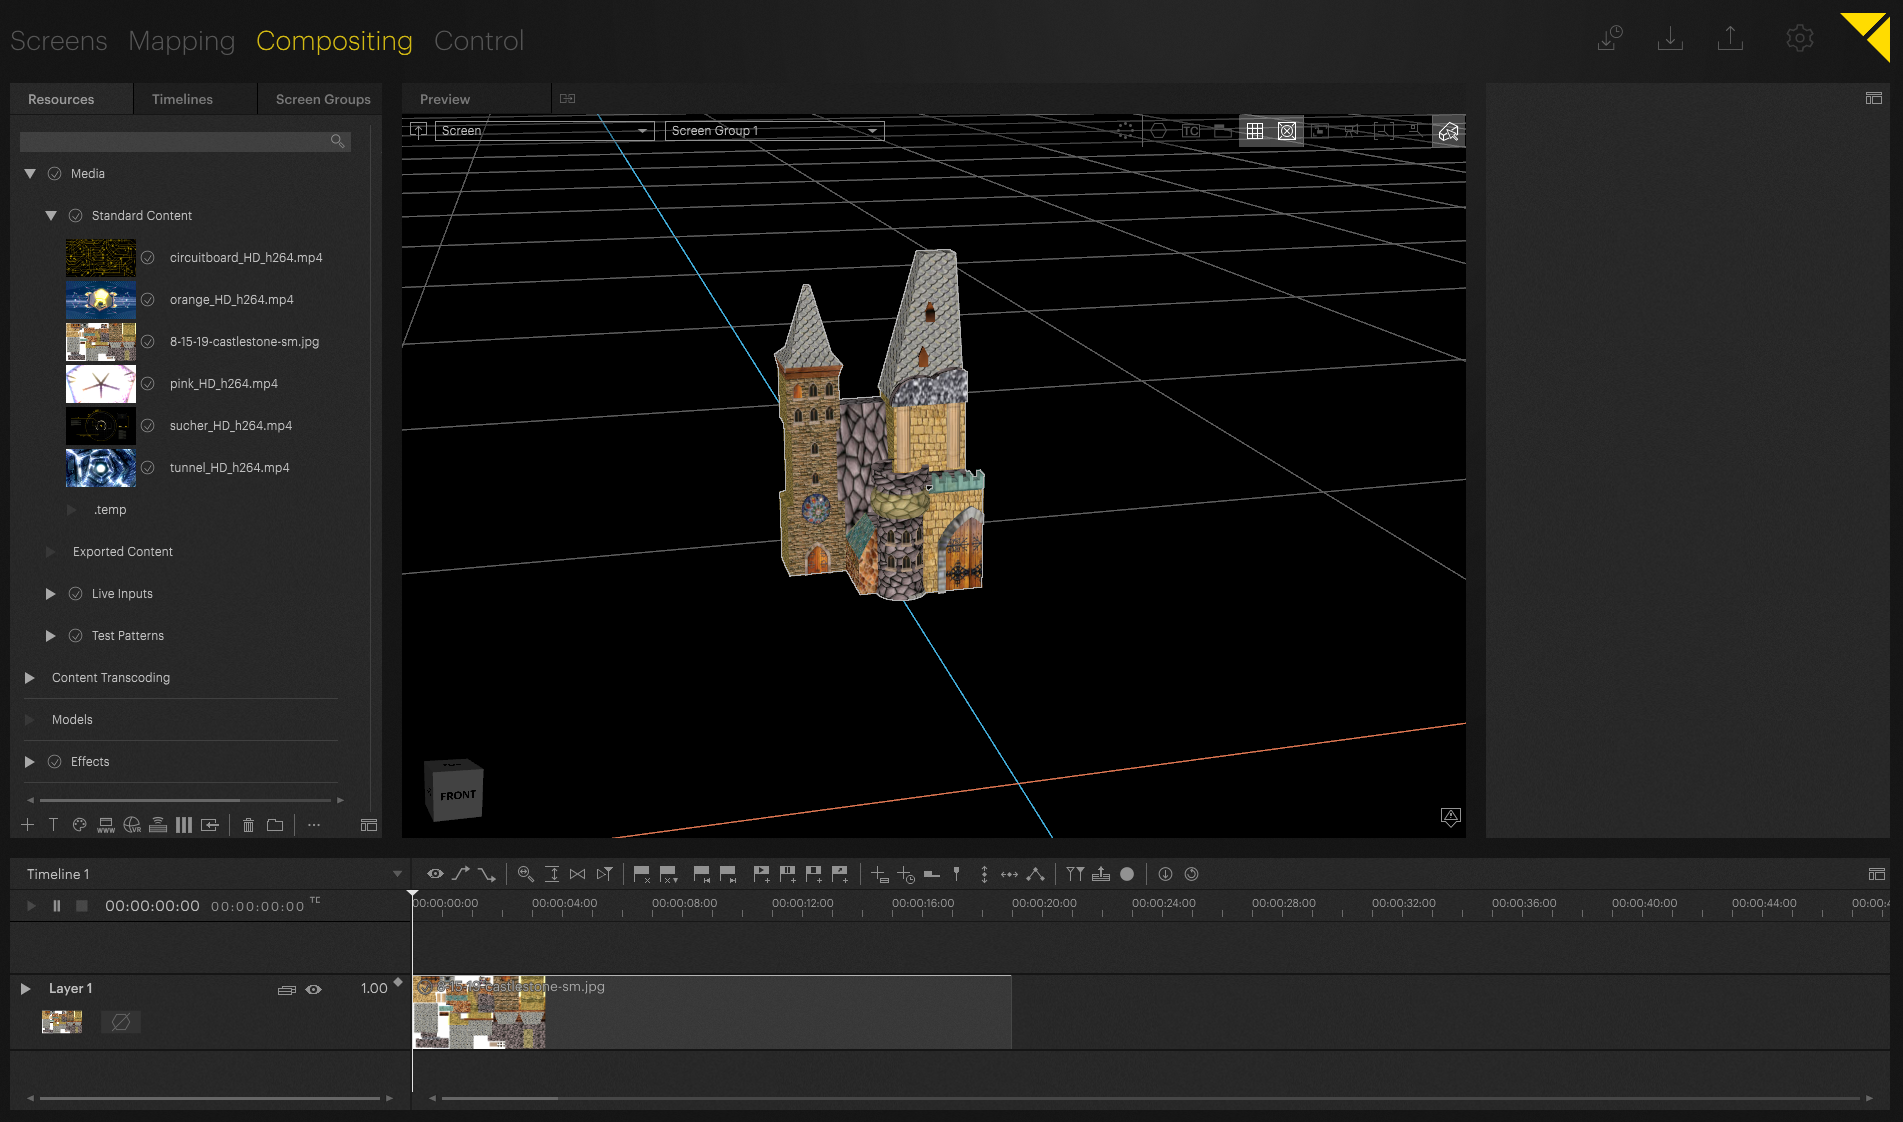
Compositing
In Compositing, content that is matched to the UV Map of the Screen can now be played correctly. To do this, assign it to the Screen and place it on the Timeline.
If there are different resolutions between the what was set on the Screen and what its UV Map is set to, it can happen that the Scale Unit Mode of the Layer has to be changed, refer to the Scale Unit Mode article for more information.
After a test pattern or content, which has been fitted to the UV Map, has been placed on the Screen, you should see it correctly map in the Preview. If these textures are not applied correctly, the texture coordinates may need to be inverted or the canvas resolution may need to be adjusted.
In most cases, this corresponds to the resolution of the test pattern with which was created from the UV Map.
PIXERA 26.1 R 1 | 30. March 2026 | C.L.