 Contact Us


If several Projectors are used to project onto a larger surface, they must be aligned very precisely to each other in order to create the impression of a large, homogeneous image.
For this purpose, it is necessary to equalize the corners of the Projector and align them to each other, this is called Warping.
In addition, the overlapping area of two projectors must be adjusted so that the impression is created as if it were only one projector, this is called Softedging.
Warping and Softedge creation can be done manually on the Projectors or in software such as PIXERA. In both cases it is a job that can take several hours, depending on the number of projectors. The more complex the structure to be projected onto (for example, a Projection into a dome or a complex 3D Object), the more difficult the manual setup becomes.
A Camera Based Calibration of the Projectors can help save time and get more accurate results. Here, each Projector image is recorded by one or more cameras, and the distortion and position is determined on the basis of test images.
Afterwards these data points are evaluated by the software and the Warping + Softedge are calculated for each Projector. If everything runs smoothly, a perfectly set-up image is obtained after the Camera Based Calibration.
In PIXERA, there are two possibilities to load/create this kind of calibration. Those being via VIOSO or MPCDI files
Warning
When creating calibration files it is mandatory to set EDID's first - otherwise it can happen that the Windows Display Enumeration changes and causes mixed up Warpings. Please see the article EDID-Management for further information.
VIOSO
VIOSO is a software solution that makes it possible to measure different surfaces with one camera, and thus automate the Warping and Softedge process. Please note that a separate license is required for using VIOSO.
VIOSO can be started directly from Pixera, information like Screen, Projector, Output Resolution and the resulting Warp is automatically exchanged between PIXERA and VIOSO.
The video farther below shows how to measure two Projectors on one Screen with VIOSO using one camera.
For further information on how to use VIOSO, please also have a look on their webpage, VIOSO Home, and their knowledgebase, VIOSO Knowledgebase.
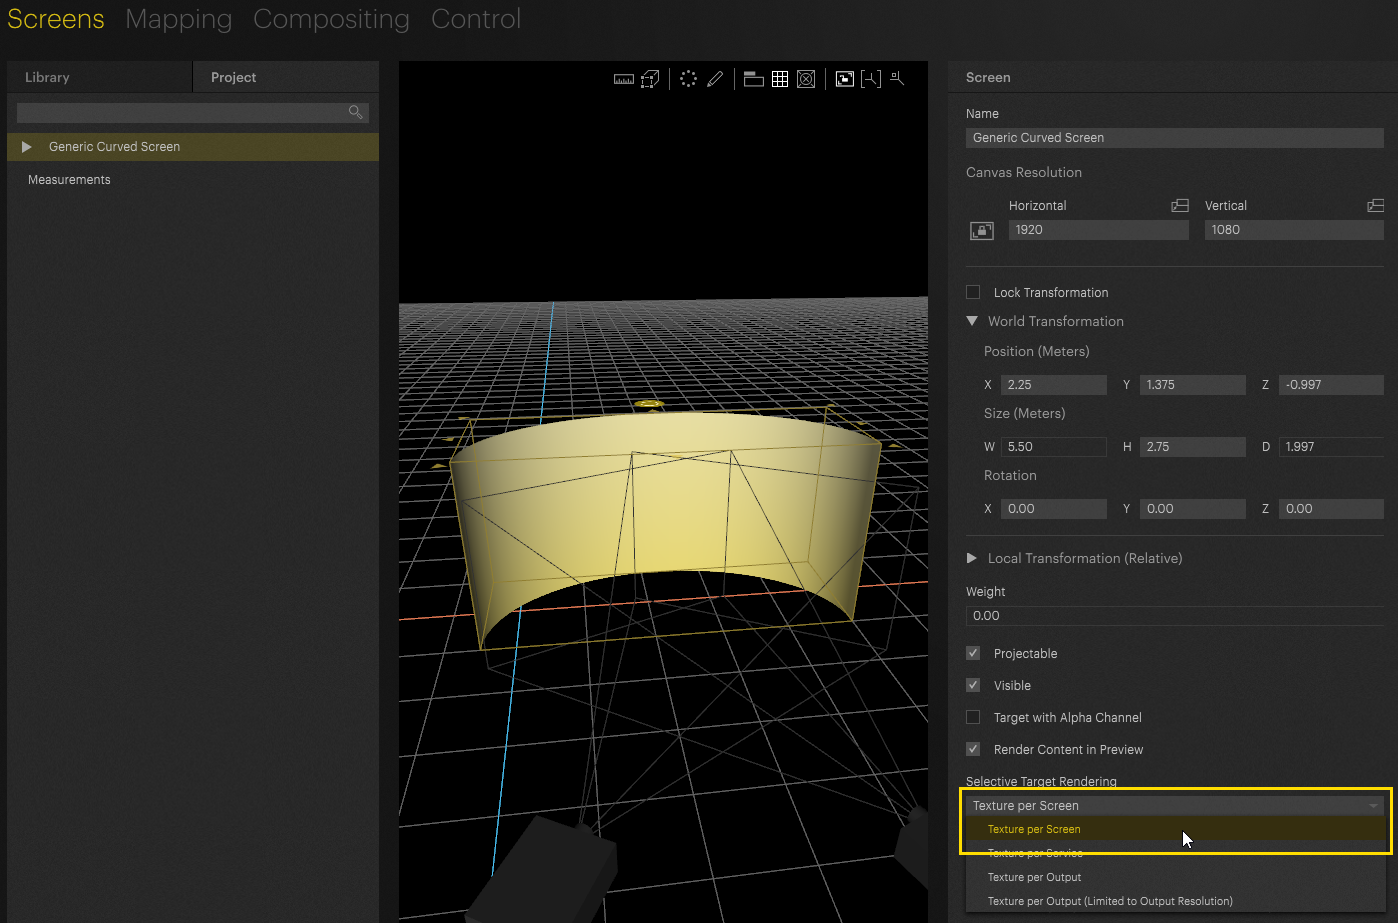
Before starting the VIOSO Calibration, it is important to change the Screen Settings to Texture per Screen.
In the video below, the workflow of how to use VIOSO within PIXERA is shown.
MPCDI
MPCDI is a standard to describe Warping and blending for projectors. It’s aimed to streamline various calibration solutions with Media Servers, image generating applications, and Projectors.
In PIXERA it is possible to load these file formats, but not to create them. More general information on the standard below:
- VESA press release 23.06.2013: MPCDI first release
- VESA press release 01.06.2015: MPCDI version 2
MPCDI for Separated Outputs (No Mosaic)
Change the Selective Target Rendering in the Inspector of the selected Screen to Texture per Screen.
Go to the Mapping Tab, and change the Selection Mode to Screens, then select the Screen.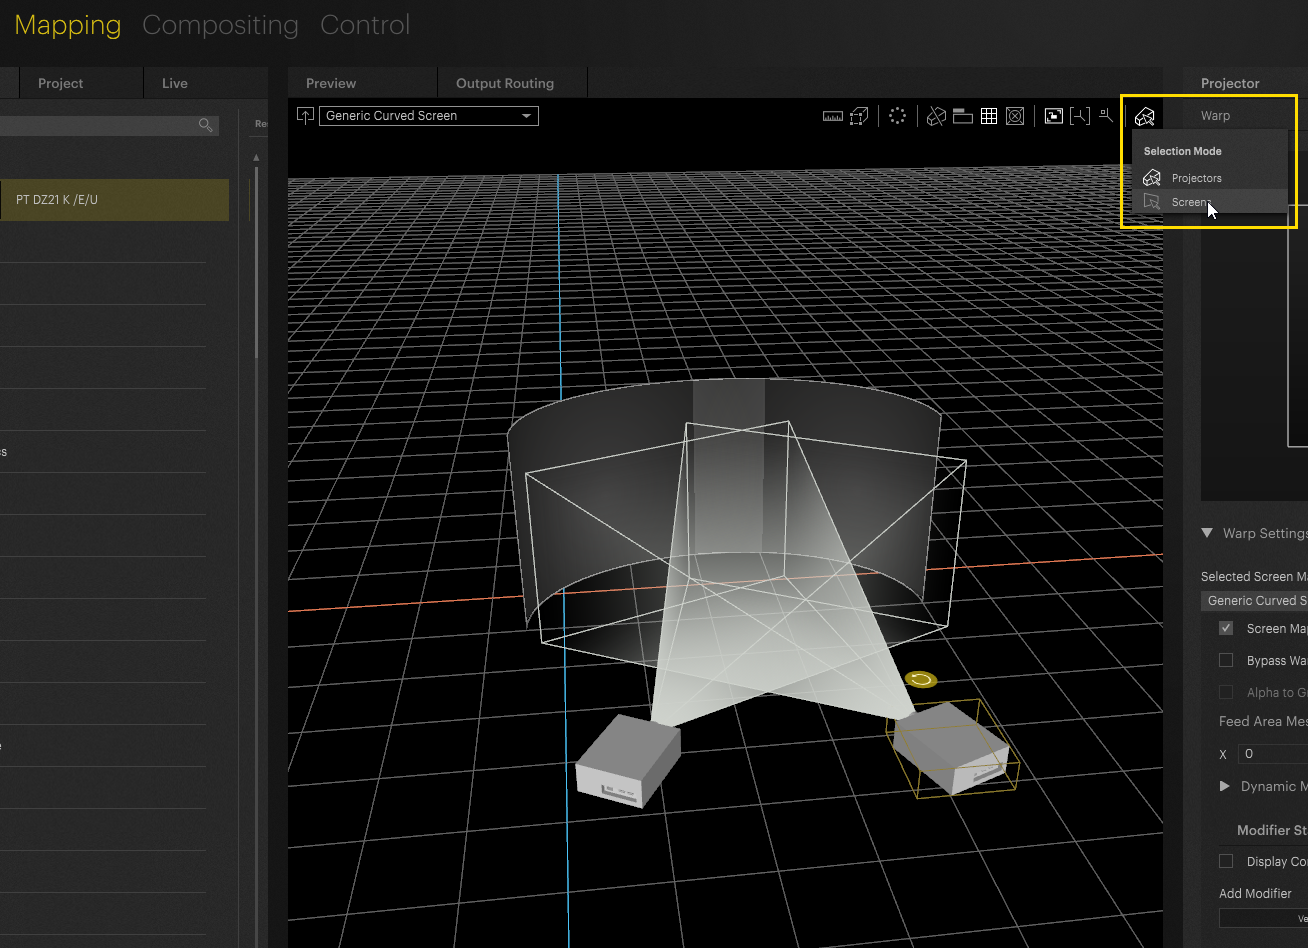
In the Inspector on the right side the options for MPCDI files can be found. By clicking on Load Calibration a specific MPCDI file on the hard drive can be selected.
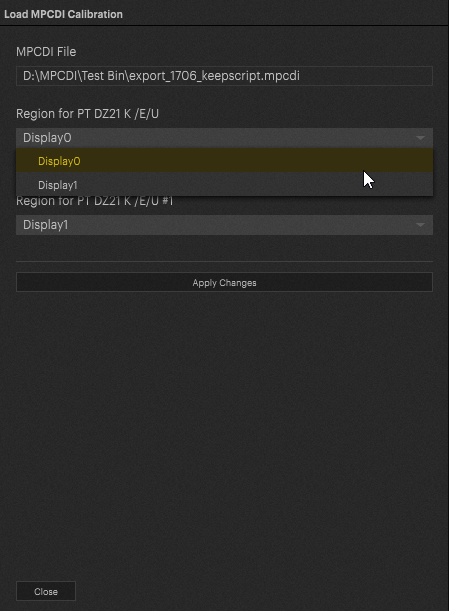
Now, select what Regions of the calibration should be tied to what Projector. Then click on Apply Changes.
By changing the Selection Mode to Projectors, and selecting the Projector, the Warp window in the inspector on the right should indicate that a calibration file is currently loaded.
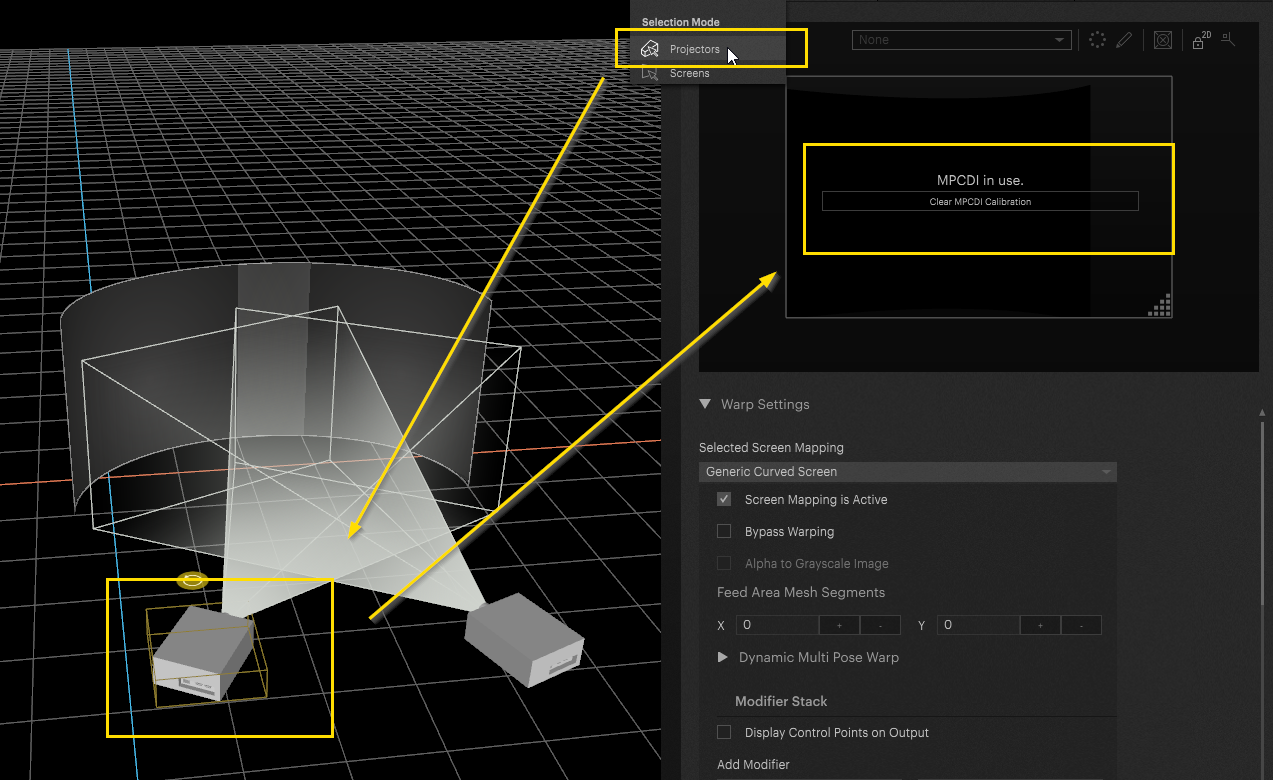
The Output should then be displaying the loaded Warp and Softedge as expected.
MPCDI for Outputs in Mosaic Mode
Sometimes it makes sense to combine all Outputs of a Graphics Card into a Mosaic. This can be necessary to improve the performance.
For further information about how to set up a Mosaic, please read the article Mosaic Setup.
For further information about how to use and set up an Aggregate Output in PIXERA, please read the article Aggregate Output.
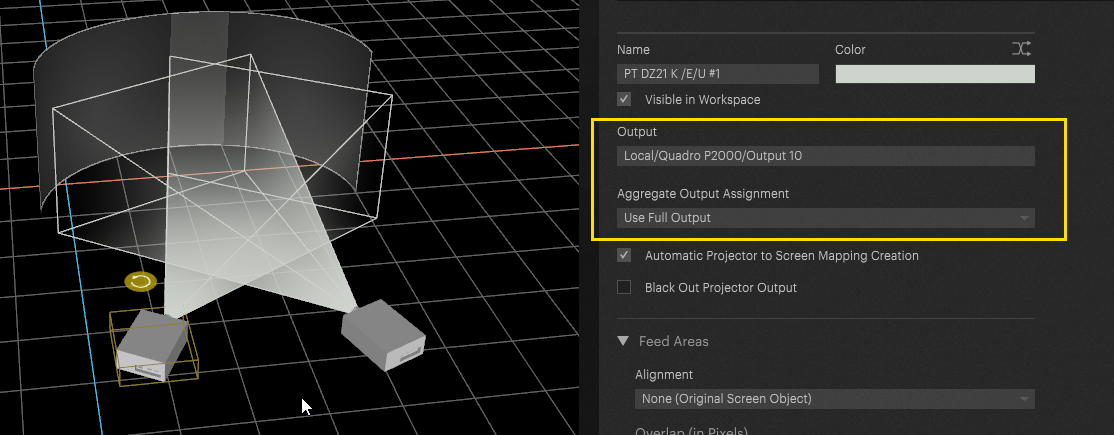
Once these have been setup, assign this single Output to all Projectors involved. If the MPCDI was created in such a way that it only refers to the final Mosaic without splitting the Outputs in it, the selection Use Full Output must now be selected here for each Projector in the Aggregate Output Assignment setting.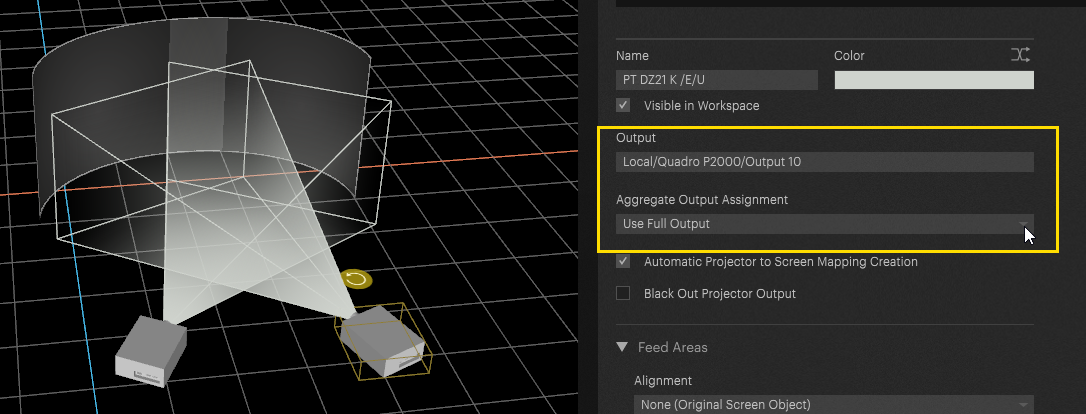
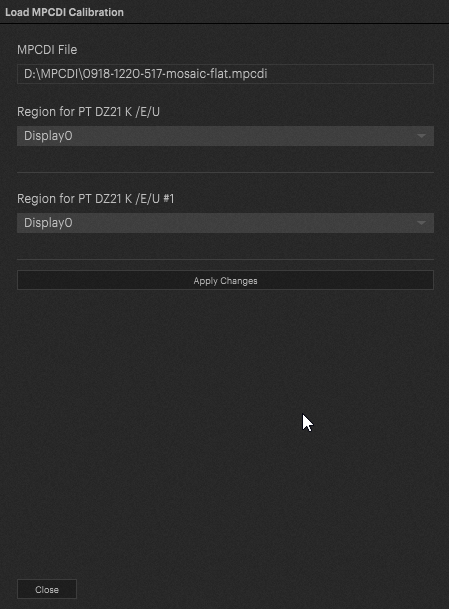
The MPCDI file can now be loaded again by selecting the Screen and clicking the button Load Calibration.

In this case - the same Region needs to be assigned to each Projector.
PIXERA 25.1 R 4 | 10.. September 2025 | C.L.