 Contact Us


To be able to synchronize different devices such as sound, light or video with each other, there is the so-called time code.
The timecode is a centrally generated clock that sets the timing for all devices in the setup. This ensures that everything runs synchronously.
In Pixera either timecode via the SMPTE usb interface or LTC timecode via audio in can be used. Timecode can be received for the timeline, hot regions can be defined and LTC timecode can be played out.
Link to Pixera SMPTE Interface
The following explains how to activate and use timecode in Pixera.
SMPTE interface setup
- Connect the Pixera SMPTE Interface to the mediaserver and start Pixera
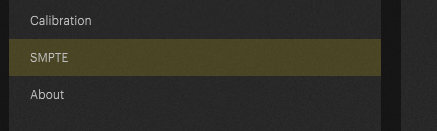
- in the settings of Pixera you can find the submenu "SMPTE"
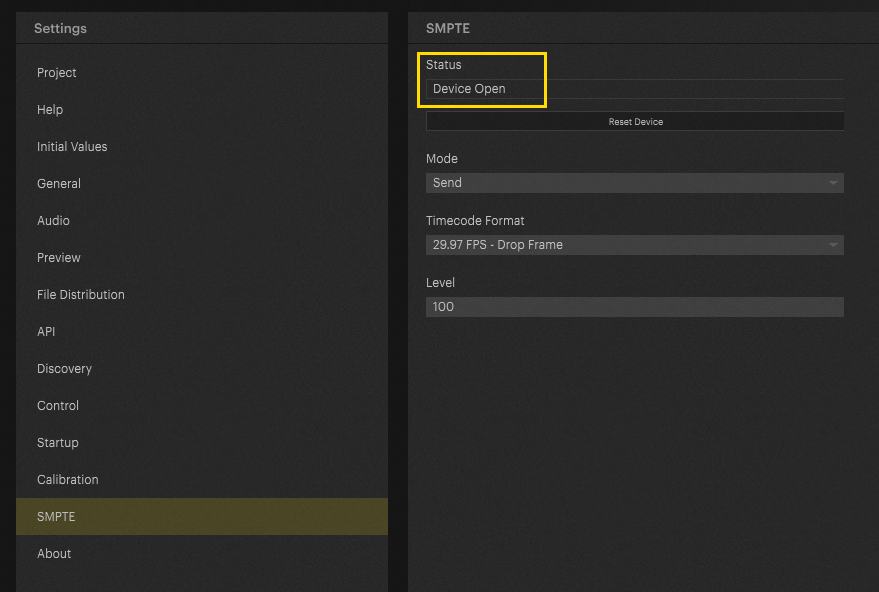
- If the device is connected correctly, the message "Device Open" appears in the "status" info box.
- if the device doesn't show up in here - press "Reset Device" to re-initialize the interface.
- if the device doesn't show up in here - press "Reset Device" to re-initialize the interface.
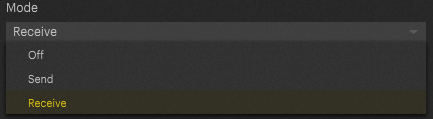
- Now the SMPTE interface mode can be set to "send" or "recieive" Timecode
- Since there are different timecode formats, you can select the one you want in the next step.
Here you can also choose between formats with and without dropped frame.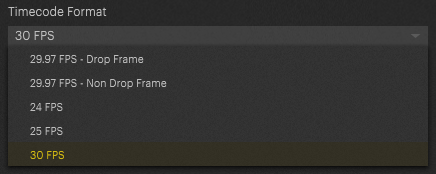
- Now the Interface is ready to use - in the next step you must decide which Timeline "follows or sends " timecode
Timecode IN via Audio Introduction
Starting with Pixera 2.0 it is possible to receive and manage timelines through LTC via Audio in. The audio-source can be digital (for example Dante or like in this case a virtual soundcard) or analog.
By utilizing SMPTE Hot Regions, certain parts of timelines can be controlled via SMPTE timecode. Traditionally only the timeline was controllable via timecode.
By defining "hot regions" in the timeline settings, certain time regions can be set hot to be controlled by the received timecode. As soon as the locator leaves the hot region, timecode control will stop, and the timeline returns to regular playback.
The settings can be found in the timeline options. Hot Regions can be set up for multiple timelines.
For this article timecode was played back locally from the VLC player.
Timecode was generated using this homepage:
To be able to feed the audio stream into Pixera, a digital audio interface was used. However, audio can be distributed by analogue sources as well.
Following the installation, simply playback the Timecode via VLC and change the audio device to the virtual soundcard:
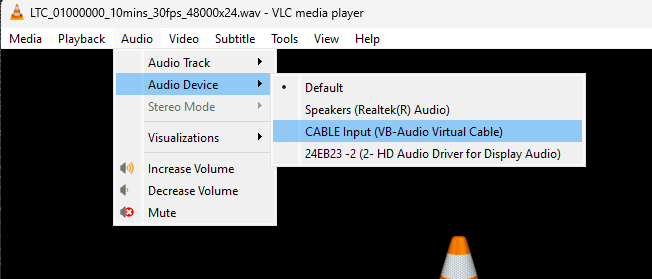
In this case the timecode has a length of 10 minutes, 1 hour offset 30 fps, 48kHz sample rate and 24 BIT.
By simply playing it back in the VLC player and selecting the cable device we will be able to receive the signal in Pixera.
LTC Audio IN Setup (Pixera 2.0)
The Audio input settings inside Pixera can be accessed in the “Settings - Audio Tab”.
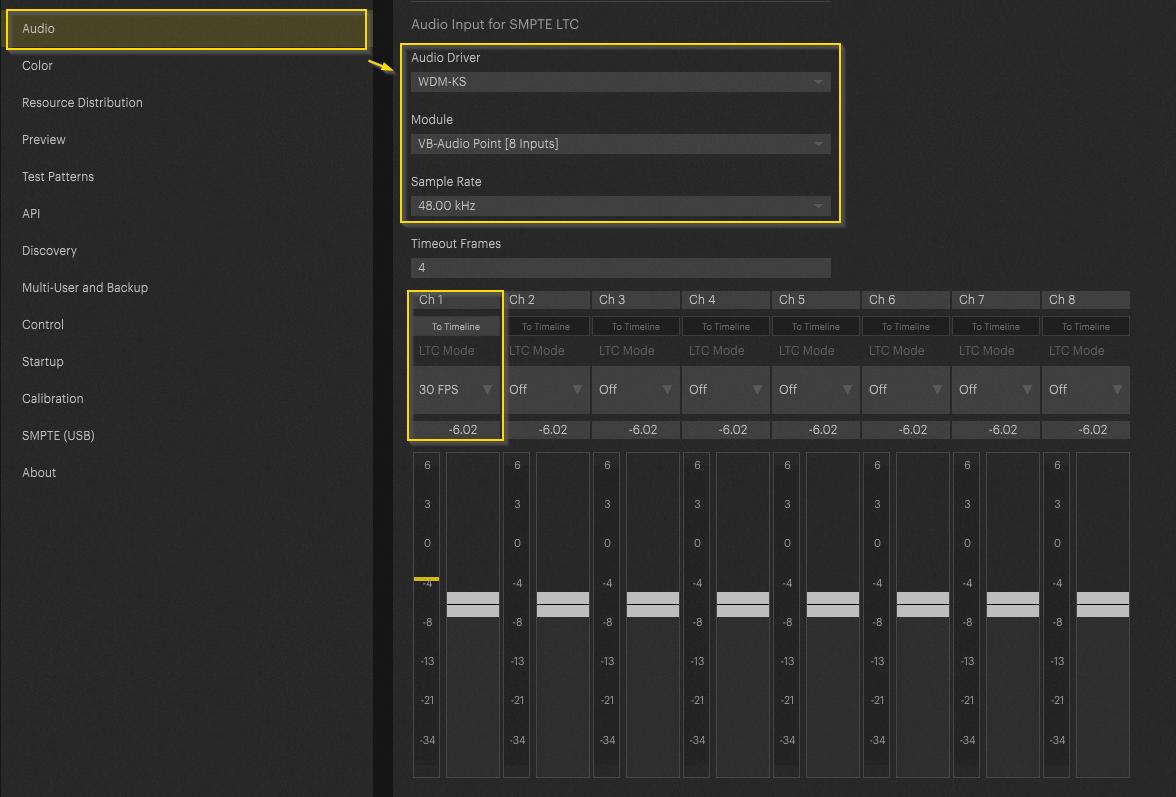
- Setup the correct Audio Input Driver (WDM in this case).
- Module corresponds to the input device.
- Finally set up the correct Sample Rate, FPS and route the input to the desired Timeline by activating “To Timeline”.
Timeline - Timecode settings
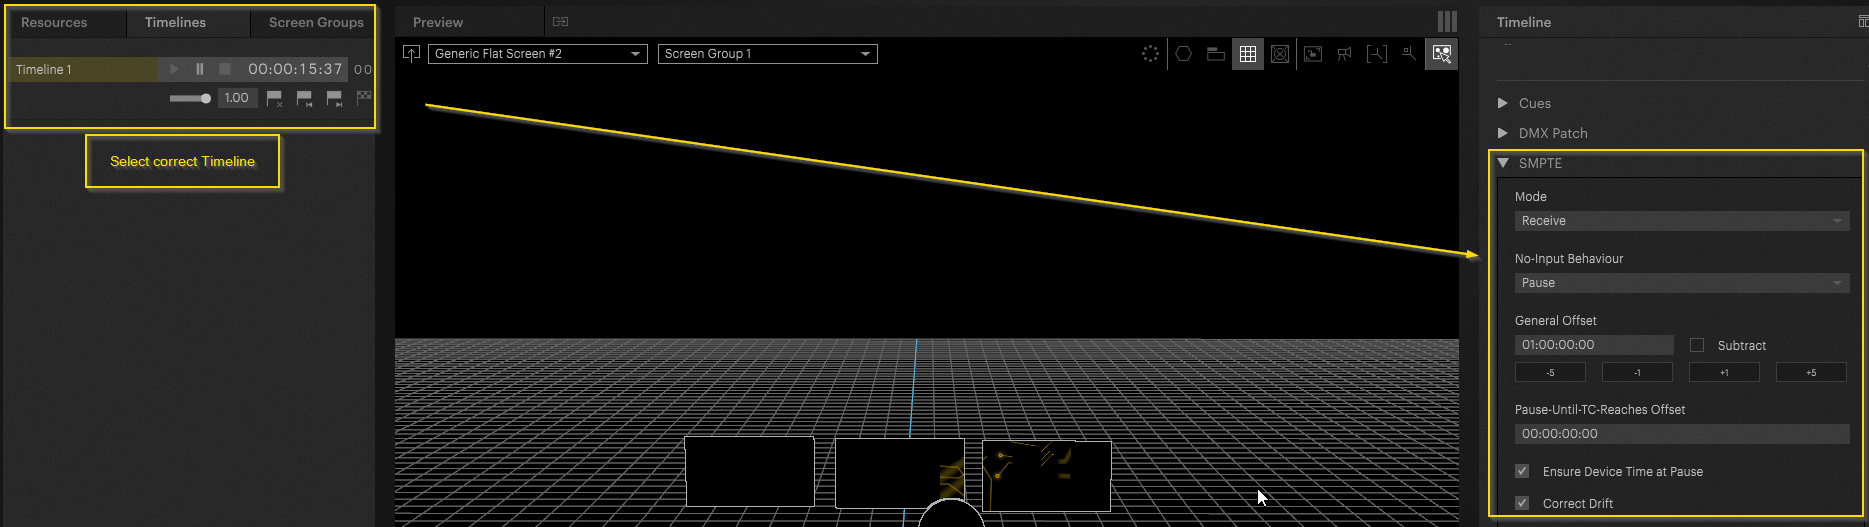
In the next step, a timeline must be determined, which either receives or transmits timecode.
1. Switch to "Timelines" in the Compositing tab and select the desired timeline.
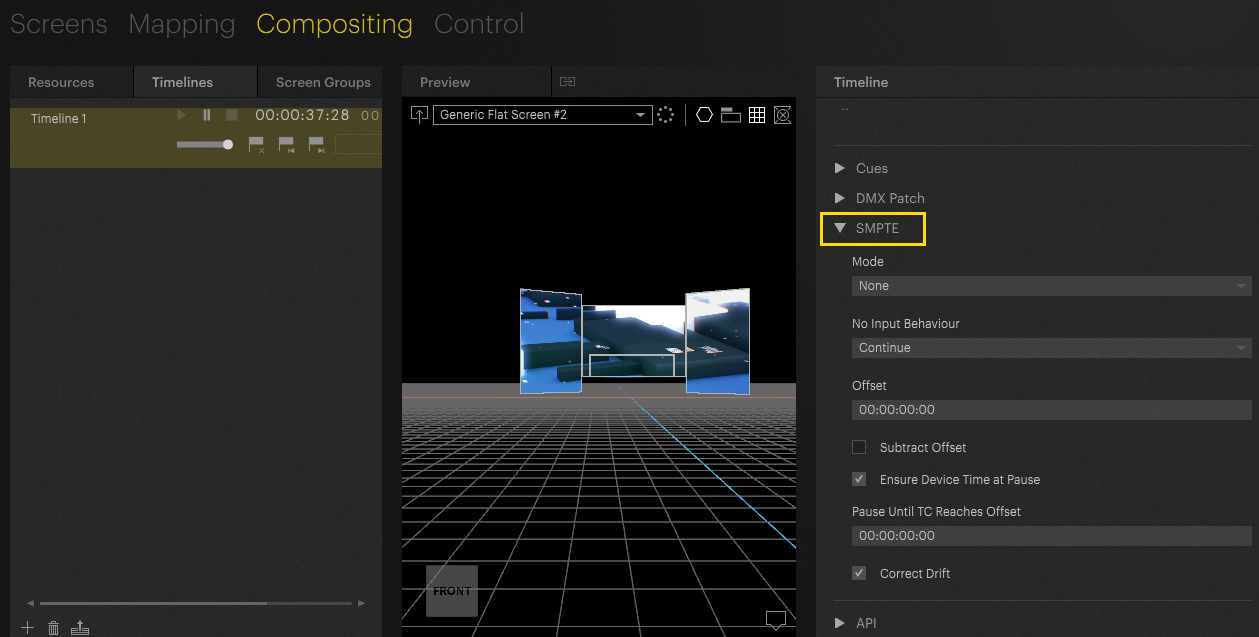
2. All settings concerning the timeline can now be selected here.
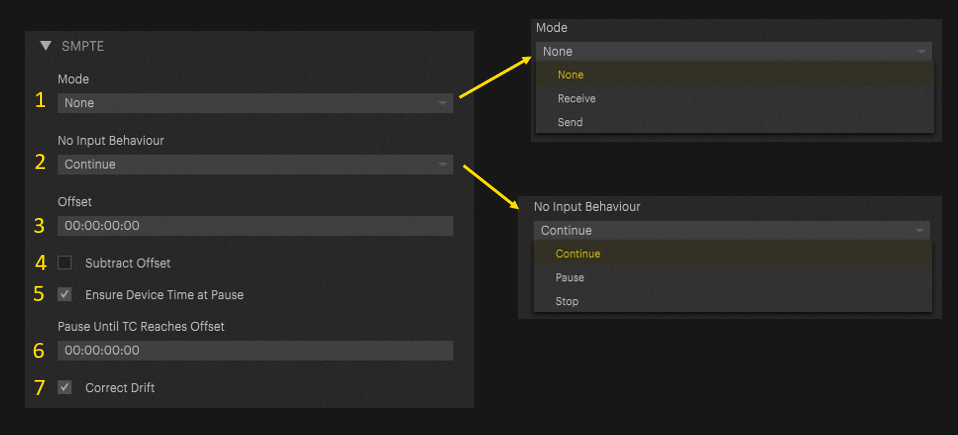
[1] Mode: sets the timeline to "listen to timecode - recieve" or "generate timecode - send"
[2] No Input Behaviour: this setting defines what happens if incoming timecode stops - should the timeline continue, pause or stop
[3] [4] Offest: the defined time set in here will be either added or substracted from the incoming timecode
[5] Ensure Device Time at Pause: This setting compares the values of the timeline time and the timecode and sets the timeline time to that of the incoming timecode if they do not match (in the case that timecode pauses) - this ensures that the timeline is set to the exact timecode when paused.
Attention - by this setting it can happen that the timeline skips a few frames either forward or backward when the incoming timecode pauses.
[6] Pause Until TC Reaches Offset: This special setting makes it possible to prevent content stutter when receiving timecode starts to run.
For example, if the timeline is just before a container, but outside the "pre-buffer-time", it can happen that the time until the content is too short to buffer the first frames - thus the content stutters at the beginning.
If a time is entered here, then the Nowpointer jumps forward by this time, pauses at this point, waits until the timecode has reached this time and then runs with timecode.
[7] Correct Drift: This option corrects a drifting timecode.
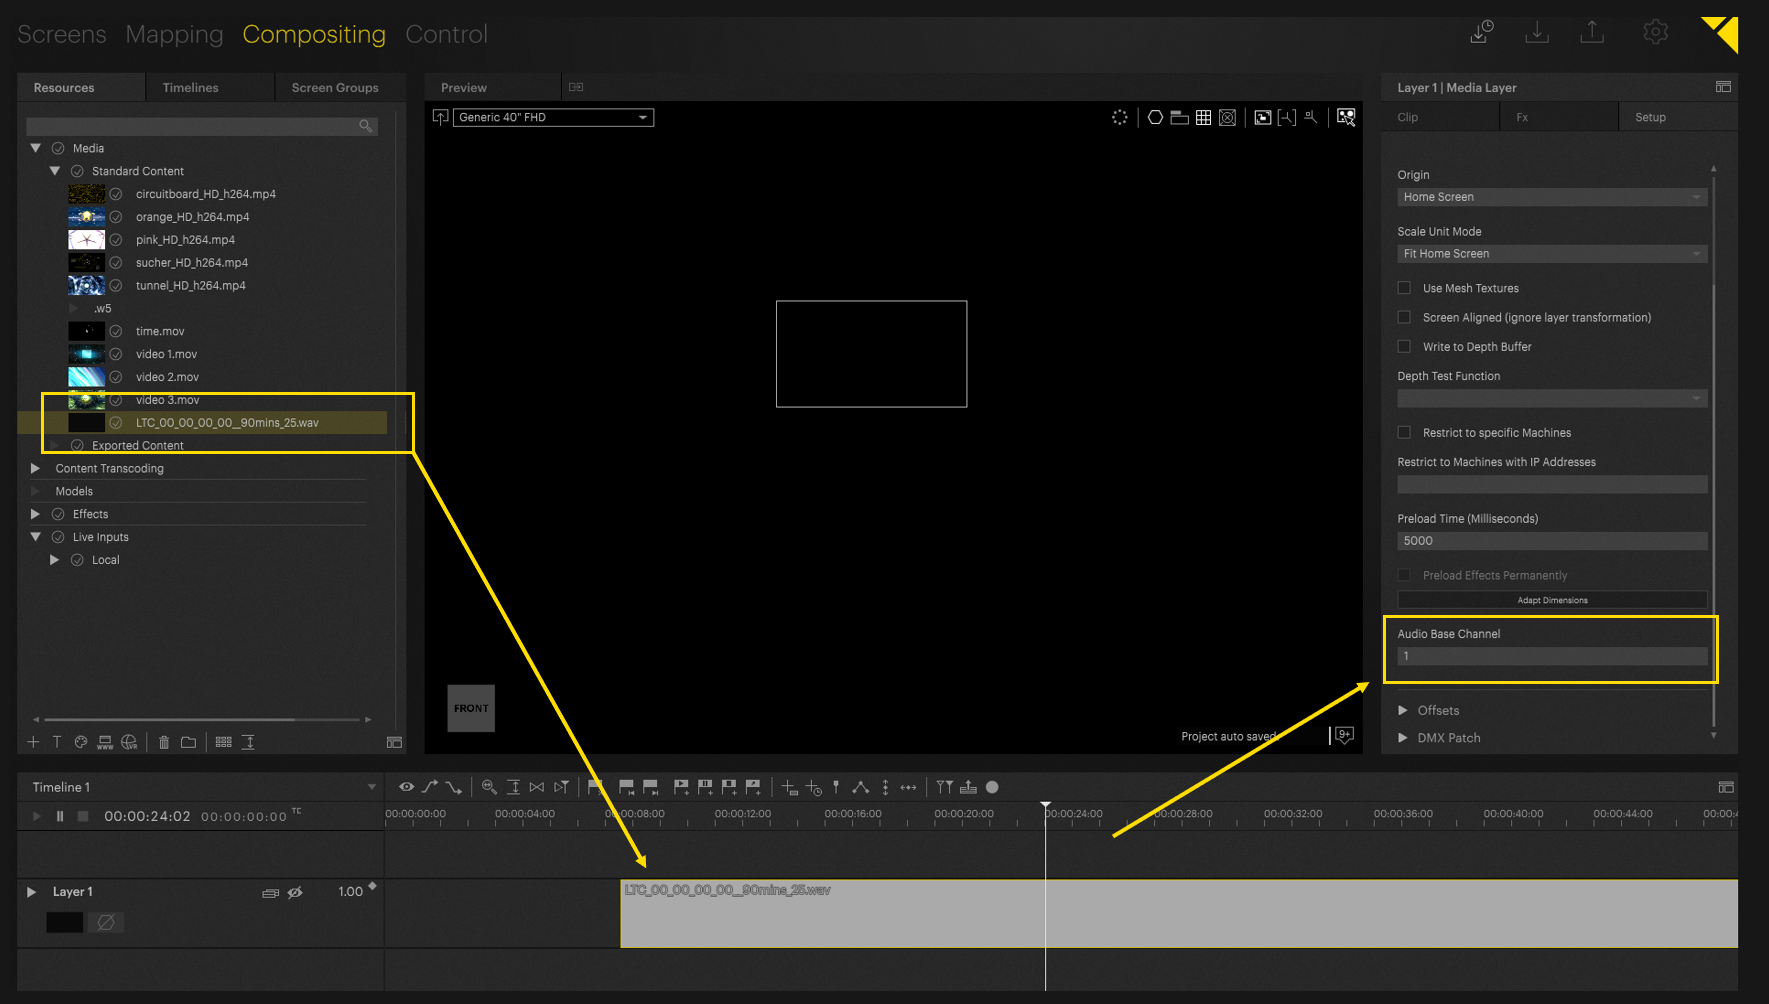
LTC Timecode playout via audio file
Beside SMPTE Timecode Interface Pixera also supports to play out and Audio LTC Timecode file
LTC Timecode is an effortless way to play Timecode - the only thing which must be done is to generate an LTC Timecode file and play it out as audio - file on the timeline.
An audio LTC Timecode-file can easily be generated on i.e. the following webpage: LTC Timecode generator
This file can then easily be used on the timeline. Just assign this layer to an "Audio Base Channel" and an "Audio interface" to be able to play that timecode out.
SMPTE hot regions setup (Pixera 2.0)
Timeline settings must be changed. Select the correct timeline and configure the SMPTE settings as needed.
Hot regions can be defined in the SMPTE settings. By pressing + additional hot regions can be added to the selected timeline.
The hot region will be highlighted on the timeline with a green indication line:

For general information about the timecode settings please refer to: SMPTE Timecode
Pixera 2.0 | 4. October 2023