 Contact Us


IPMI
IPMI stands for “Intelligent Platform Management Interface” and can be used to manage your server. It is usually used to switch servers on/off remotely, to query the health status or query the CPU temperature or fan speed.
IP Address
PIXERA servers have a preconfigured IPMI IP address. This address is usually incremented by 10 on the second octet of the address you find on the serial number sticker at the backside of your PIXERA server. So for example if the address on the sicker is 10.31.42.43 the IPMI IP address is 10.41.42.43
On some servers the IP address is shown as BMC-IP on the boot screen while booting.
If it is not possible to find out the IPMI IP address of the server in question, follow the instructions below for installing ipmiutil and running the command locally. You should then be able to find out the IP address by executing the command locally on the desired server.
⚠️ PIXERA Mini is not capable of IPMI
Username
The predefined username is ADMIN
Password
The predefined password follows the following scheme: Px<LAN1-IPADDRESS>
<LAN1-IPADRDRESS> is the preconfigured IP address of LAN port LAN1 where the dots separator is stripped. Each octet needs to have three characters. For example: IP address 10.11.1.200 needs to be written as 010011001200 An example of what the password for the server with the LAN1 port IP address 10.31.42.43 and an IPMI IP address of 10.41.42.43 looks like is as follows Px010031042043
⚠️ The IP address of the IPMI port is not used in the password scheme, but the preconfigured address of the first LAN port LAN1. This address is usually incremented by 10 on the second octet. So for example if your IPMI address is 10.41.42.43 your LAN Port LAN1 is preconfigured to the address 10.31.42.43
⚠️ Changing the preconfigured IP address of your server in Windows does not automatically change the IPMI password or the IPMI IP address.
⚠️ AVStumpfl does not provide support for security issues caused by connecting these devices to public networks.
Tools & Installation
Tool
⚠️ The ipmiutil tool is preinstalled on Pixera Hardware in the path: "C:\Program Files\AV Stumpfl\Pixera Hub\tools\ipmiutil"
To be able to use IPMI on Windows 10, you need the ipmiutil tool. The latest version can be found here: https://ipmiutil.sourceforge.net/ Unfortunately, the version 3.1.9 released at the time of the article is defective and does not run correctly. It is therefore recommended to use version 3.1.8, which can be downloaded here: https://ipmiutil.sourceforge.net/FILES/ipmiutil-3.1.8-win64.zip
Installation
Unzip the downloaded file and copy the content to a desired location. For example to C:\Program Files\ipmiutil\
To be able to use this program in Windows Terminal, PowerShell or Command Promt the installation path must be entered in the PATH environment variable of Windows.
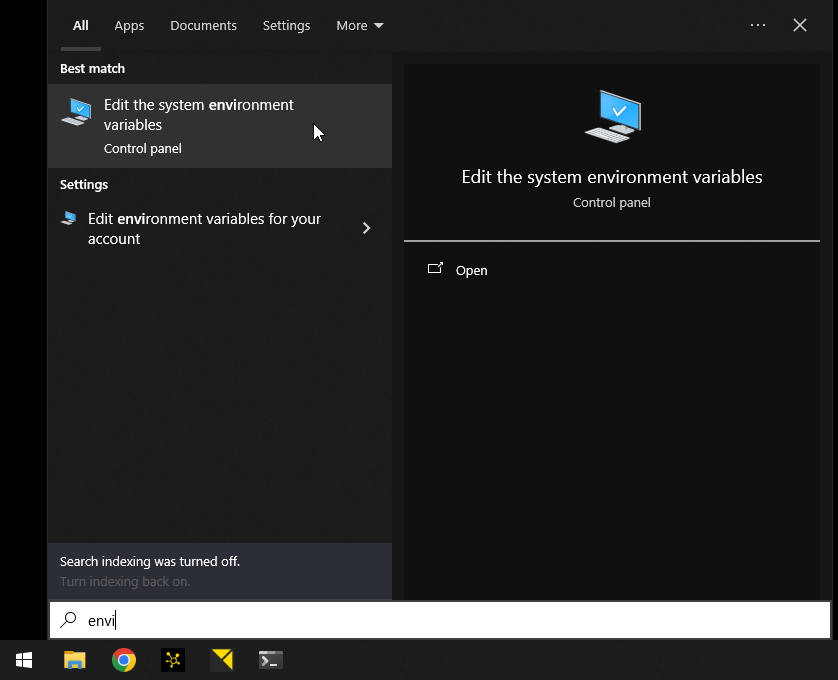
This can be done by opening Windows Start Menu and typing “Envi”. Open “Edit the system environment variables” as shown below:
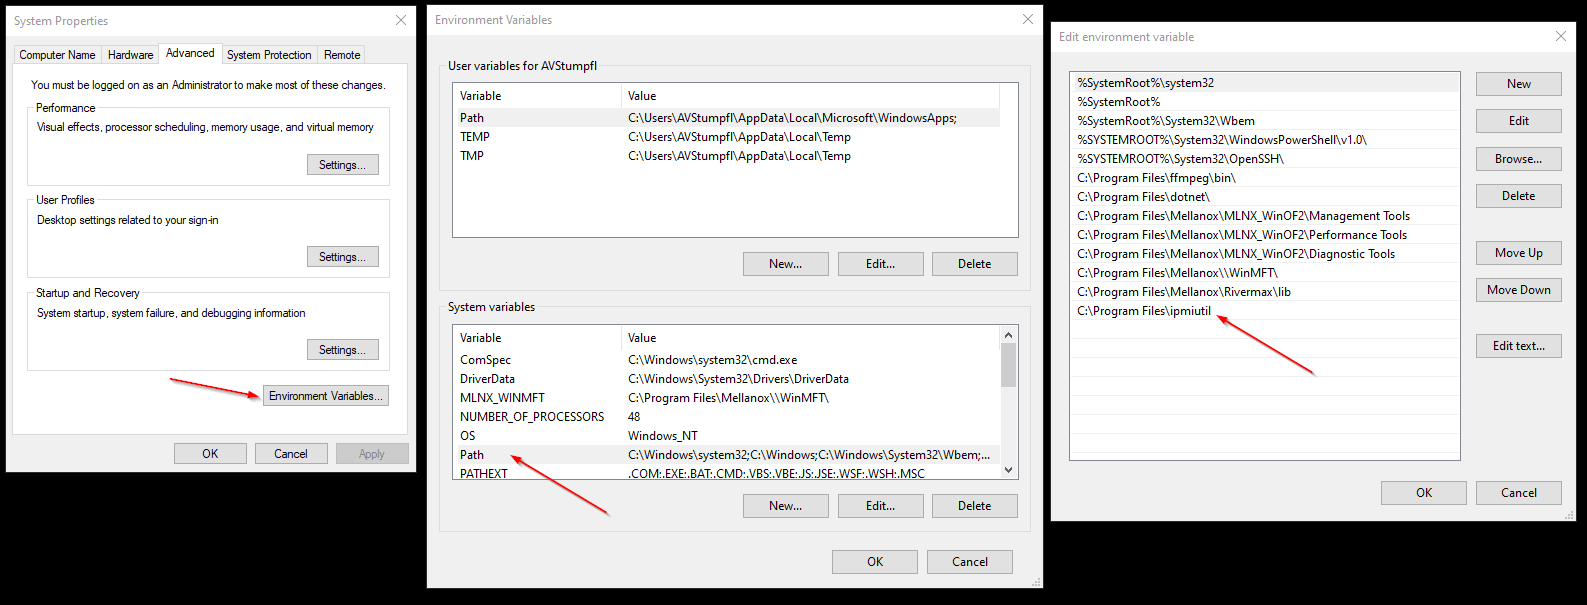
Next click on “Environment Variables” and then on Path. Enter the Installation path (in our example C:\Program Files\ipmiutil\) to the bottom of this list. As shown below:
After setting the environment variable and restarting the system, it should be possible to execute the commands described below.
IPMI network commands for power control, health check and sensor readings
The program requires the following inputs. As explained in this example:
ipmiutil power -u -N 10.41.98.252 -U ADMIN -P Px010031098252 -F lan2
| ipmiutil | Calling the program |
| power -u | The actual command to be executed. In this case to power up the system |
| -N 10.41.98.252 | The IP address of the node to be connected to |
| -U ADMIN | The user name. In this case, the preconfigured ADMIN user |
| -P Px010031098252 | The password In this case, the preconfigured password as described above |
| -F lan2 | The LAN+ connection method to be used. This is the required connection method for all PIXERA servers an is mandatory |
⚠️ Note that the commands are case sensitive!
# Powers Up the system
ipmiutil power -u -N 10.41.98.252 -U ADMIN -P Px010031098252 -F lan2
# Powers Down the system
ipmiutil power -d -N 10.41.98.252 -U ADMIN -P Px010031098252 -F lan2
# Soft-shutdown OS and power down (recommended way to power down a PIXERA server)
ipmiutil power -D -N 10.41.98.252 -U ADMIN -P Px010031098252 -F lan2
# Hard Resets the system (like pressing the Reset-Button)
ipmiutil power -r -N 10.41.98.252 -U ADMIN -P Px010031098252 -F lan2
# Cycles the system (Soft-Shutdown and Power Up)
ipmiutil power -c -N 10.41.98.252 -U ADMIN -P Px010031098252 -F lan2
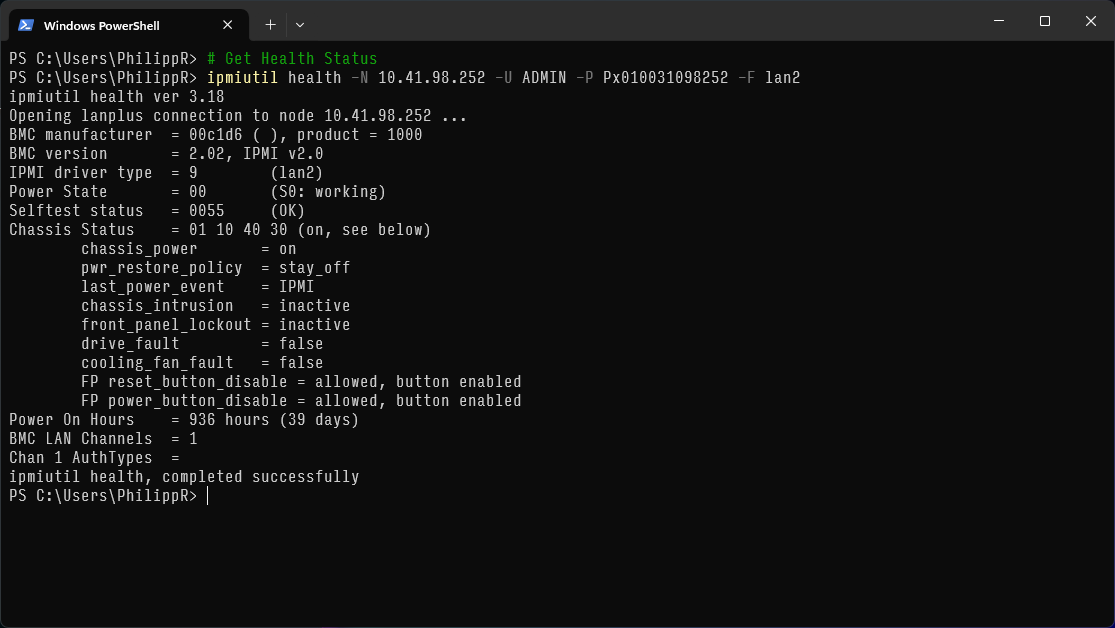
# Get Health Status
ipmiutil health -N 10.41.98.252 -U ADMIN -P Px010031098252 -F lan2
# Get Sensor Data readings and thresholds (Temperatures, Fanspeed, Voltages)
ipmiutil sensor -c -N 10.41.98.252 -U ADMIN -P Px010031098252 -F lan2
⚠️ Note that the PC from which the commands are sent is connected to the same network as the IPMI network port or the bridged LAN port LAN1. On PIXERA servers by default LAN port 1 is bridged with the IPMI port. However, it still requires a connection to a switch to access this IPMI IP locally as Windows does not use this bridge locally so it has to hop over a switch back to itself (the physical port).
A successful execution of the command looks like this:
Local IPMI control
ipmiutil can not only be used remotely it even works locally. To do so the commands need to be executed in an elevated (Start as administrator) Command Promt, Windows Terminal or Power Shell. Local execution makes little sense for executing power commands, but it can make sense if you want to find out the IPMI IP address of the server on which you are currently working. Or you want to change the IPMI IP address or switch to DHCP. The following commands can be used for this:
⚠️Start an elevated Command Prompt by right-clicking Command Promt and click on “Run as administrator”
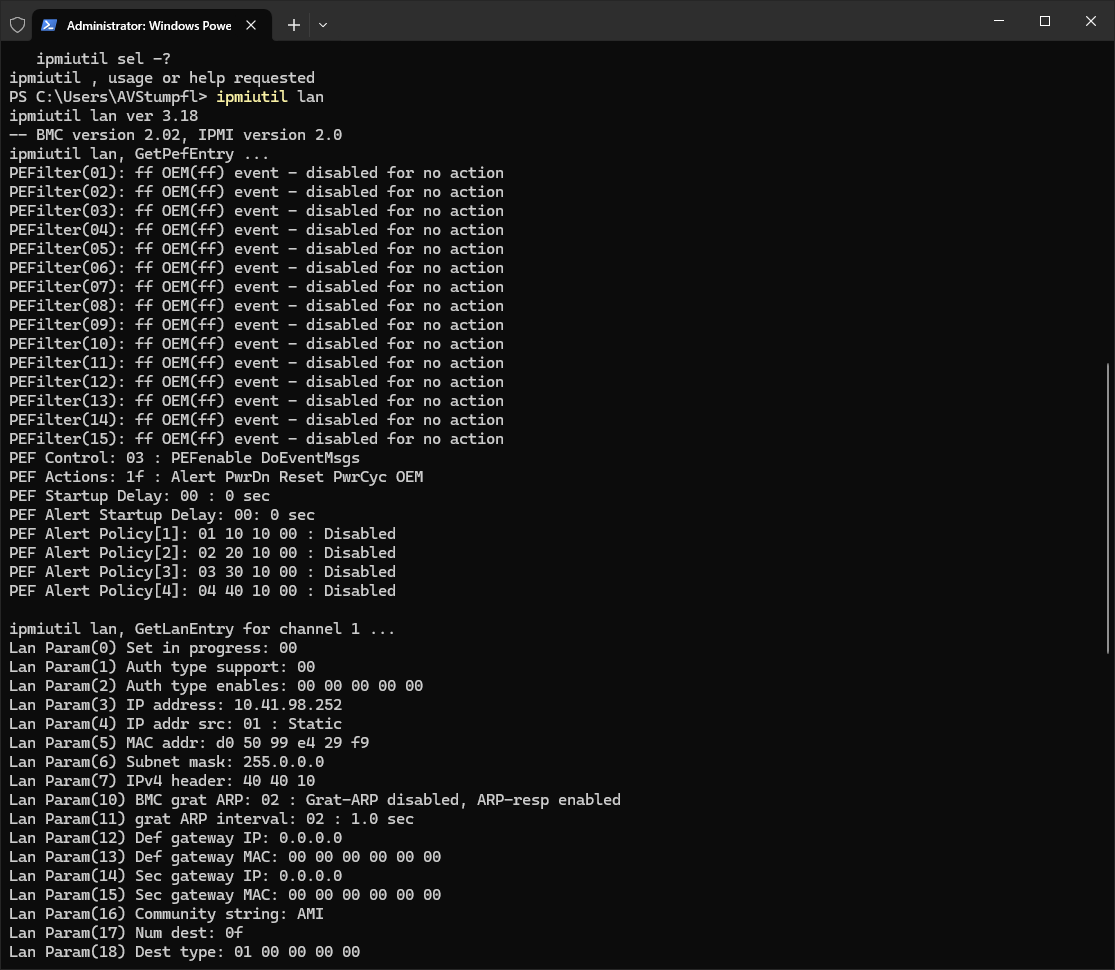
# Querying the IPMI IP address
ipmiutil lan
You should get a message like in the screenshot below and find the string IP address
Although it is not recommended to change the IPMI IP address, it may be necessary for some network setups. The following commands can be used to change the IP address of a PIXERA server:
⚠️ Note that the commands are case sensitive!
# Set or change the IPMI IP address to a static address (IP and Subnet is mandatory). LAN1 and IPMI Port is bridged
ipmiutil lan -e -I <IP_ADDRESS> -S <SUBNET> -G <GATEWAY_IP>

# Set or change the IPMI IP address to DHCP. LAN1 and IPMI Port is bridged
ipmiutil lan -e -D

# Set or change the IPMI IP address to a static address (IP and Subnet is mandatory). Bridge is deactivated
ipmiutil lan -d -I <IP_ADDRESS> -S <SUBNET> -G <GATEWAY_IP>

# Set or change the IPMI IP address to DHCP. Bridge is deactivated
ipmiutil lan -d -D