 Contact Us


Configuring VLANs on PIXERA four and PIXERA one/two Gen.2
On a PIXERA four and PIXERA one/two Gen.2 products, VLANs can be created using the PROSet Tool provided by Intel.
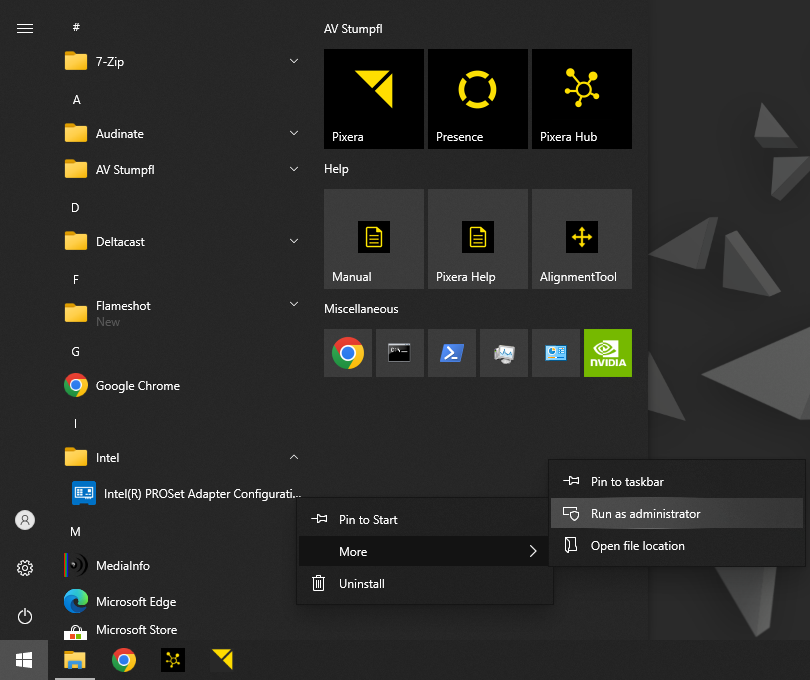
To do this, the Intel PROSet Adapter Configuration Tool program must be started as an administrator.
Select the physical network controller, on the left side, on which you want to create a new VLAN and open the tab “Teaming/VLAN”. There you can add/remove and modify VLANs assigned to that physical network controller.
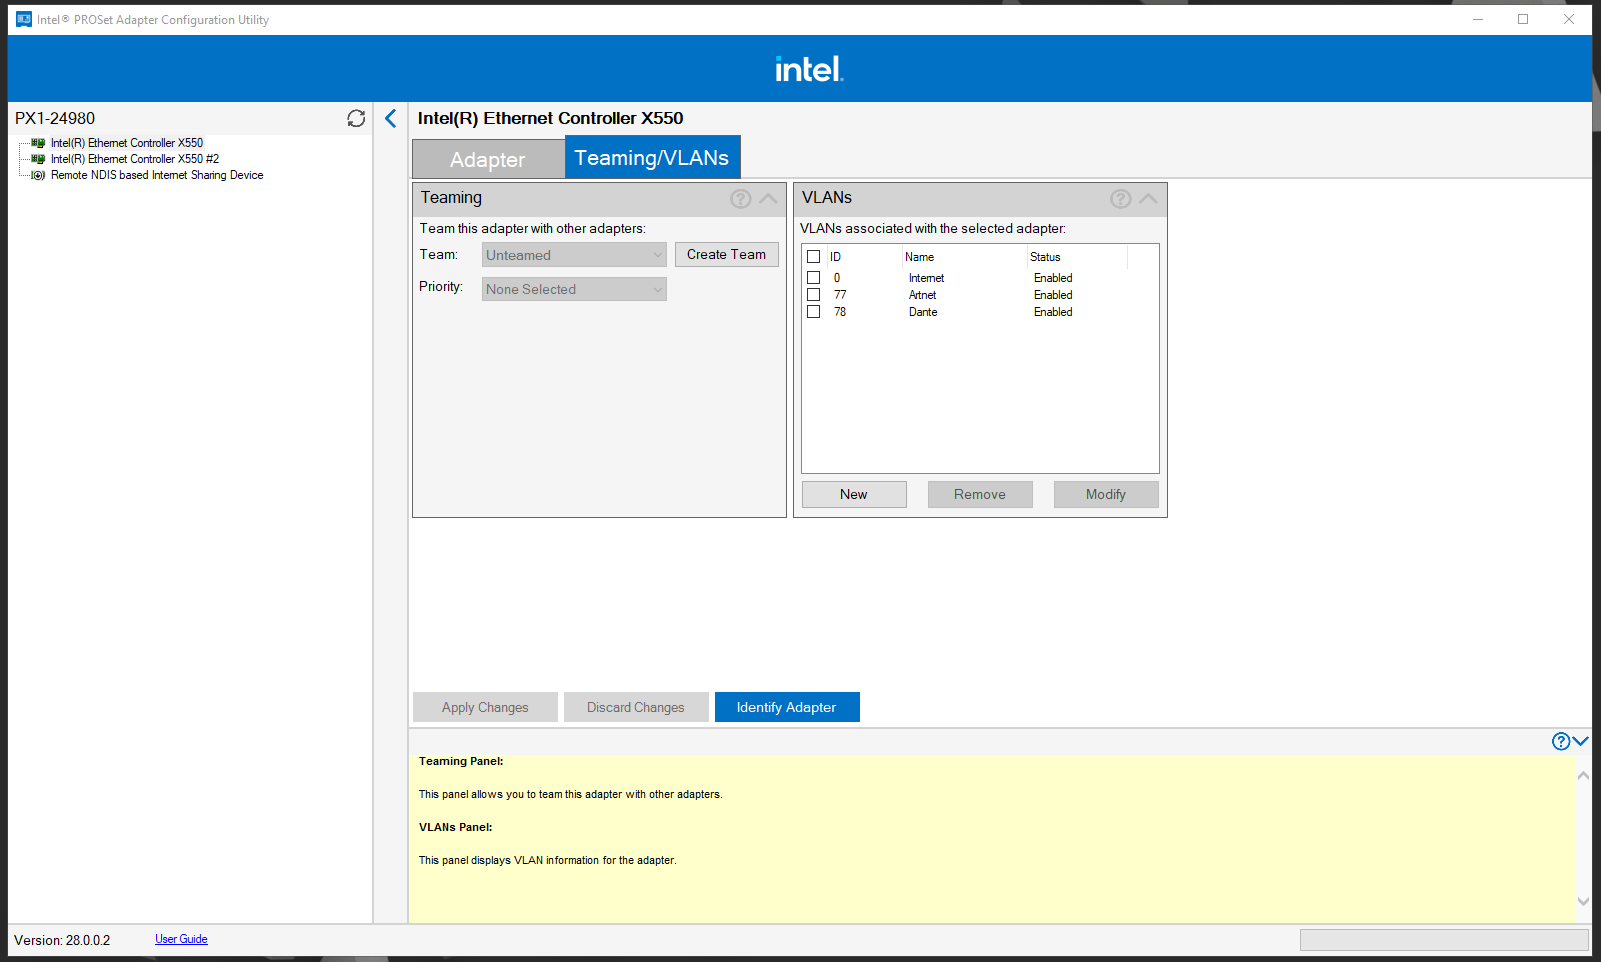
Press the “New” button, enter the corresponding VLAN ID give it a name and press “Create VLAN(s)”. If you need an untagged VLAN you can add it here as well by selecting the “Untagged” checkbox.
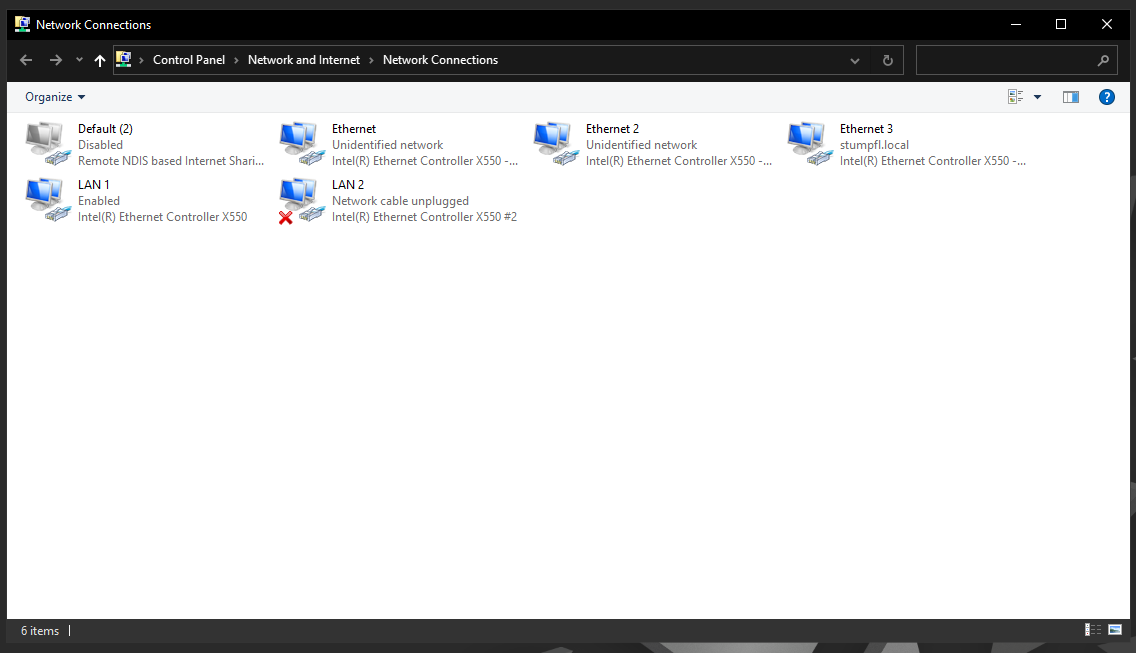
After creating the VLANs, you will find a corresponding network adapter for each VLAN created. Now you can assign your network configuration (IP, Subnetmask,…) to the different adapters.
Configuring VLANs on PIXERA one/two Gen.1, PIXERA mini and addon NIC cards
Although a PIXERA one/two Gen.1 server or a PIXERA mini has an Intel network card installed, these products unfortunately do not have the option of creating a VLAN using the Intel PROSet tool. However, it is possible to accomplish the same function using Microsoft Hyper-V vSwitches. Unfortunately, this requires a little more configuration.
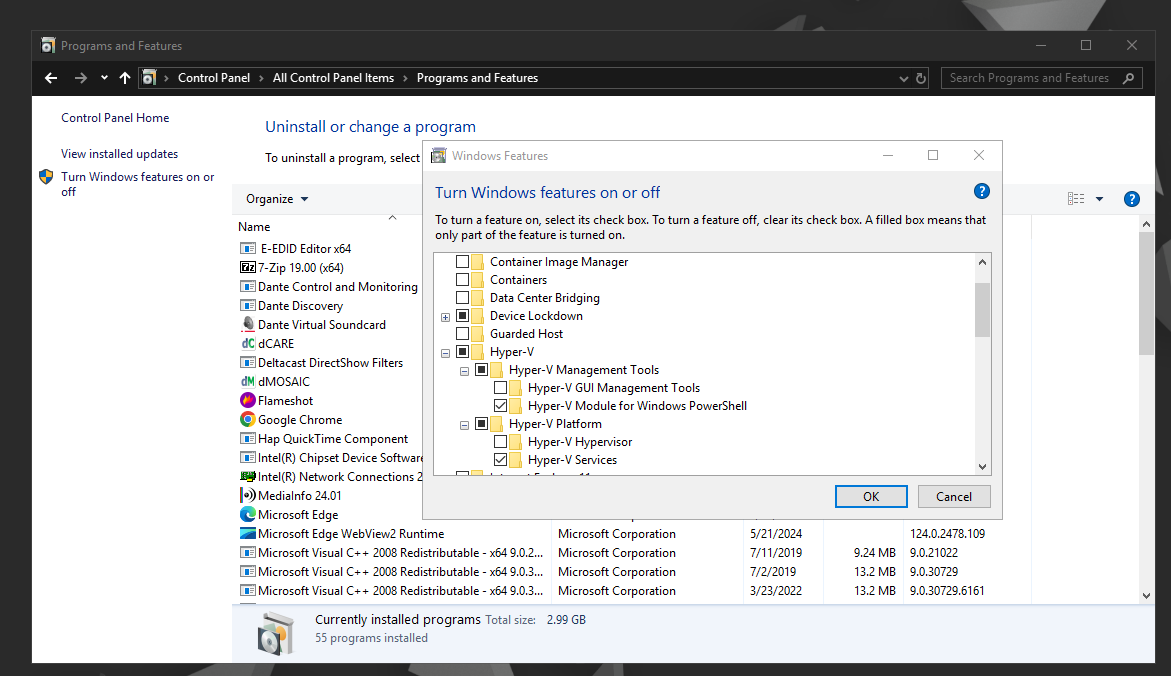
Step 1: Installing the windows components
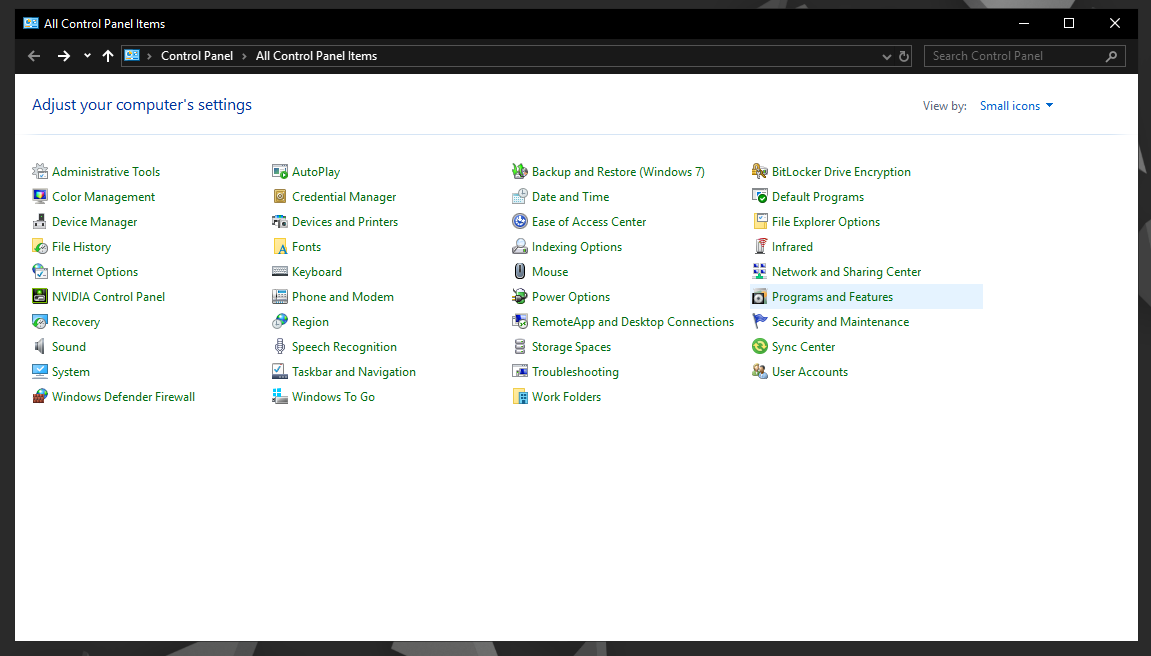
Open Windows Control Panel and start “Programs and Features”. Navigate to “Turn Windows features on or off”. There we have to install three components called “Hyper-V-Services”, “Hyper-V-Module for Windows PowerShell” and “Hyper-V-GUI Management-Tools”. After the setup is done, you have to reboot the computer.
Step 2: Setting up the vSwitch
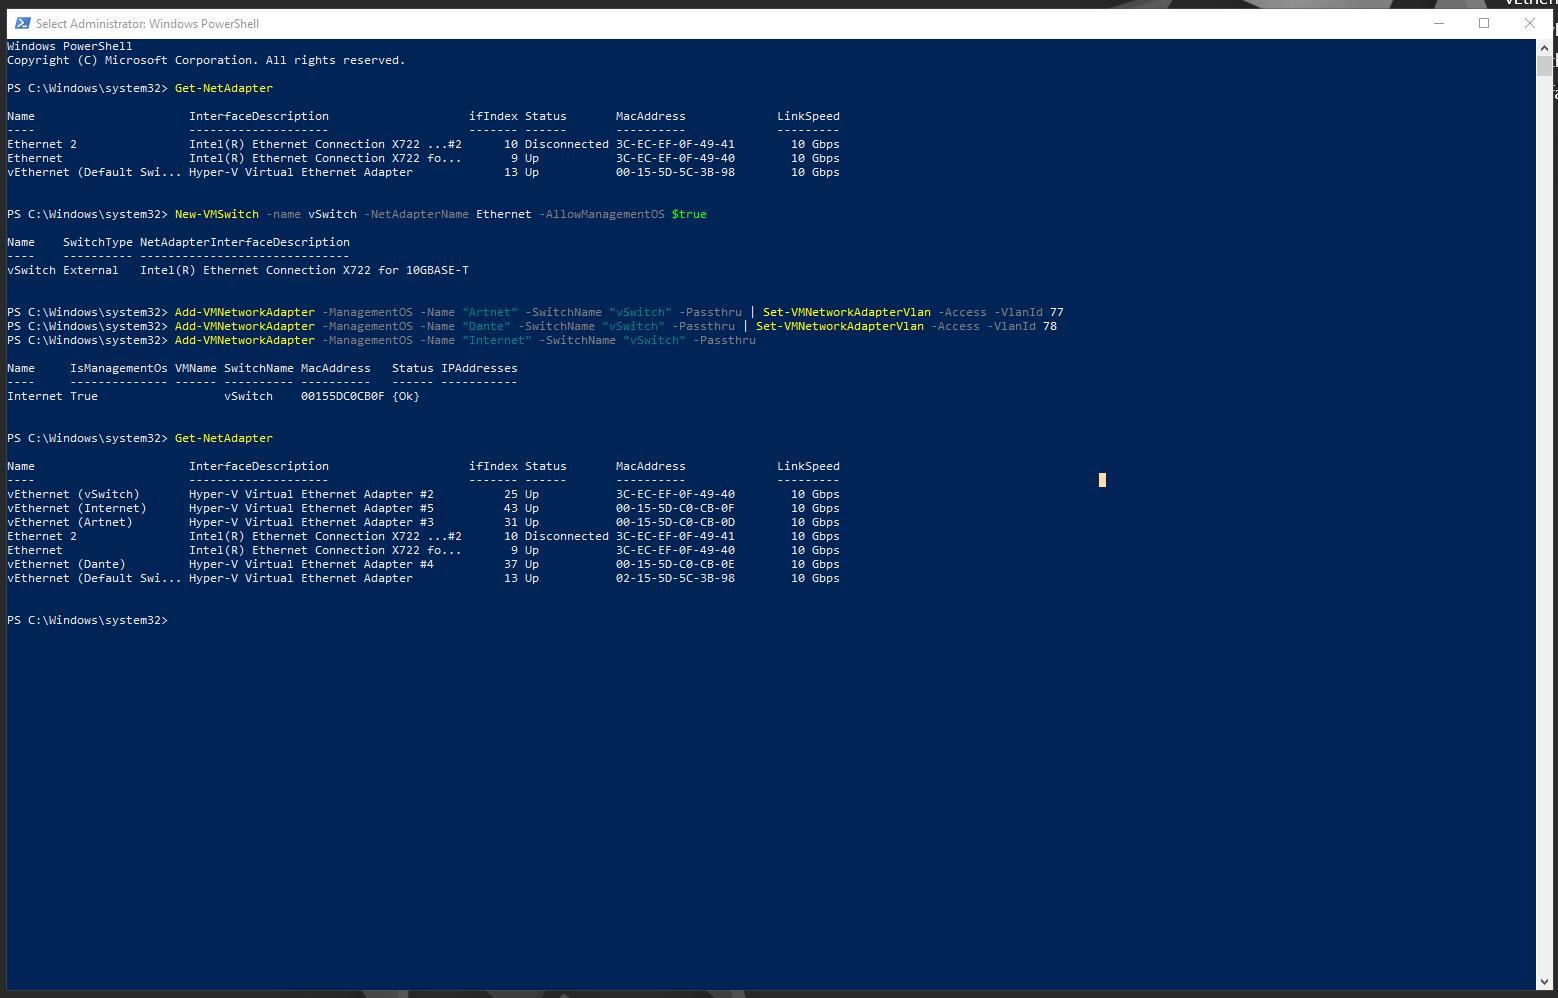
Hyper-V automatically creates a “Default vSwitch” that you can not delete and unfortunately it is not VLAN-Aware. We will have to keep this one as it is and go ahead creating a second vSwitch. For this, we need to open up powershell as an administrator and enter the following commands:
# This will return a list of network adapters, find your physical NIC and note its "Name" - In most cases "Ethernet"
Get-NetAdapter

# This creates a new vSwitch named VLAN-vSwitch and bridging our physical NIC called "Ethernet". Also we allow to add virtual Host-NICs to this switch.
New-VMSwitch -name "VLAN-vSwitch" -NetAdapterName "Ethernet" -AllowManagementOS $true

# Hyper-V automatically creates a virtual NIC without a VLAN tag to keep the host online - Remove it, except you are using a Untagged/Tagged combination.
Remove-VMNetworkAdapter -ManagementOS -Name "VLAN-vSwitch"
We do now have a clean new VLAN-Aware vSwitch.
Step 3: Setting up VLAN interfaces
# Now we create a new virtual Host-NIC and assign a VLAN tag 77 to it. Please note, that the interface name can be chosen freely. One might want to name them by purpose.
Add-VMNetworkAdapter -ManagementOS -Name "Artnet" -SwitchName "VLAN-vSwitch" -Passthru | Set-VMNetworkAdapterVlan -Access -VlanId 77

# You can now add as many virtual NICs as you need. For example a Dante network with the VLAN tag 78
Add-VMNetworkAdapter -ManagementOS -Name "Dante" -SwitchName "VLAN-vSwitch" -Passthru | Set-VMNetworkAdapterVlan -Access -VlanId 78

# Finally, verify that all adapter are in place
Get-NetAdapter
Done
That is all you need to do. You do now have replicated the VLAN feature Intel PROSet with windows “onboard-tools” and this solution should be compatible with any available NIC.
Now you can assign your network configuration (IP, Subnetmask,…) to the different adapters.