 Contact Us


Requirements:
- Keyboard
- USB Stick (at least 32GB)
- Computer with working Internet connection
Prerequisites
Before following our Server Update Guide, make sure, that you download Rufus from the link below.
Download the latest PXimagerversion and Windowsimage (*.wim file).
Please contact support for all Pixera Server image files at
https://avstumpfl.freshdesk.com/support/tickets/new.
It is important that you specify the serial number and server type to get the correct Windows image!
PXM REV.1 | PX1 | PX2 (images for Pixera Mini, One and Two are currently identical)
- on request
PXM REV.2
- on request
PX1 Gen.2, PX2 Gen.2
- on request
PX4
- on request
PXiso
- on request
USB Setup
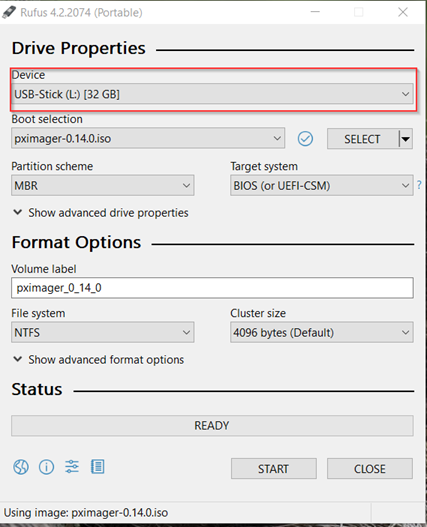
- Plug in your USB stick and open Rufus.
- Select the USB drive where you want to install the PXimager. In your case, that will be the previously plugged in one.
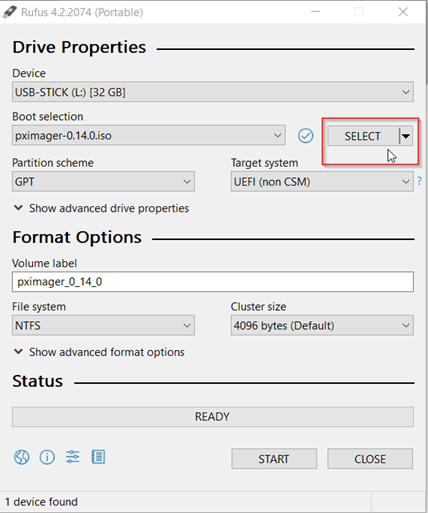
- Click on select, a file dialog will appear.
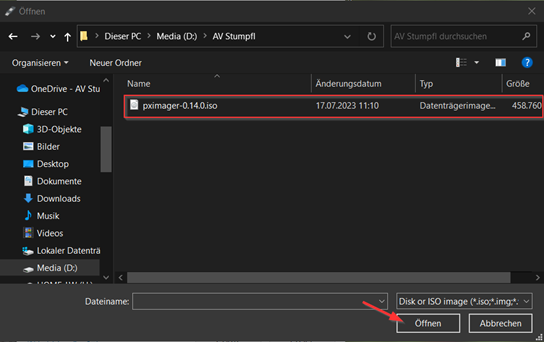
- In the file dialog that opened, locate the folder where our PXimager .iso file has been downloaded and select it.
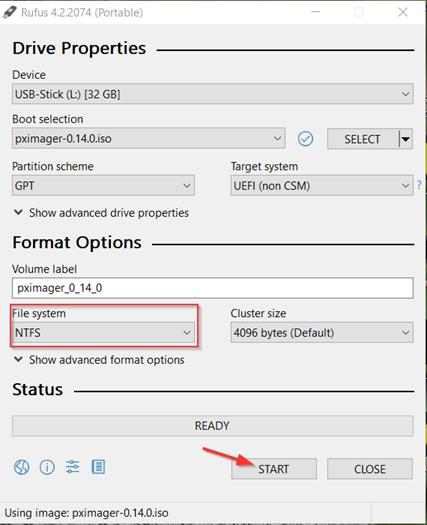
- Make sure you have selected GPT as the partition scheme. Be aware, that everything from the USB Stick will be removed completely!
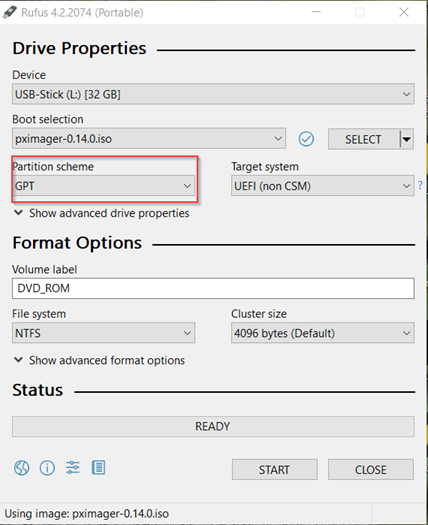
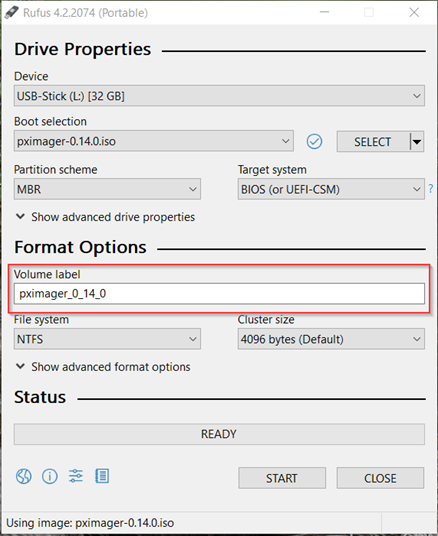
- Name the volume label as shown in the figure (here for example with the version number 0.14.0).
- Make sure to select NTFS as target file system. Then click start. Be aware, that everything from the USB Stick will be removed completely.
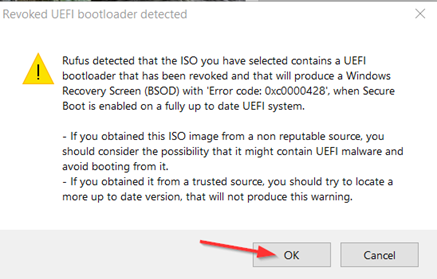
- A warning pops up, just accept it by clicking OK.
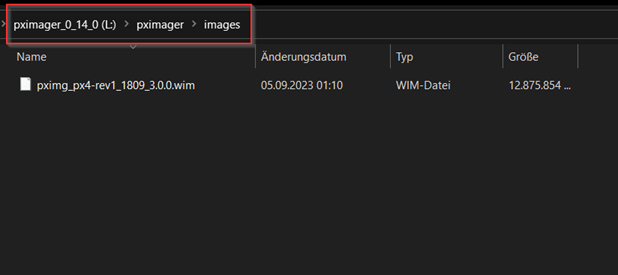
- When Rufus has finished setting up the USB drive, one can copy the Windows Image (*.wim file) over to the USB Stick into the “pximager/images” folder.
Booting into the PXimager environment
- Connect a keyboard and the USB Stick you created before to your PIXERA server.
- Startup the server and repeatedly press "F11" until you see a text that says “Invoking Boot Menu…“ in the lower left corner.
- A list with devices should appear. Find your USB stick in the list. Select it via the arrow keys and continue by pressing “Enter” to up into the PXimager setup environment.
Image installation
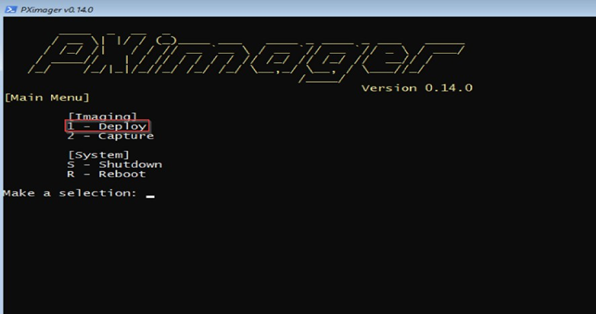
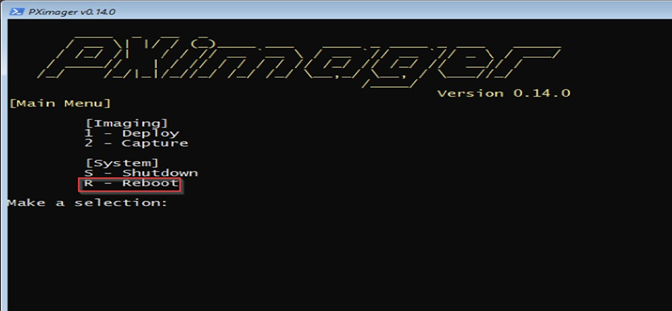
- You should be greeted with a menu that allows you to select whether you want to deploy/capture an image or shutdown/reboot the system.
- In your case, select the “deploy image” item by entering number 1 and continue by pressing “Enter”.
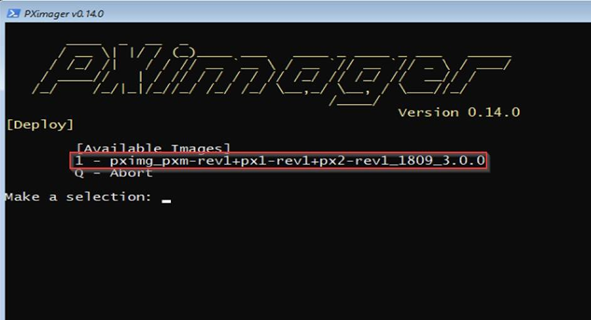
- Now you should see all images on your USB Stick. Select the one you want to install on your system by entering the number leading the name and confirm with “Enter”.
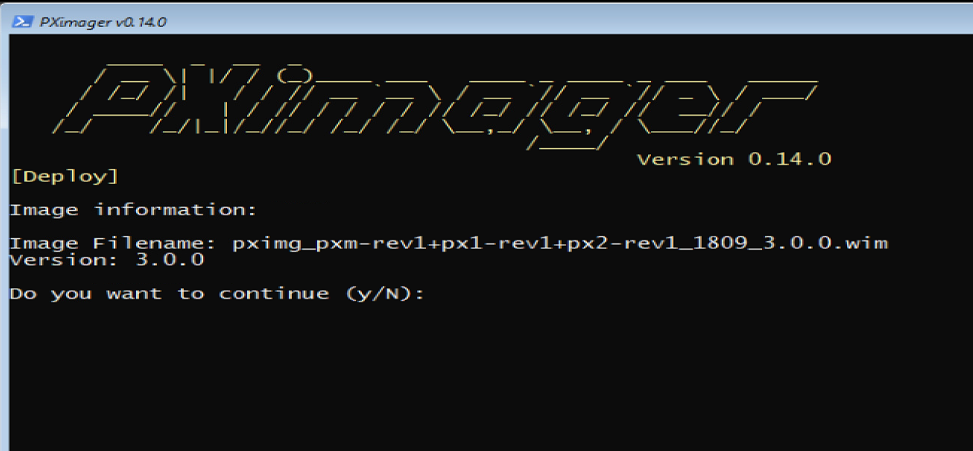
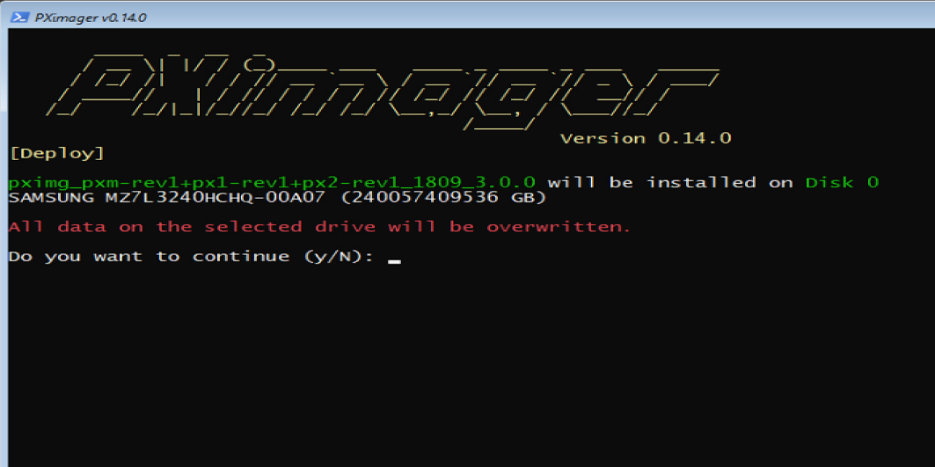
- Now it is checked if it is the correct image for the server type and with the input of the letter "Y" and the confirmation with "enter" it goes to the next step.
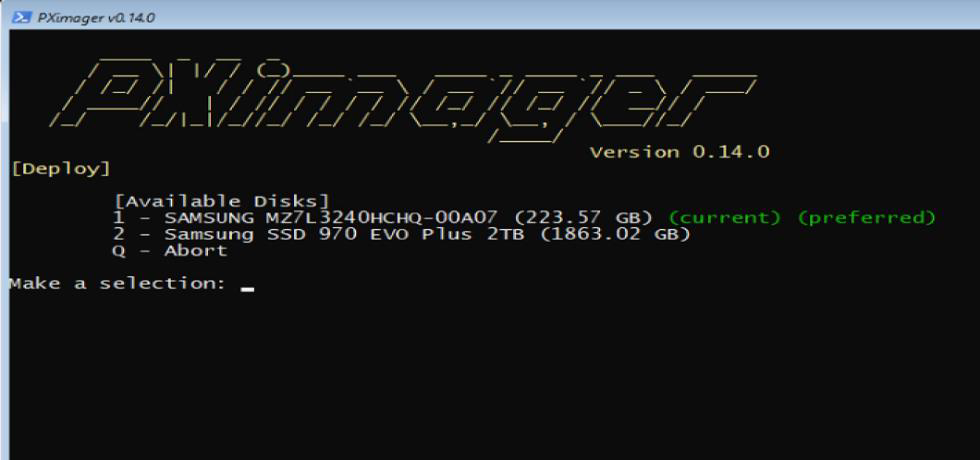
- In the next menu, you will be prompted to select the disk where the image should be installed on. Select the disk by entering the number again and confirm with “Enter”.
- Now you will see an overview of the changed that will be made to your system. Confirm the operation by entering “y” or abort with “n” or by entering nothing and continue “Enter”.
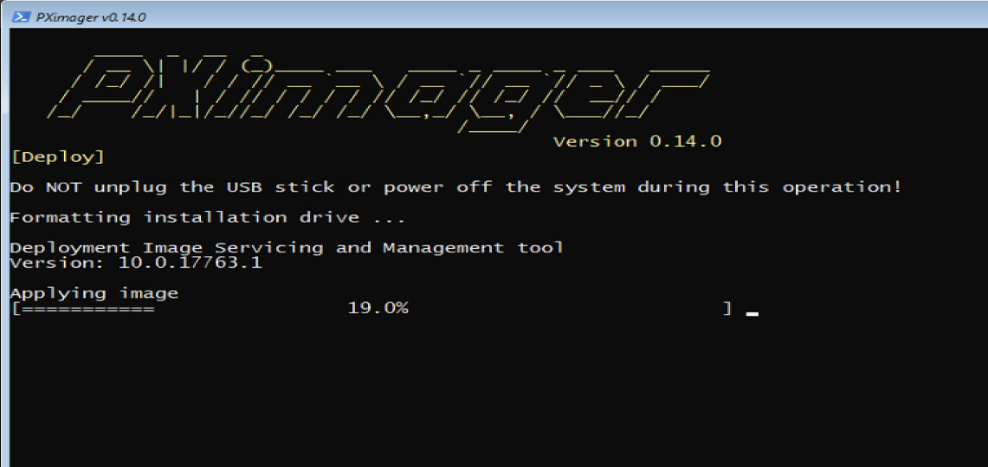
- The image will now be installed on the selected disk and the system will be prepared for the first boot. Please wait until this process is finished, do not unplug the USB- Stick or shutdown the device. This may take a few minutes depending on your setup.
- After the process is finished, continue with any key. Now enter “r” and press “Enter” to reboot the system.
- The system will reboot and then run the Windows installation. Please do not interrupt the installation process until it is complete, the server will reboot several times.
!Important! After the installation process has been completed, settings still need to be made to achieve maximum performance. The following settings are essential!*
*Only required for Windows 10 IoT LTSC 21H2 image
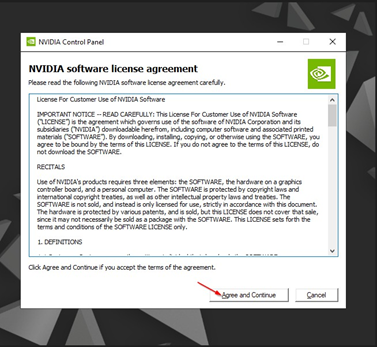
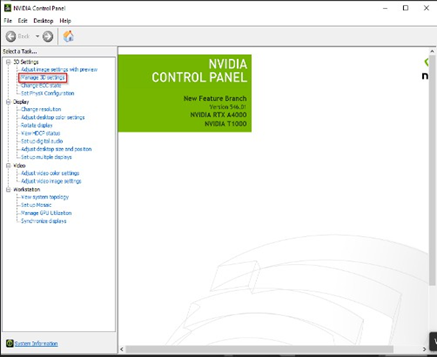
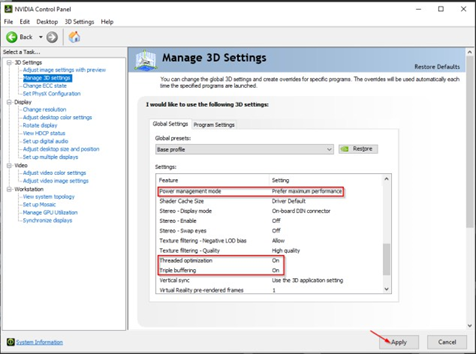
- Start the NVIDIA Control Panel.

- Accept the terms and conditions of NVIDIA by clicking on "Agree and Continue".
- Click on "Manage 3D settings".
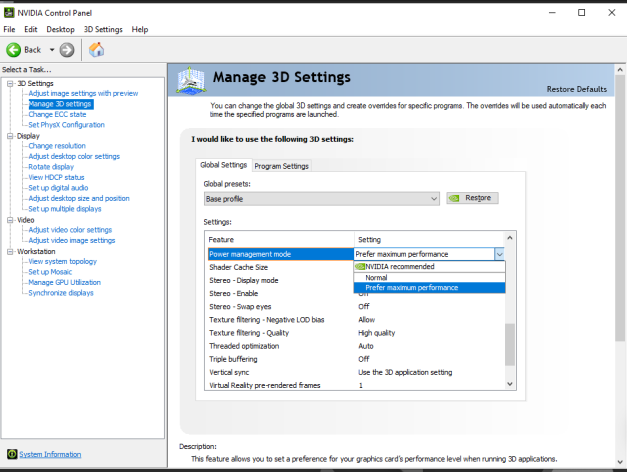
- Set power management mode to "Prefer maximum performance".
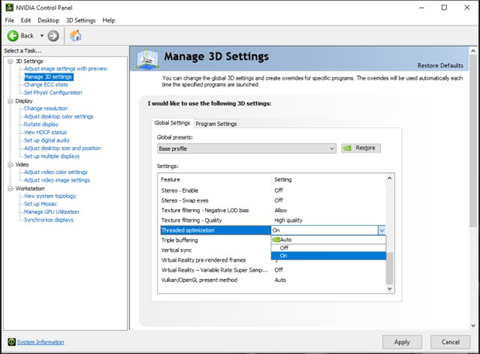
- Set Threaded optimization to “On”.
- Set Triple buffering to “On”.
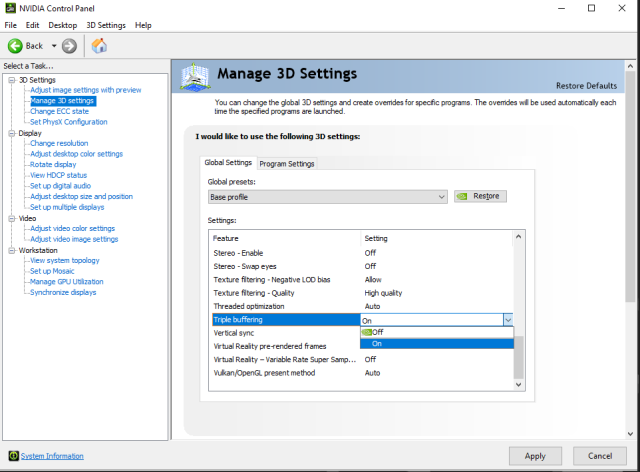
- Once you have made all the settings, apply the settings by clicking on "Apply".
Possible Errors
-
No disks are present in the PXimager installation target selection.
Verify that you changed the BIOS settings correctly. Configure SATA as AHCI.
BIOS Settings:
- Start the server and press “DEL” on the keyboard to enter the BIOS.
- Locate the “Advanced” tab and select PCH SATA Configuration. Change the setting from RAID to AHCI (as shown below).
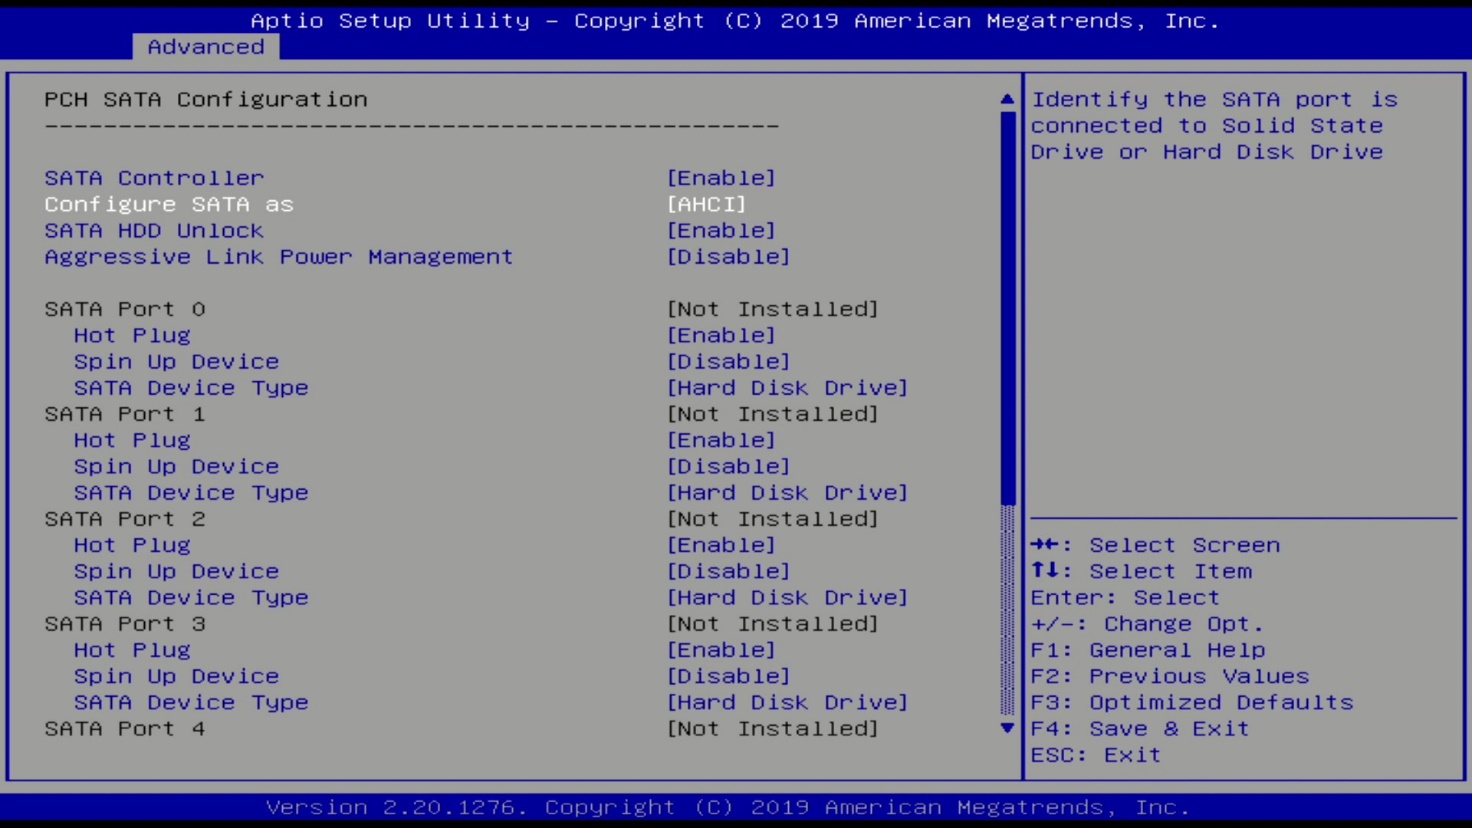
- Select PCH sSATA Configuration. Do the same, change the setting from RAID to AHCI.
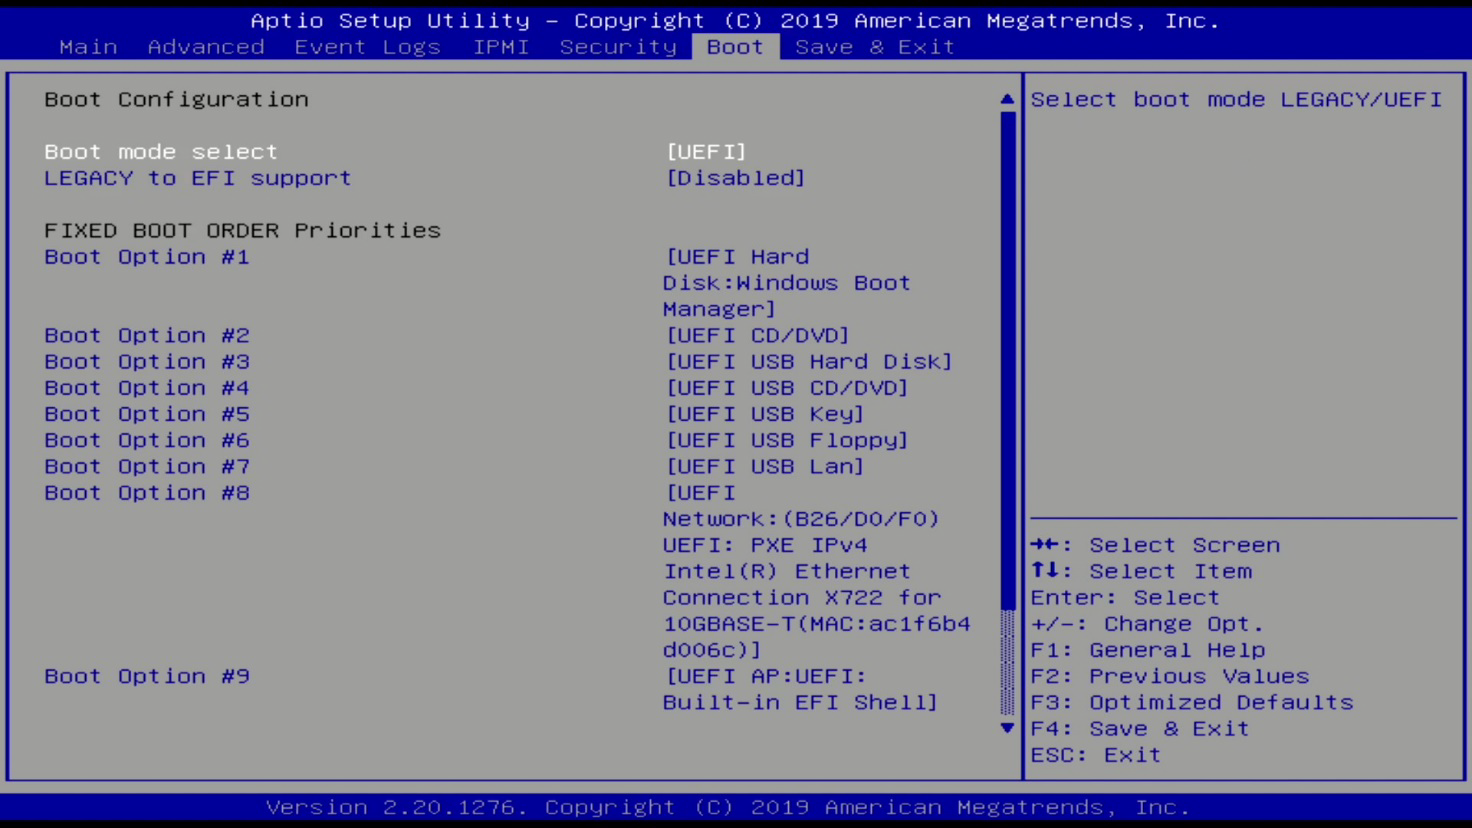
- Locate the “Boot“ tab and change the boot mode from DUAL to UEFI (as shown below).
-
No images are present in the PXimager menu.
Verify that there is an image file in the image's folder on the USB-Stick.
- No media drive present in Windows
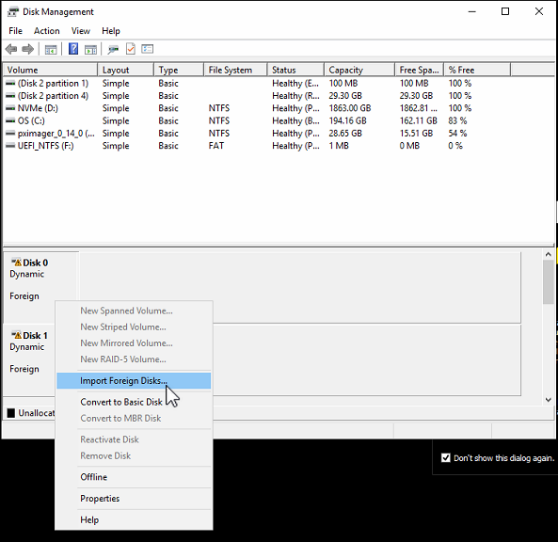
- Go to disk management with a right click on the Windows icon.
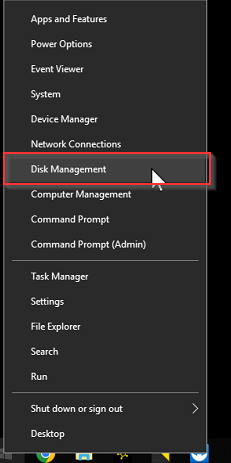
- Right-click on one of the affected disks in the raid and click on "Import Foreign Disks...".
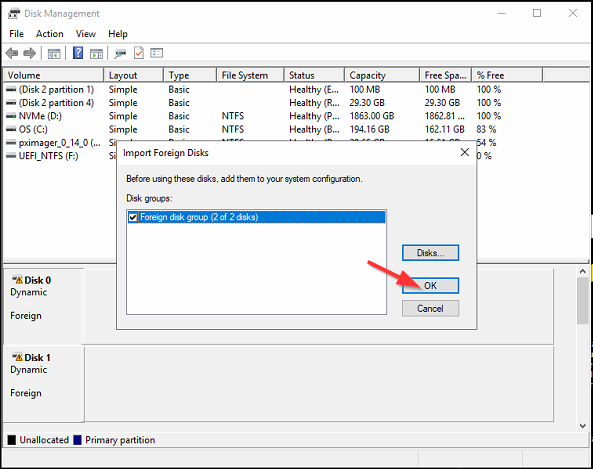
- Confirm with a click on "ok".
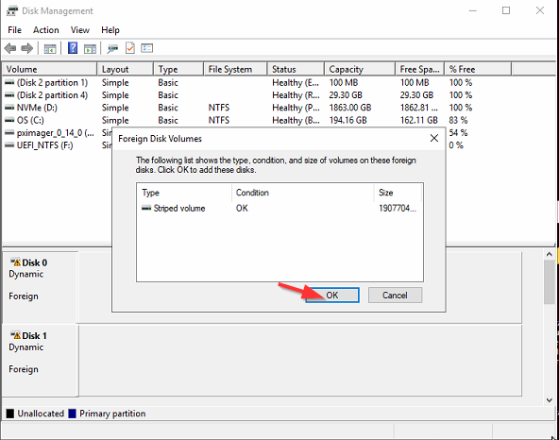
- Confirm once again with a click on "ok".
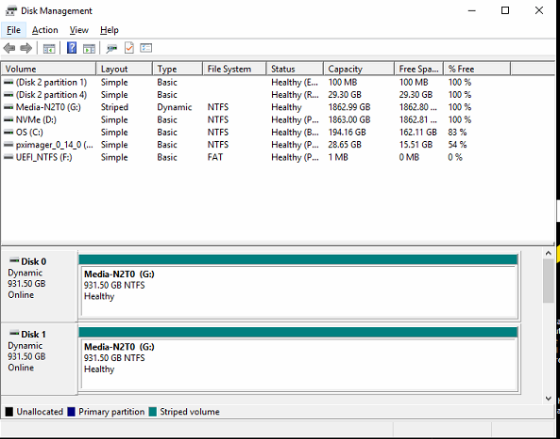
- Now the media drive is visible again and can be used.
2.1 | 24. April 2024 | A.L.