 Contact Us


Timecode LTC IN via Audio
Starting with PIXERA 2.0 it is possible to receive and manage timelines through LTC via Audio in. The audio-source can be digital (for example Dante or like in this case a virtual sound card) or analog.
By utilizing SMPTE Hot Regions, certain parts of timelines can be controlled via SMPTE timecode. Traditionally, only the timeline was controllable via timecode.
By defining "hot regions" in the timeline settings, certain time regions can be set hot to be controlled by the received timecode. As soon as the locator leaves the hot region, timecode control will stop, and the timeline returns to regular playback.
The settings can be found in the timeline options. Hot Regions can be set up for multiple timelines.
For this article, timecode was played back locally from the VLC player.
Timecode was generated using this homepage:
To be able to feed the audio stream into PIXERA, a digital audio interface was used. However, audio can be distributed by analog sources as well.
Following the installation, simply playback the Timecode via VLC and change the audio device to the virtual sound card:
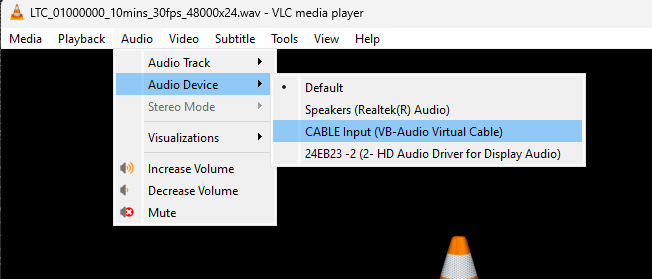
In this case the timecode has a length of 10 minutes, 1 hour offset 30 fps, 48kHz sample rate and 24 bit.
By simply playing it back in the VLC player and selecting the cable device, we will be able to receive the signal in PIXERA.
PIXERA Settings
The Audio input settings inside PIXERA can be accessed in the “Settings - Audio Tab”.
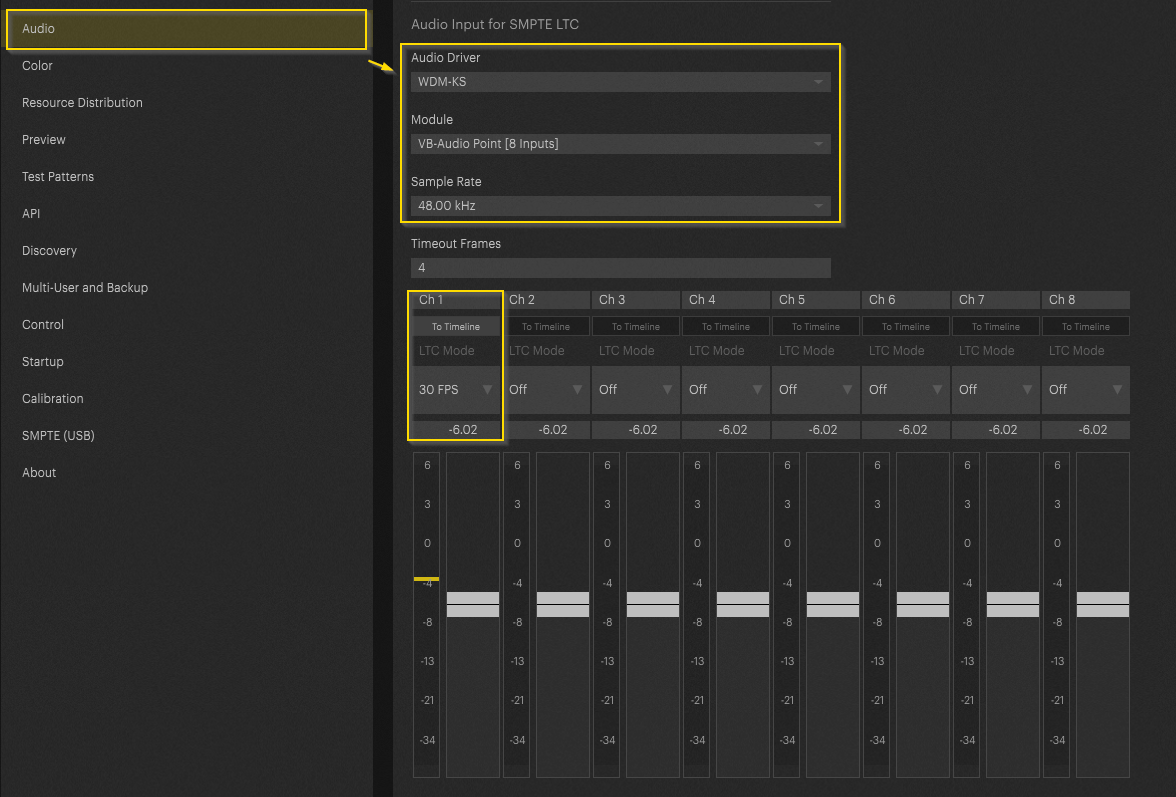
- Setup the correct Audio Input Driver (WDM in this case).
- Module corresponds to the input device.
- Set up the correct Sample Rate, FPS and route the input to the desired Timeline by activating “To Timeline”.
- Timeout Frames corresponds to when PIXERA detects no more timcode input, in this example after no signal for 4 Frames Pixera will apply the “No-Input Behavior” setting in the Timeline
NOTE
Timecode can be configured with the SMPTE in interface as well. Please refer to this article: SMPTE Timecode
Please make sure you have set the “device type” in settings > SMPTE Timecode to “Audio” Otherwise PIXERA will not react to the incoming TC if still set on USB or API.

For the next steps, please follow this guide: Timecode PIXERA
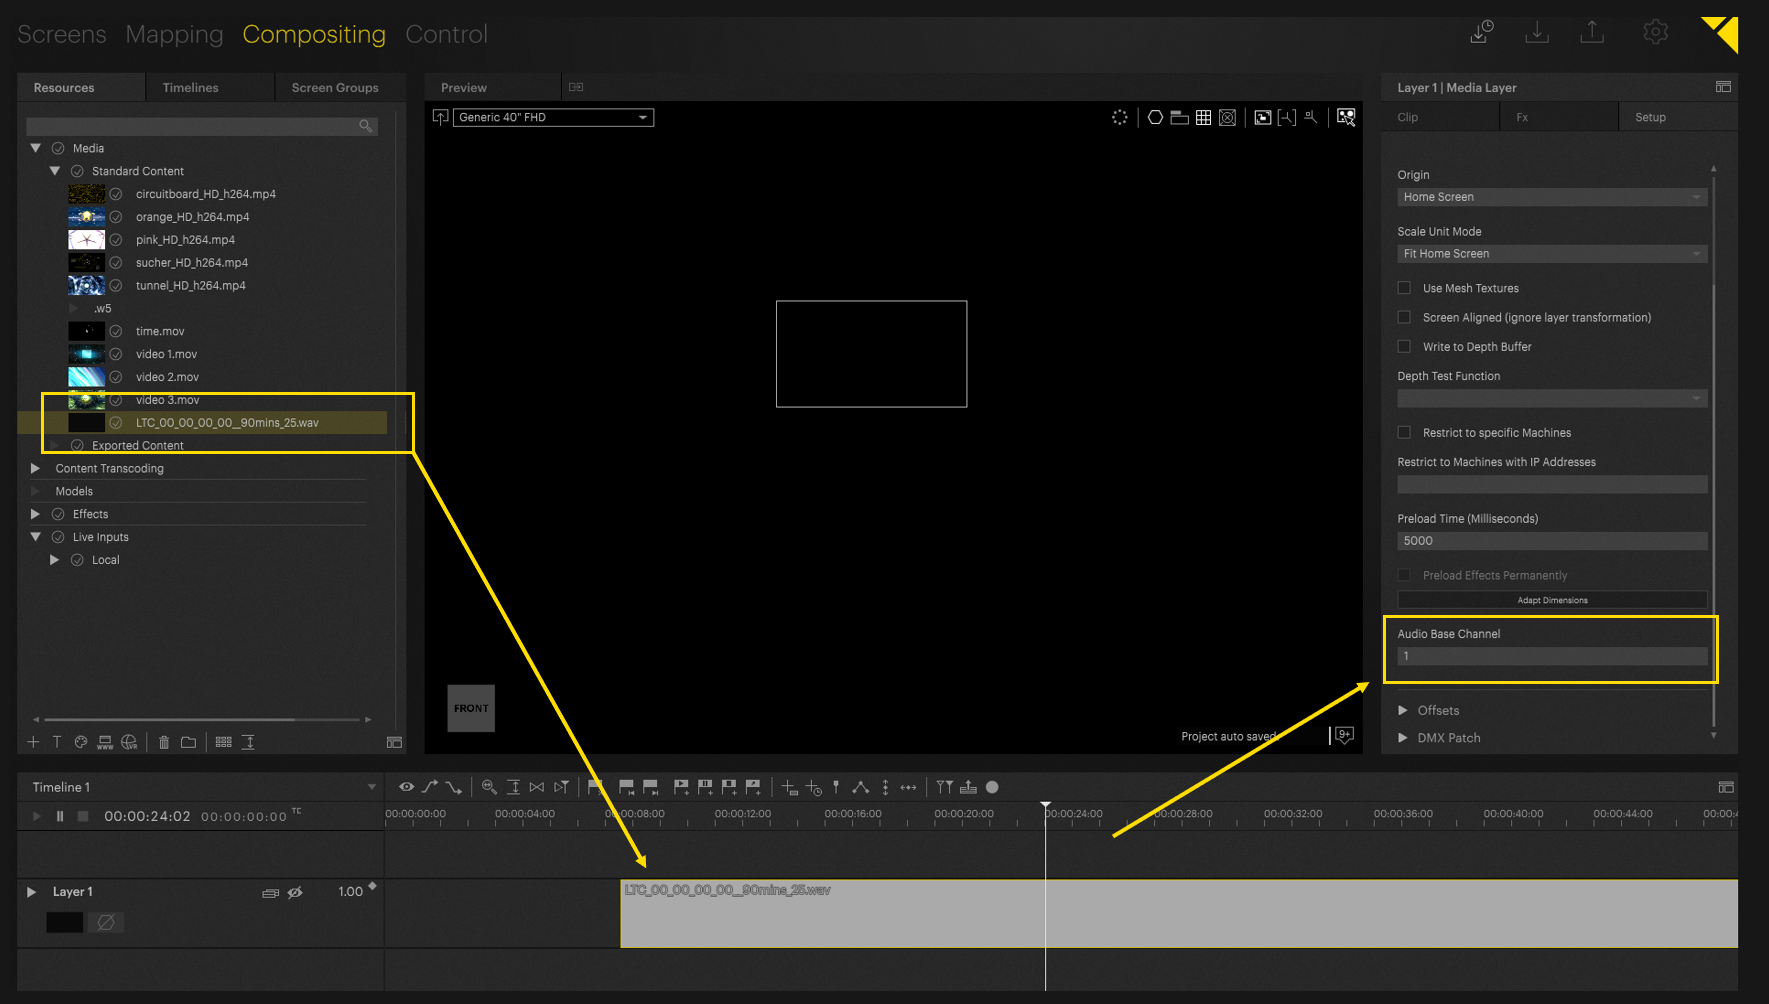
LTC Timecode playout via audio file
Beside SMPTE Timecode Interface, PIXERA also supports to play out and Audio LTC Timecode file
LTC Timecode is an effortless way to play Timecode - the only thing which must be done is to generate an LTC Timecode file and play it out as audio - file on the timeline.
An audio LTC Time code-file can easily be generated on i.e. the following webpage: LTC Timecode generator
This file can then easily be used on the timeline. Just assign this layer to an "Audio Base Channel" and an "Audio interface" to be able to play that timecode out.
PIXERA 25.1. INTER 29 | 11. March 2025 | J.B.