Technical Setup Polygonal Warp
One new addition to the PIXERA Feature set is the "Polygonal Warping" feature.
Through this feature it is possible to edit the warping feeds not only rectangular but polygonal.
To access this feature, a projector and a screen object must be in the workspace.
It is important that the correct feed modes are activated and stored for the projector. In this case, the "Pixel Accurate" mode is required. For are more in-depth explanation on feed modes, please refer to: Projector Feed Areas.

After the settings have been set correctly, you must now "dive" into the projector. Please be careful to select the correct projector:
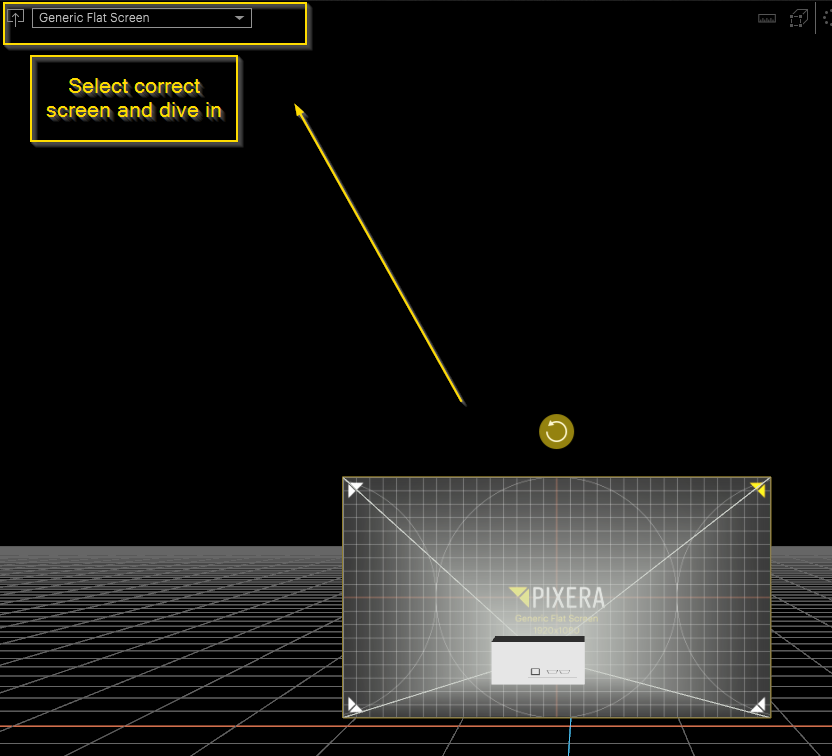
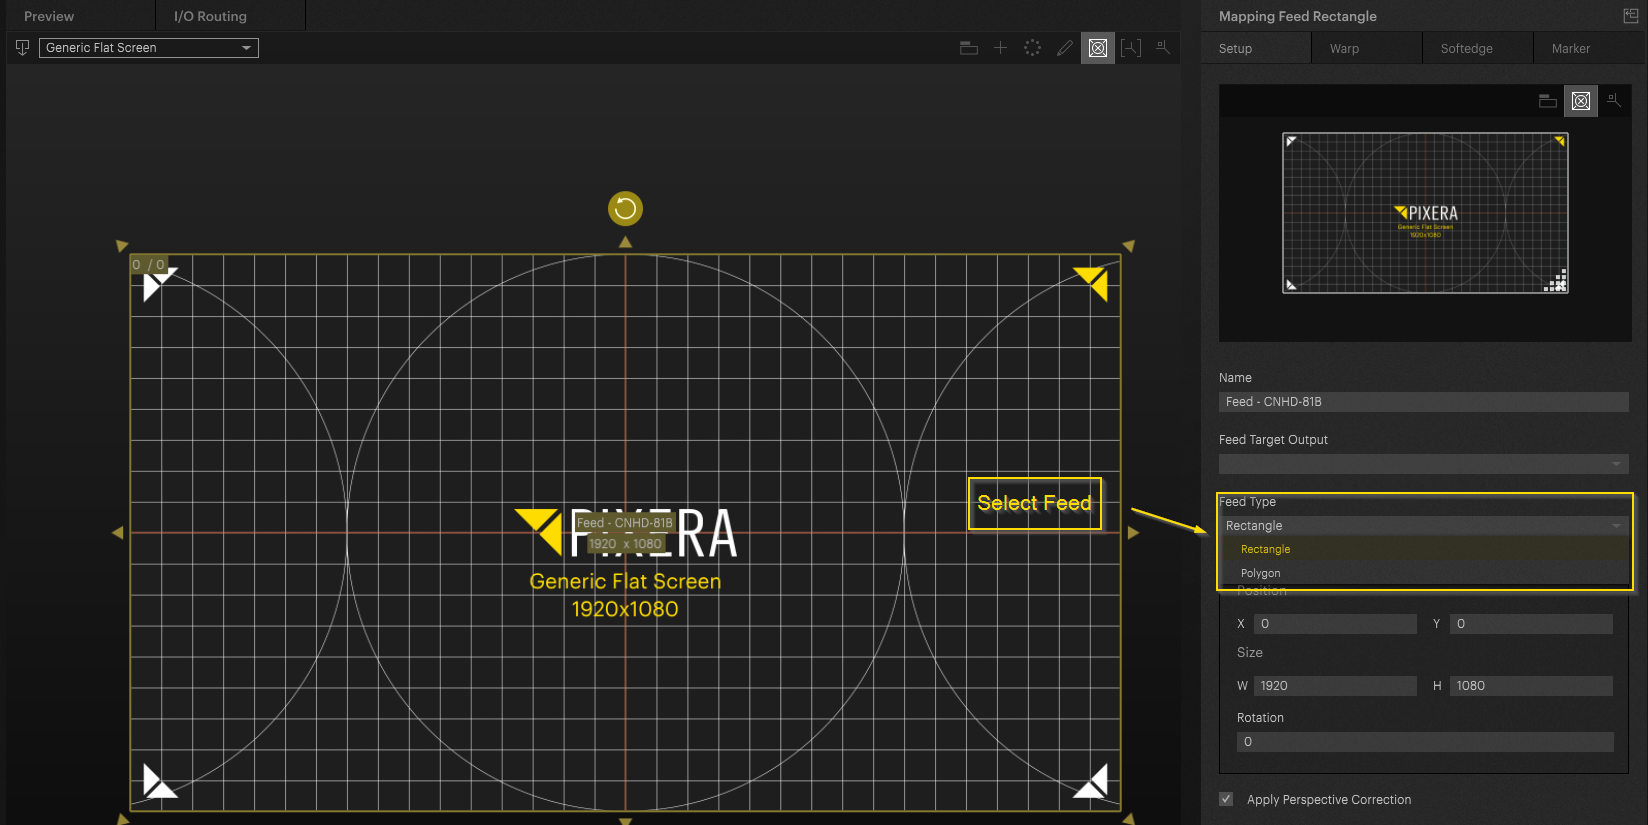
Here we are now in the feed view. By default, this can be edited in “Rectangle” mode. In the settings, you can now switch to “Polygonal” mode:
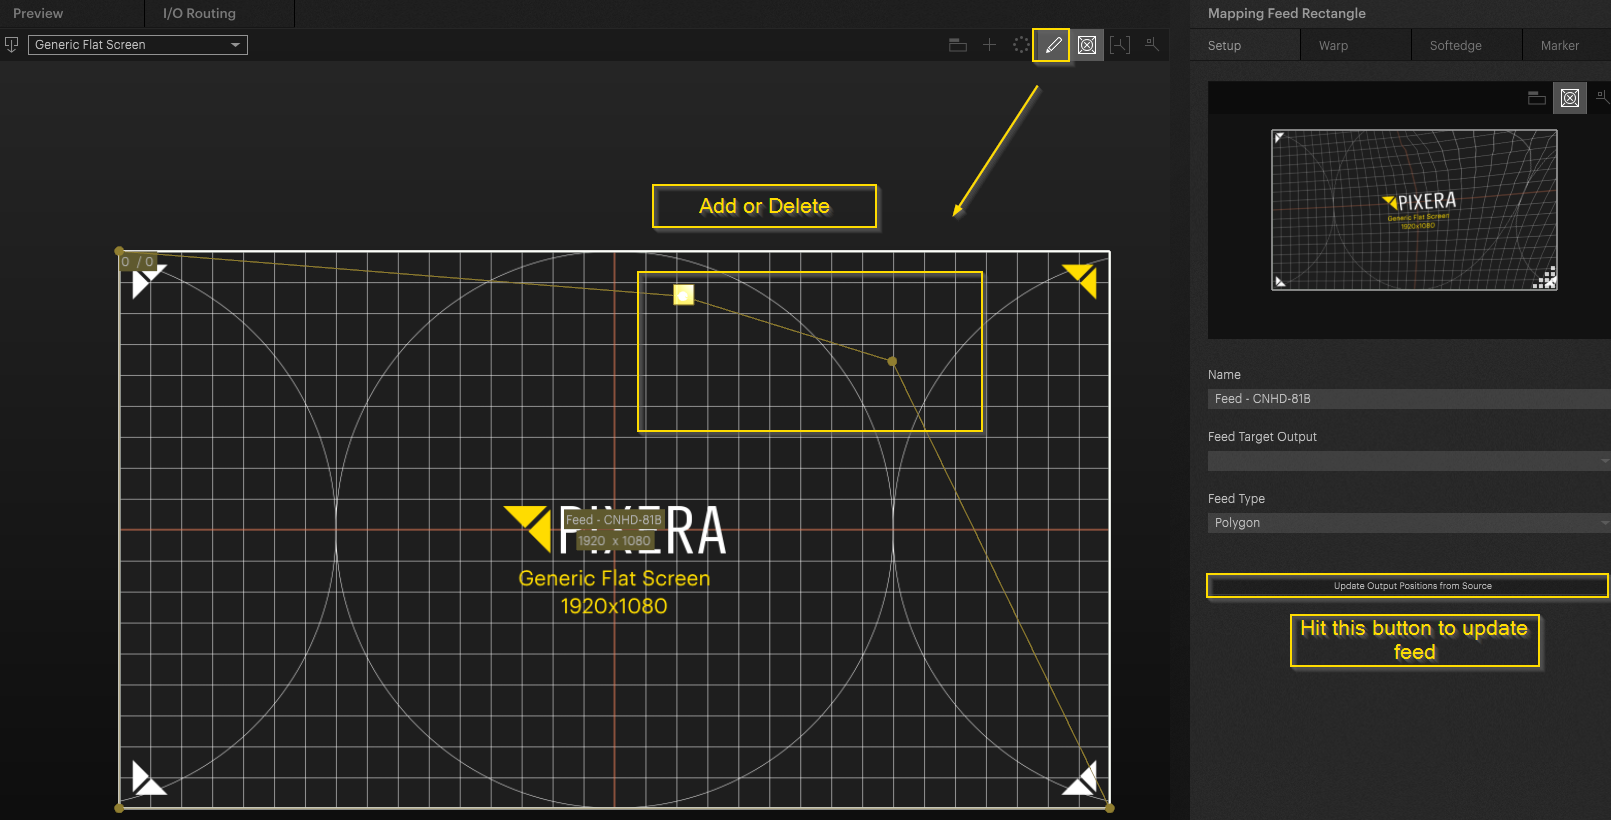
The “Edit” pencil icon can now be used to switch to Edit mode. Here, it is now possible to create additional points or delete existing points.
Example - Dodecahedron
Here is a practical example of dodecahedron texture mapping without using the 3D model.
For this example, a texture map of the dodecahedron is imported. The goal of this example is to illustrate how Polygonal Warping can be used.
The content is imported in the Compositing tab and placed on the screen used.
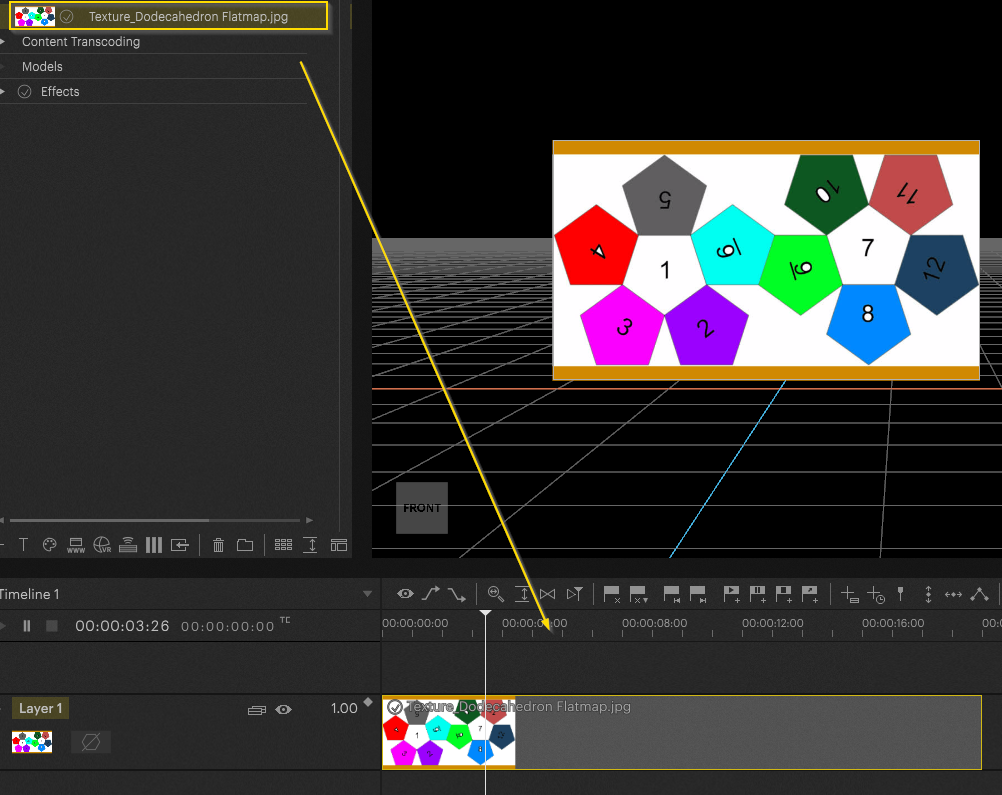
In the “Warping” tab, the steps already described are now carried out to achieve the desired settings.
In our case, we will now cut out a part of the texture to be able to edit only this part of the output feed for warping.
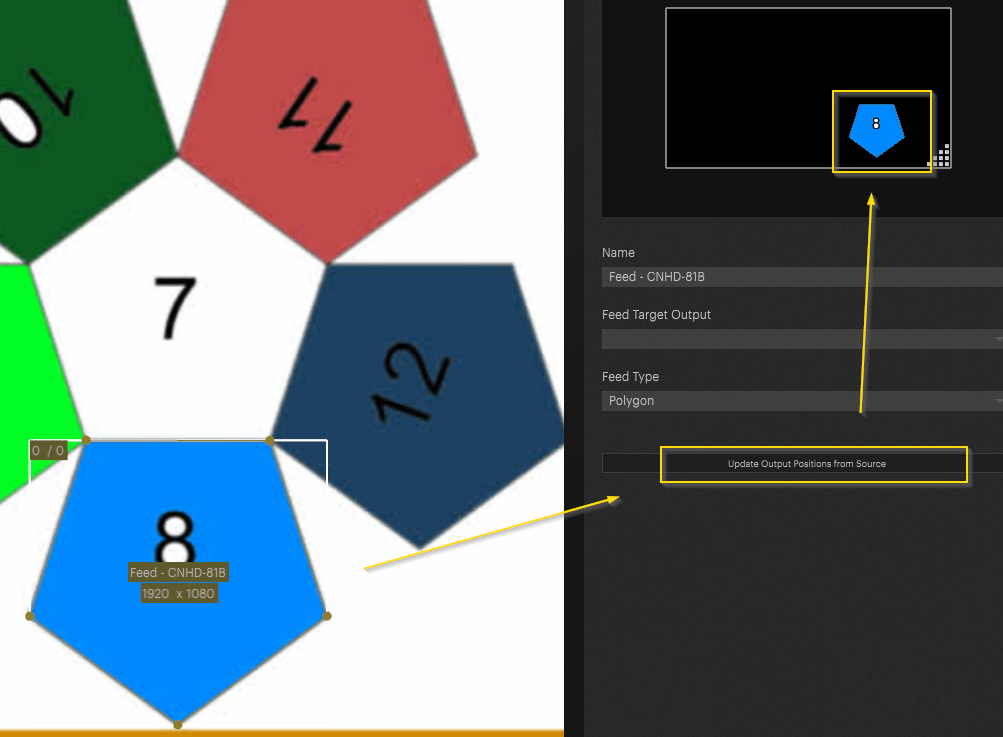
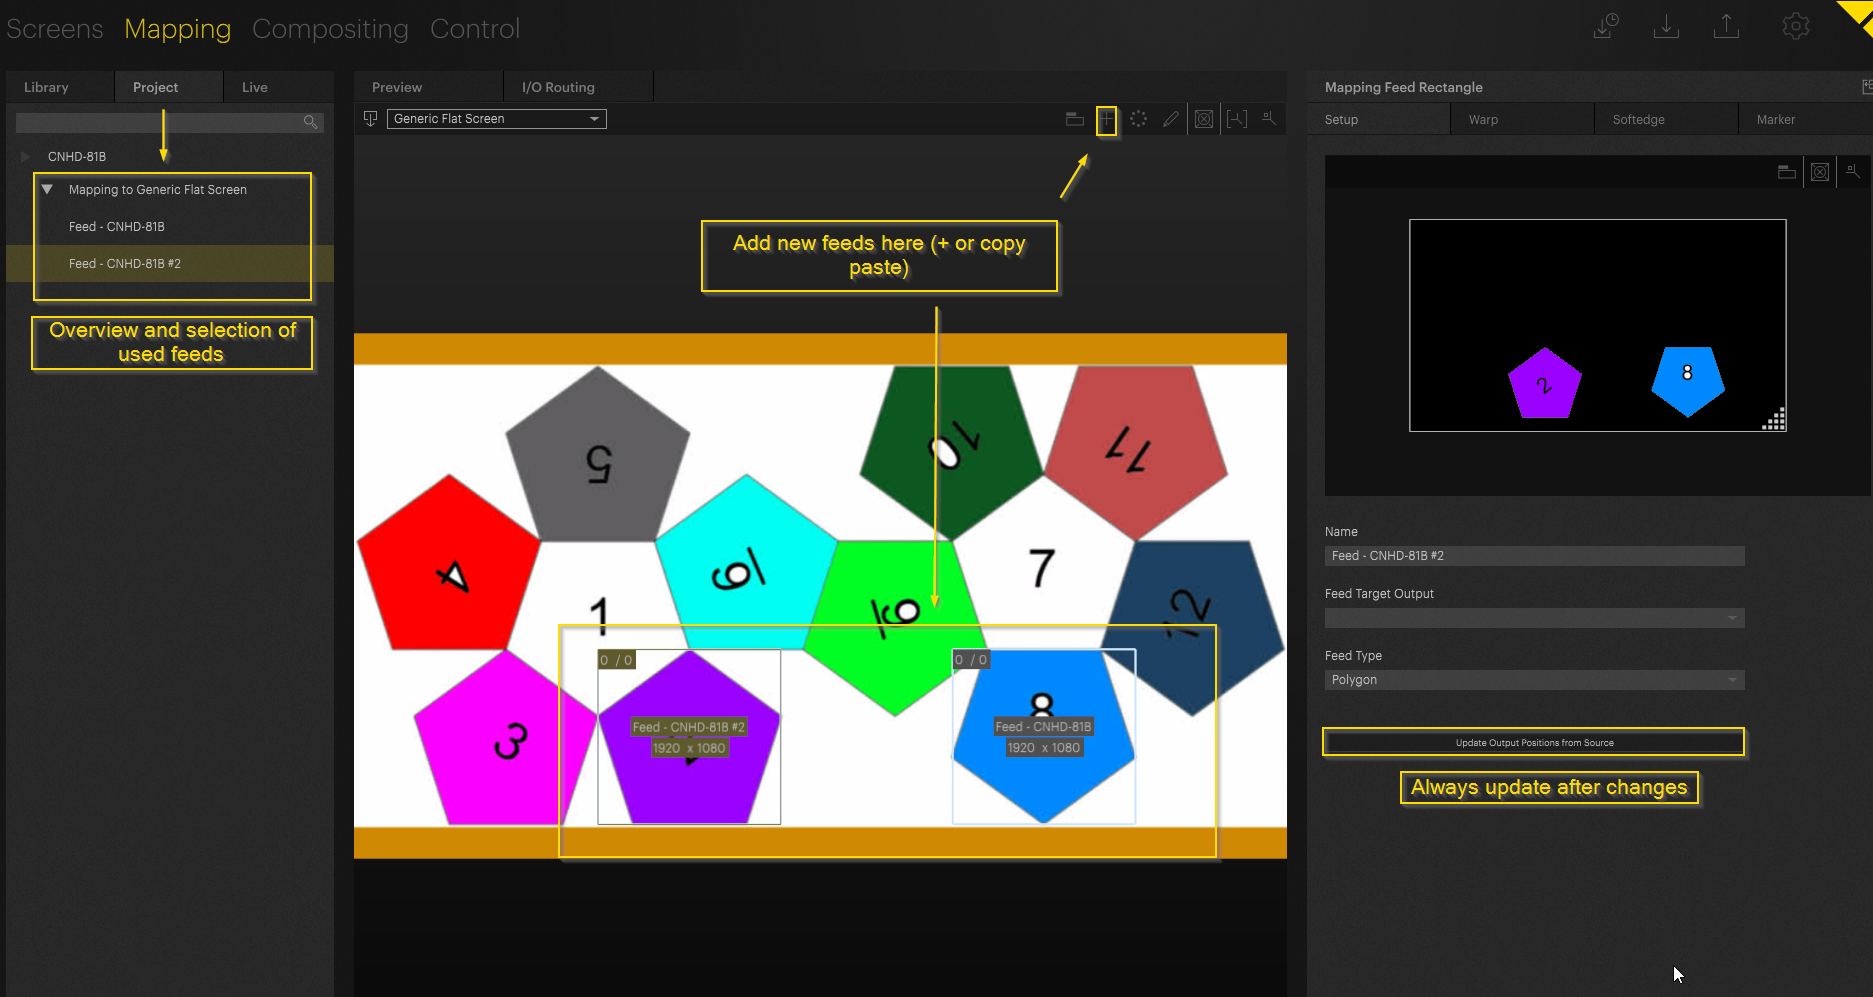
In this case, multiple feeds will of course be necessary. Additional feeds can be created via the + icon at the top of the settings, or via a simple copy + paste (CTRL + C then CTRL + V).
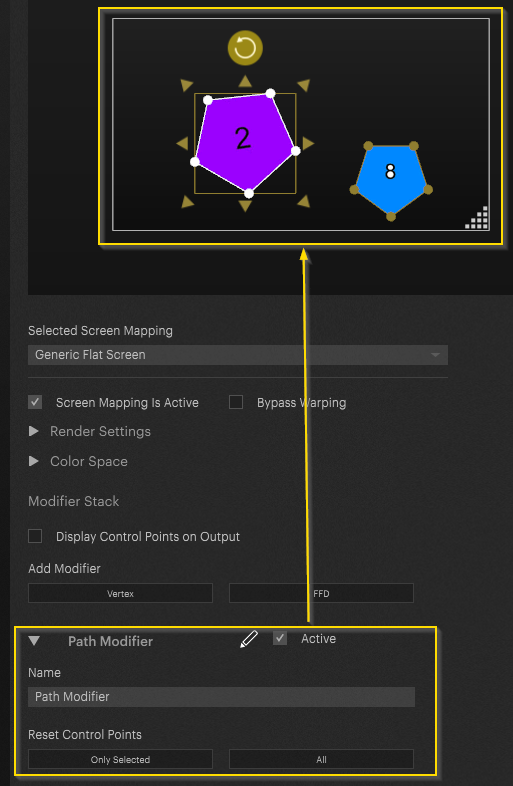
Now you can return to the workspace view. Here, the warping - feeds can now be edited independently of each other.
PIXERA 2.0.230 | 2 January 2025 | CL
 Contact Us


