 Contact Us


It can happen with Deltacast cards that a firmware conflict occurs, especially if you reinstall a Deltacast driver.
In this case, it can happen that the Deltacast card is no longer visible in PIXERA or in the Device Manager, but this does not necessarily mean that the card is defective.
In this article, you will find instructions on what can be helpful in such a case.
Failsafe Procedure
Restoring Deltacast Card Firmware
Introduction
It is common for DELTACAST.TV customers to update cards’ driver in order to benefit from the last product's features and fixes. The drivers update generally implies an update of the firmware hosted on the card. As explained in the Installation Guide, this firmware update is done in background during the driver loading.
If for any reason the firmware update is interrupted (power outage, system malfunction etc.), the firmware on the card can be corrupted, leading to a non-detection of the card by the operating system upon the next computer restart.
The failsafe procedure allows the user to restore a proper firmware on a DELTACAST.TV card.
The different steps to achieve the firmware restoration are listed below.
Procedure steps
1. Shutdown the system and remove the card.
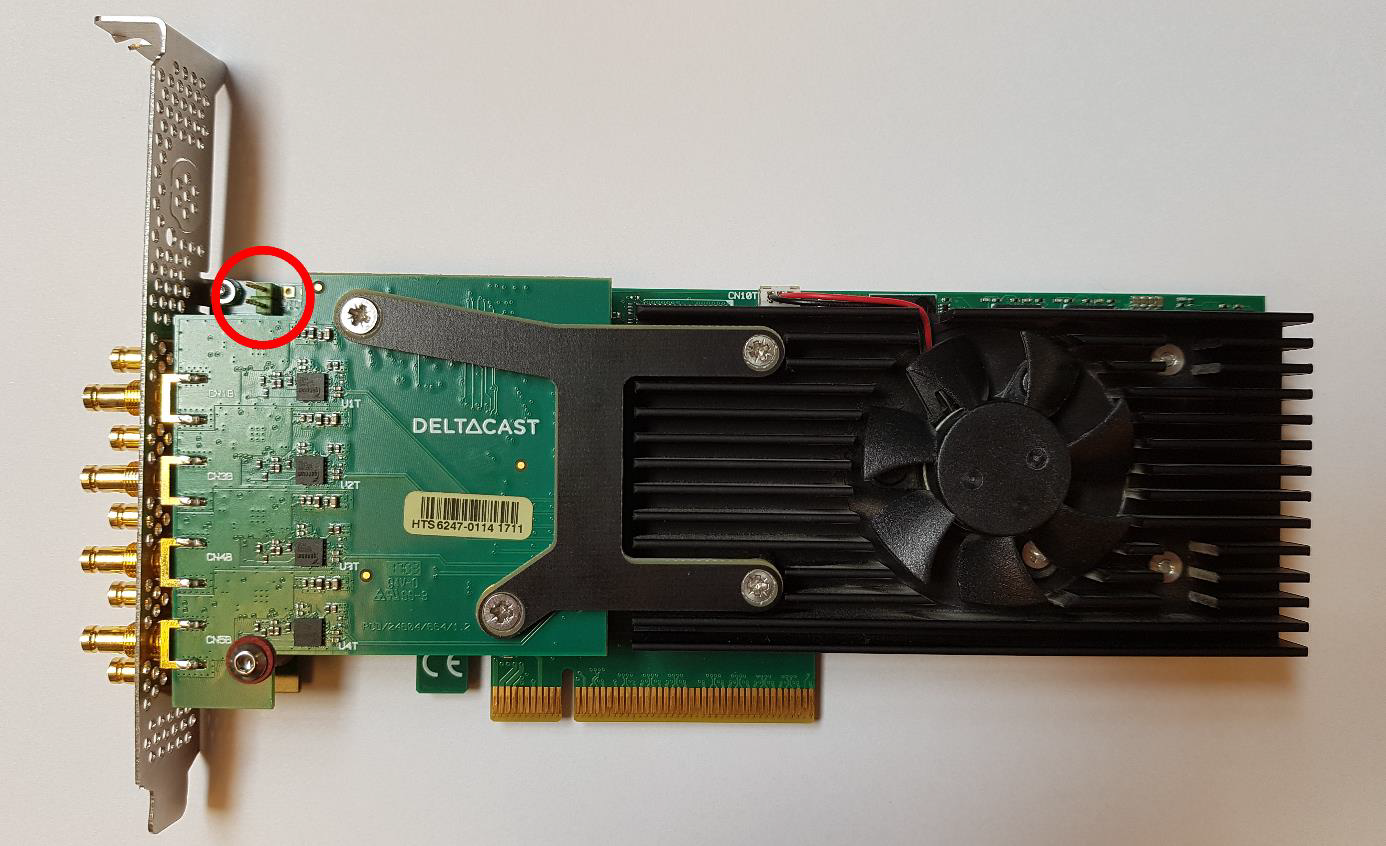
2. Put a jumper on the failsafe connector, or set the dipswitch in its failsafe configuration (the connector location depends on the card model, please refer to the card picture in the “Connector Location” chapter)
3. Put the card back in the system and power it on.
4. During driver loading, which is automatic under Windows, a fresh copy of the firmware will be restored onto the card. This operation can take a couple of minutes, do not shutdown the system during this step.
If no driver loads, please reinstall it like explained in the DELTACAST Installation Guide. This document is provided with the SDK or can be retrieved from the DELTACAST download center: https://www.deltacast.tv/support/download-center
5. Once done, shutdown the system and unplug the DELTACAST card
6. Remove the jumper or set back the dipswitch in its normal configuration, plug the card back, and boot up the system. The card is now visible and functional
CONNECTOR LOCATION (EXAMPLES)
DELTA-3G-ELP-D 8C and similar models: located near the bracket
DELTA-h4k-elp 20 and similar models: located at the rear of the card, next to the heat sink corner

DELTA-12G-elp-h1c and similar models: located at the back side of the card, next to the bracket fixation

If you are unsure about carrying out this process yourself, please contact our PIXERA support team and we will help you.
Deltacast V2.25 | 26. August 2024 | A.L.