 Contact Us


Table of Contents
Scripting IDE and Block BuilderCreating a PAUSE Button with the Block BuilderUsing Conditions in the Block BuilderCreating a PLAY/PAUSE Button in the Block BuilderScript your first ActionCoding a STOP ButtonCoding a PLAY/PAUSE ButtonAction Input and OutputCoding a Cue SliderExpanding your Actions
Until now, Actions had no real purpose other than forwarding values and acting as connection points for Buttons. However, Actions can execute whole programs and control many different things at once. All previous examples could have been realized in just one Action without the need of drawing a wire mesh, which can become confusing over time.
There are two tools in Control for defining the functionality of an Action. The first one is the Scripting IDE which support LUA as a scripting language. The second one is the Block Builder, which is a graphical representation of the Scripting IDE. Instead of writing code, blocks of commands can be connected with each other to define the behavior of the Action. It allows a fast realization of simple tasks, but is usually not sufficient for advanced projects.
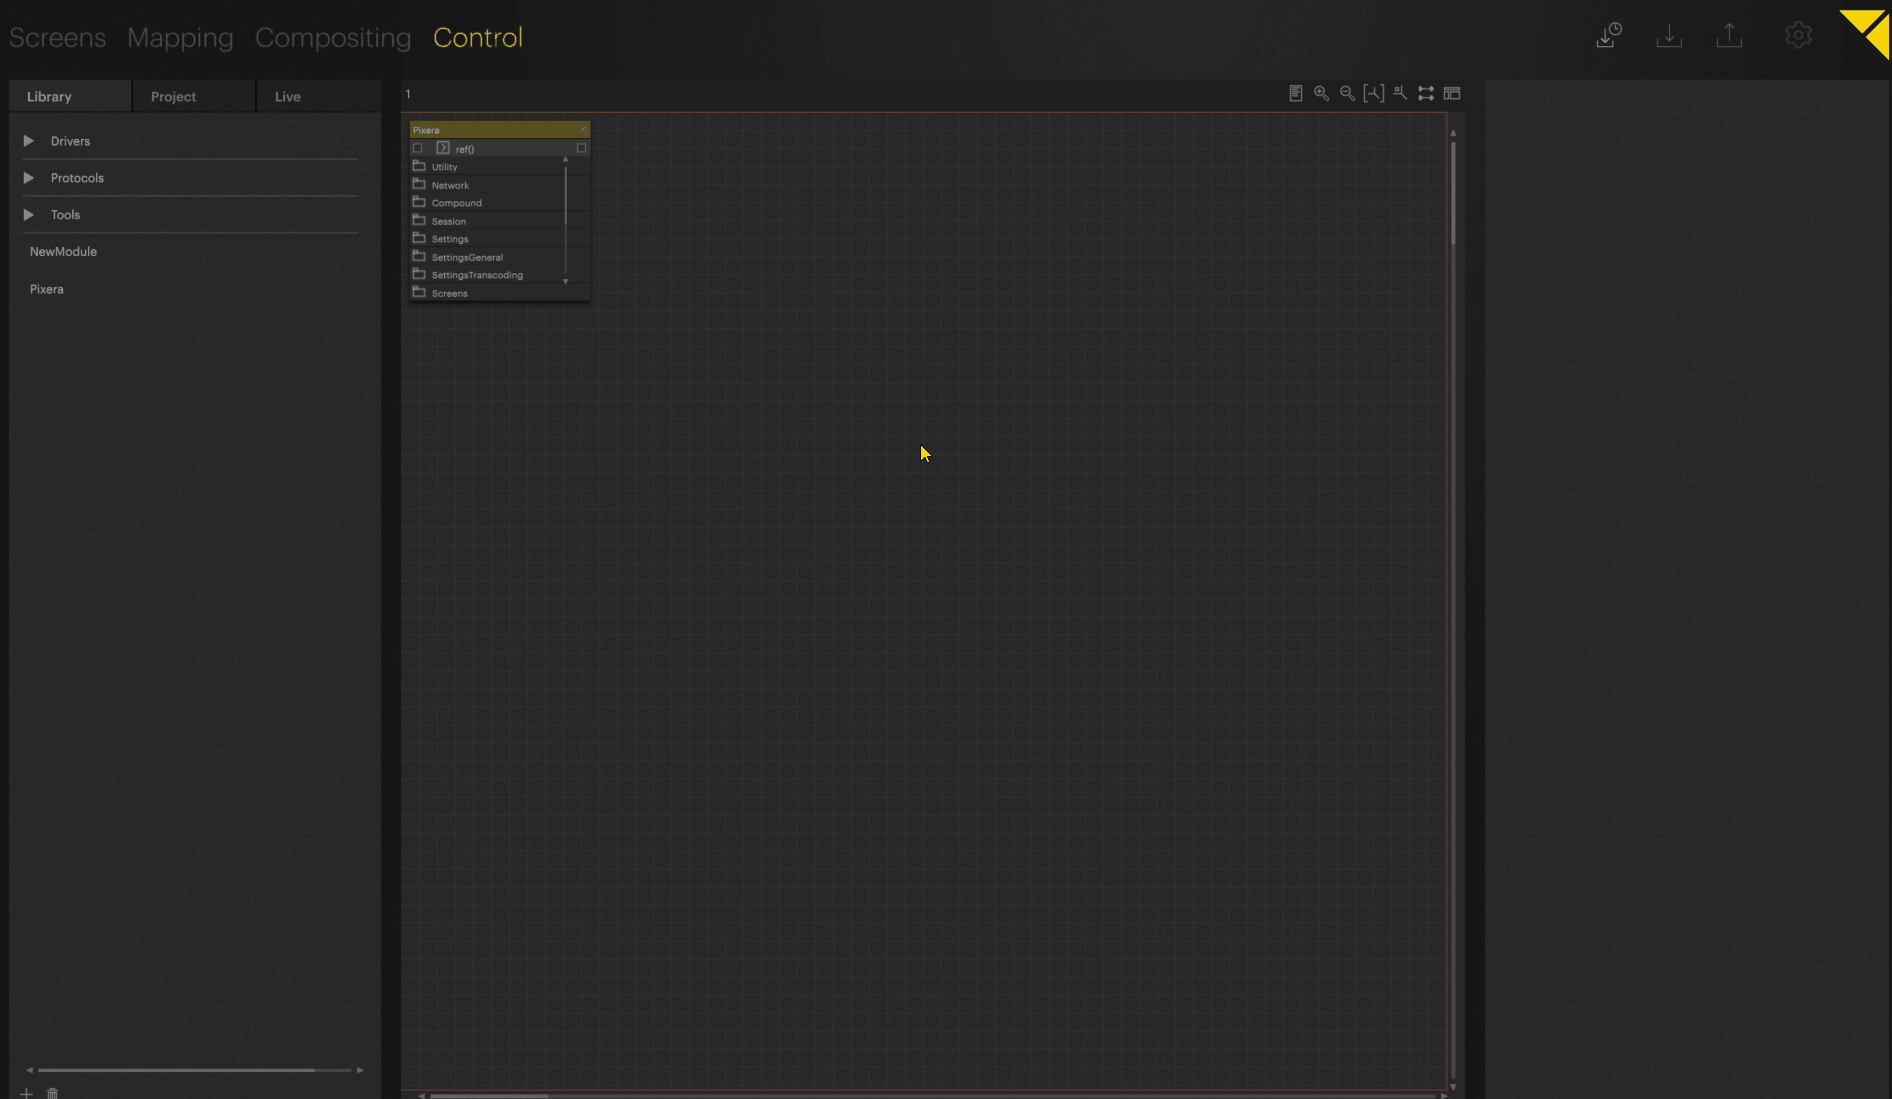
Scripting IDE and Block Builder
To open the Scripting IDE or the Block Builder, just click on the Action. On the right side a text editor will show up (the Scripting IDE). You can switch to the Block Builder by clicking on the text symbol.
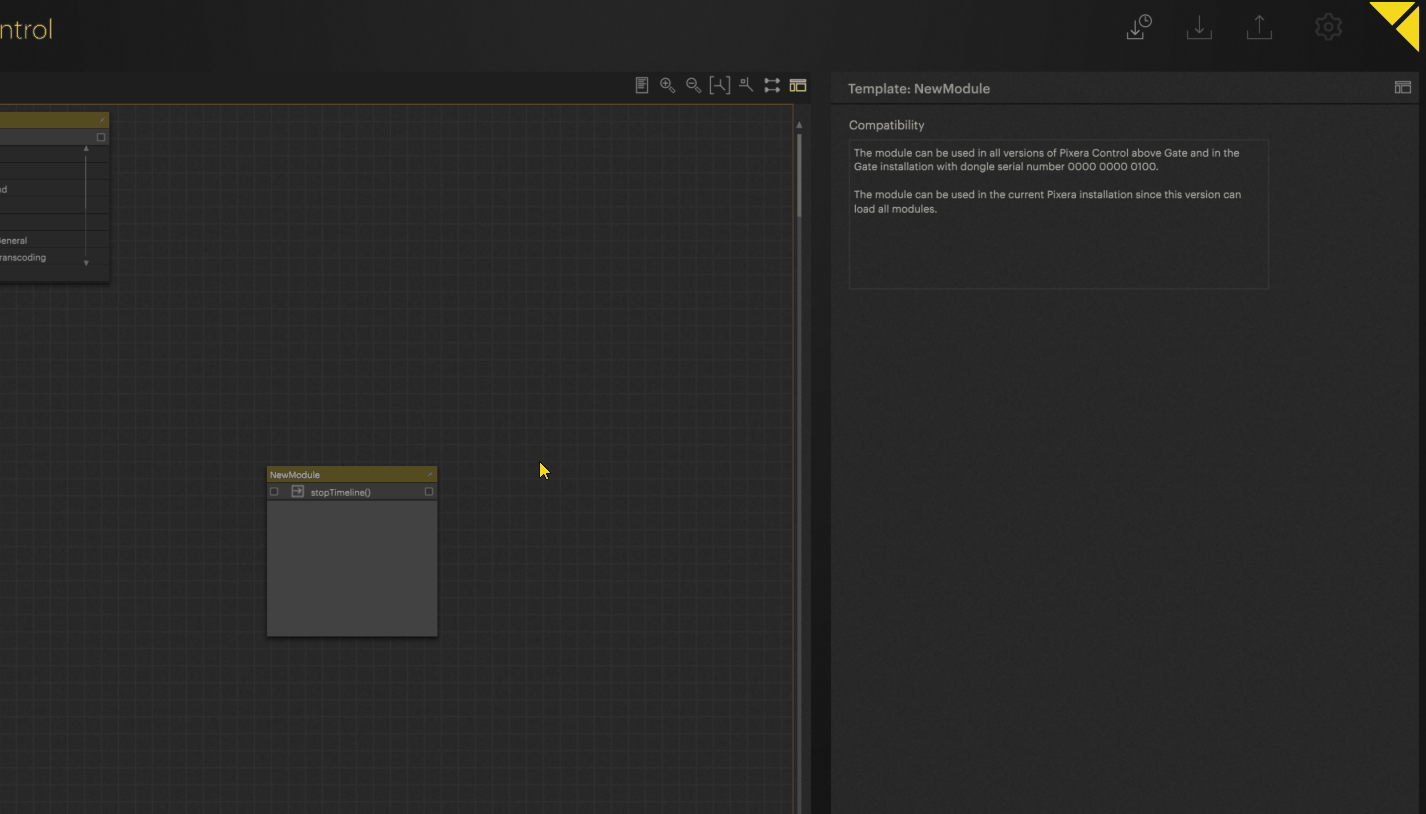
Creating a PAUSE Button with the Block Builder
- Create a new Module with an Action called “pause()”.
- Select the Action and open the Block Builder.
-
Click on the “+” – sign to create a new command. Choose:
Pixera → Timelines → Timeline1 → pause.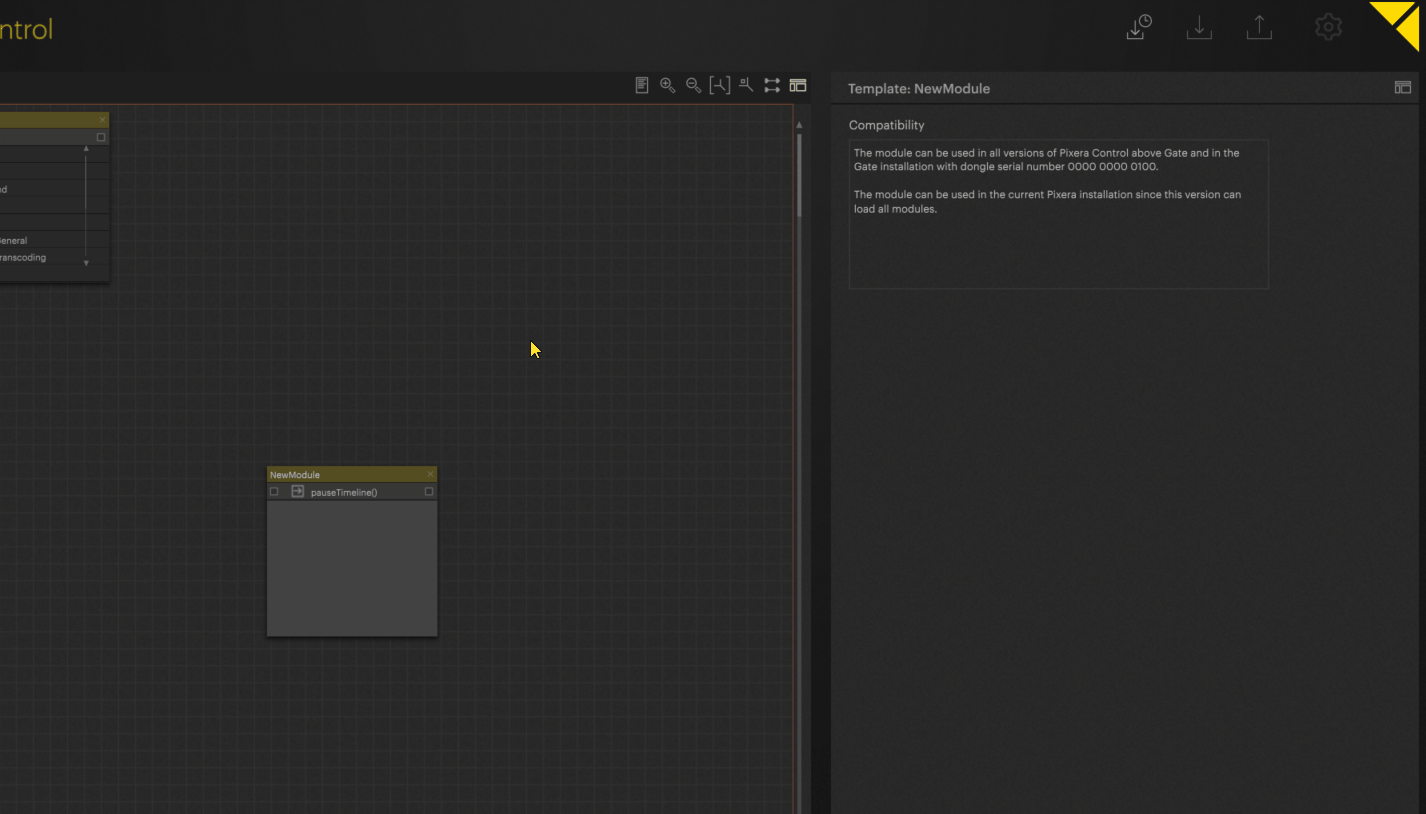
4. Save your changes in the Block Builder.
5. This does basically the same as drawing a wire from your Action to the “Pixera” Module and connecting it to the “pause” property of the timeline.Connect your Action to a Button and try it out.
Using Conditions in the Block Builder
Often you don’t just need to trigger something, but you need to trigger something when something else happens. This can be realized by using conditions. The easiest one is the “if”-statement. It will execute the next command IF its condition has been fulfilled.
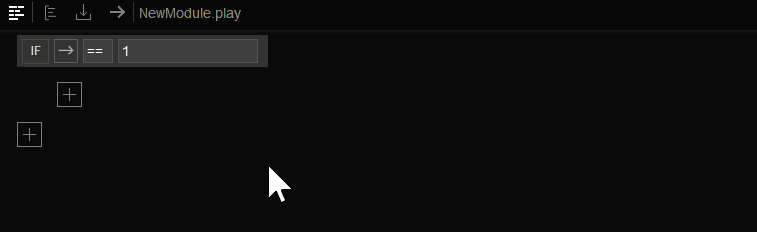
To create a Condition, right click onto the plus symbol and select “Add Condition”.
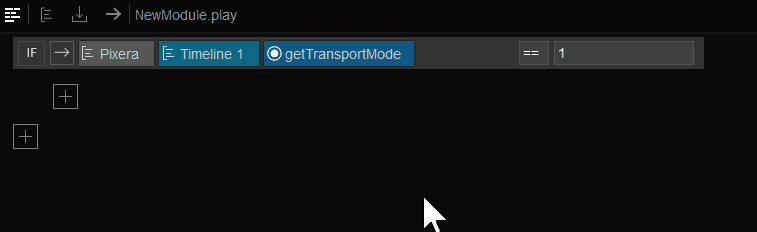
The text field on the right (“true”) defines the condition. The “double equal” symbol means “expression on the left is equal to expression on the right”. Currently the “expression on the left” is not defined. Click on the arrow to add it.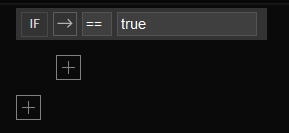
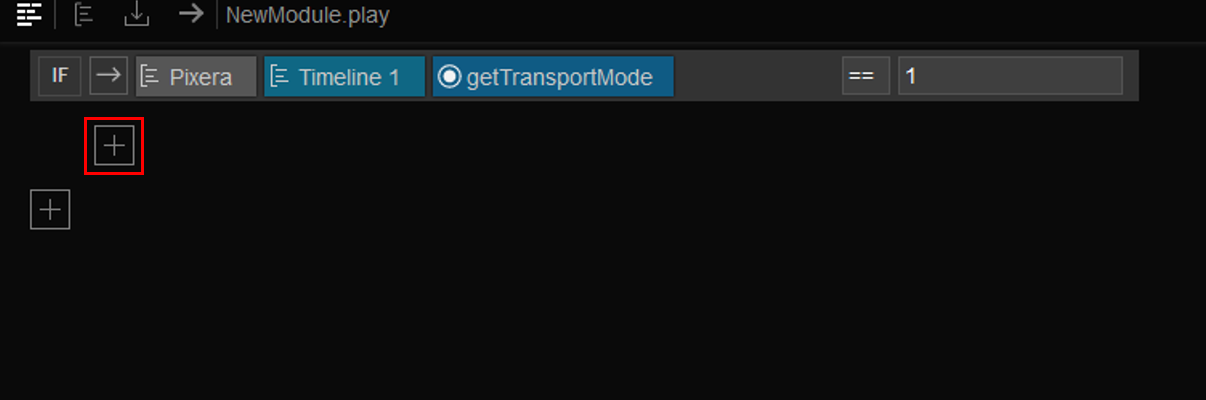
In this case, we want to get information from the timeline and choose the transport mode. The transport mode tells us if the timeline is currently playing, is paused, or stopped.
The transport mode can have three values:
Play = 1.0
Pause = 2.0
Stop = 3.0
The current condition will execute the next command if the transport mode is playing. To define this conditional command, press on the indented plus symbol.
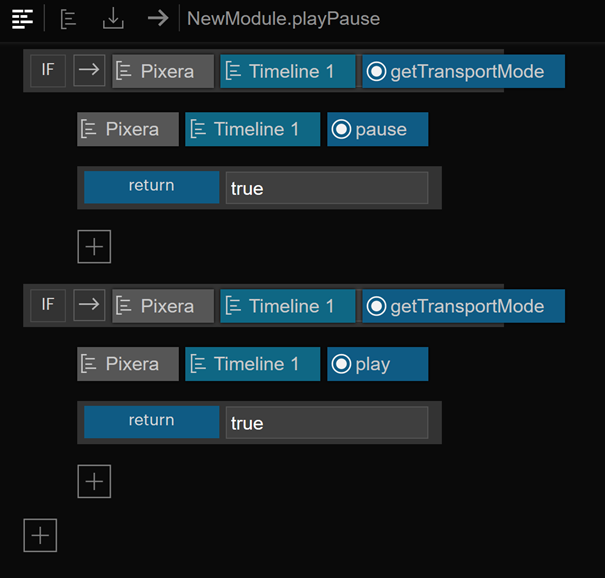
If the command is executed, we know the timeline is currently playing, so we want to pause it. Therefore, we are calling the pause property of the timeline.
Creating a PLAY/PAUSE Button in the Block Builder
Script your first Action
Most projects can be realized using only the Block Builder, but there are some situations where this tool finds its limits. For instance, it is not possible to define variables in the Block Builder, therefore Control has its own Scripting IDE. Scripts are written in LUA, a lightweight programming language comparable to Python. Thus, complex projects can be realized in a quick and straightforward manner.
Traditionally the first thing to do when learning a new programming language is displaying “Hello World!” on the screen. Therefore, we need to use the Log which is used to monitor the execution of your project. Data from your Actions (e.g., warnings and errors) are shown in the Log. To open it, press “Show Log” in the upper right corner above the viewport. You can choose the position of the Log on the screen.

-
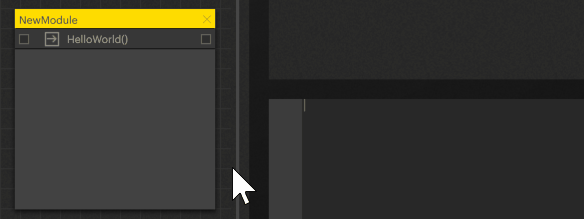
Create a new Module with an Action named “HelloWorld()”.
-
Open the Scripting IDE.
-
Type the following line into the editor.
pixc.log("Hello World!")This line will send the text in quotation marks to the Log, which is part of “pixc”.
-
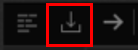
Save your code by clicking on the save symbol in the IDE:
- When executed, the Action will display the line “Hello World!” in the Log.
Coding a STOP Button
-
Create a new Module with an Action called “stop()”.
-
Open the Scripting IDE and write the following line into the editor:
Pixera.Timelines.getTimelineAtIndex(0).stop() -
What does this line do? At first we are calling the “Pixera” Module, opening the Timeline folder and can now choose a timeline. For choosing a timeline, we are using “getTimelineAtIndex(0)” which will return the timeline to index zero. Since the indices are zero-based this gives us the first timeline. Then we are calling stop() and the Action is finished.
-
Save your code in the Scripting IDE.
- We triggered the Action, which will now stop the timeline and reset it to 00:00:00.
Coding a PLAY/PAUSE Button
Moving to a slightly advanced example, we want to play and pause the timeline with a single Button. This means we want an action that starts the timeline if it is not running and pauses it if it does. To achieve that, we must again use Conditions.
-
Create a new Module with an Action named “playPause()”.
-
Open the Scripting IDE.
-
At first, we need to know the current transport mode of the timeline. Since we’ll need this information a few times, we are going to save it in a variable called “mode”:
local mode = Pixera.Timelines.getTimelineAtIndex(0).getTransportMode()
The keyword “local” before the variable name means that it is only valid in the current Action. If you don’t use it, you’ll be able to use this variable in every Action inside this Module. This can be helpful but will often lead to problems. For instance, when creating a variable of the same name in another Action.
-
Now we need the first condition: “If timeline is playing then pause it”. For which we are using the following line:
if mode == 1.00 then
    Pixera.Timelines.getTimelineAtIndex(0).pause()
-
If this is not the case, the timeline is paused or stopped, and we want to play it. This means we are searching for a command that says: “Else play the timeline”. Which looks like this:
else
    Pixera.Timelines.getTimelineAtIndex(0).play()
end
Please note that each “if”-statement needs an “end”.
-
The complete code looks like this:
local mode = Pixera.Timelines.getTimelineAtIndex(0).getTransportMode()
if mode == 1.00 then
    Pixera.Timelines.getTimelineAtIndex(0).pause()
else
    Pixera.Timelines.getTimelineAtIndex(0).play()
end
- Save your code in the Scripting IDE and execute your Action.
Action Input and Output
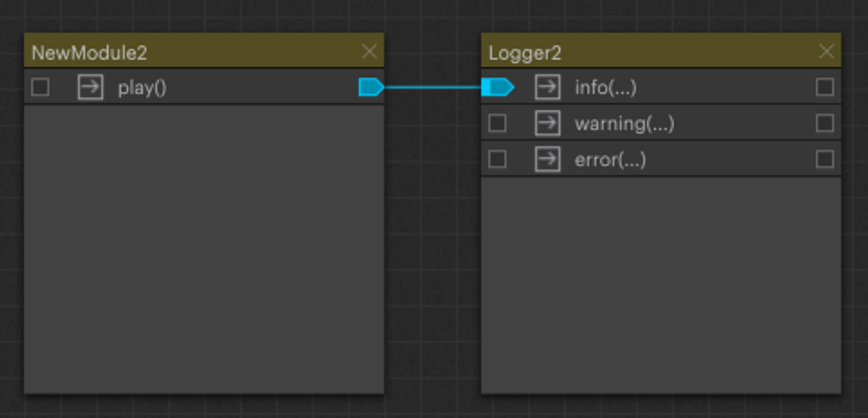
Every Action can both receive and send multiple values, which we call Input and Output. The default setting is that “everything that goes in comes out”. For instance, if you name your Action “play”, Control will create the Action “play()”, which we connect to a Logger Module that displays the Output of an Action.
This Action has no defined input variable – signified by the empty parentheses - and therefore all input values are directly channeled to the output. This setup may be sufficient when used to e.g. pass slider data, but not if you want to modify the input values inside your Action. Therefore, we must define input variables. This is simply done by naming an Action “play(x, y, z)”. The Action now possesses three input variables called x, y and z, which allows us to address the input values by these names.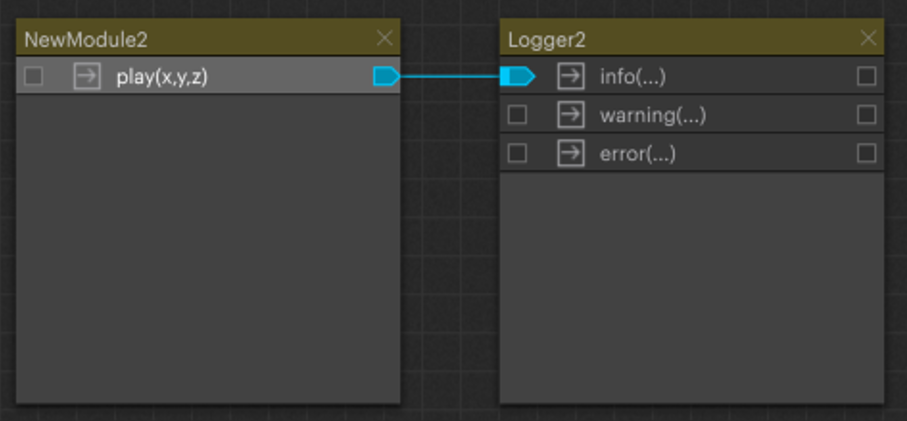
The Output behavior can be modified by using the following command, which we write into the Action.
pixc.callRefs(y)“callRefs(y)” defines that only the input variable “y” is passed to the Output, which can be tested with the “Run”-operation, by passing 3, 4 and 5 to the Action. Now only 4 should be forwarded to the Output.
However, sometimes it can happen that you must process your input variables, but you don’t know the number of variables you’ll need. In that case the three dots (…) come in handy. They function as a placeholder for a variable number of arguments. Just rename your Action to “play(…)” and modify “callRefs()” to:
pixc.callRefs(...)This will forward all input values to the Output and is basically the default behavior, but if you want specific values from the one-based input stream use:
local table = {...}
pixc.callRefs(table[1], table[7])
This will forward the first and the seventh value of all input values to the Output.

In some cases, you might even need an Action that receives input but doesn’t send Output. This can be realized with the following command:
pixc.suppressCallRefs()
Now all Output of the Action is blocked:
Coding a Cue Slider
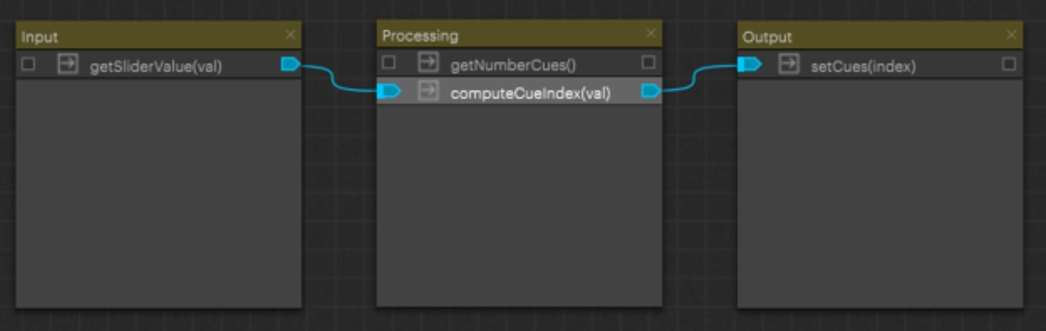
Our next project is a slider that allows us to switch between all the cues on the timeline.
-
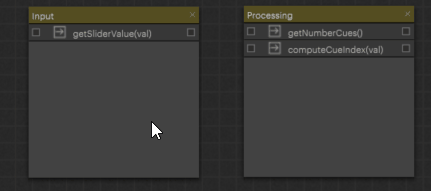
Create a new Module called “Input” with the Action “getSliderValue()”. We will only use this Action to get and forward the current Slider value, so it can stay empty.
-
Create a second module called “Processing” with two actions, “getNumberCues()” and “computeCueIndex(val)”.
-
“computeCueIndex(val)” should get the Slider value from “getSliderValue()” as Input. Therefore, we connect the Input of “computeCueIndex(val)” with the Output of “getSliderValue()”.
-
Before we can Slide through alle the cues, we must at first know how many there are.
We write the following line into “getNumberCues()”:return Pixera.Timelines.getTimelineAtIndex(0).getCues()
The action uses “getCues()” , which will get a table with all cues in it. Since other actions should be able to call this action and get its result, we must specify what exactly the “result” is. This is done with the return keyword. In this case “getNumberCues()” will return a table with all cues in it.
-
Now that we have all the cues, we need to combine this information with the current Slider value to calculate the right index. This is done in “computeCueIndex(val)”:
local noCues = #(self.getNumberCues())
To call another action in the same module, the self-keyword is used. “self.getNumberCues()” will return a table with all cues in it, but we are interested in the number of table entries. Therefore, we use the #-operator to get this information, which is saved in “noCues”.
-
Then we need to allocate an area on the slider for each cue. Since the slider has a maximum value of 100 we can just divide this number by the number of cues to get size of these areas.
local rangeSize = 100 / noCues
-
We are now going to calculate the cue index which belongs to the current position of the slider. “val” is the input Variable of the Action that is provided by “getSliderValue()” and defines the current slider-position. If we have 5 cues on the timeline, we know that the slider must be divided into 5 areas with a size of 20. When the slider-position is now 79.0 , which cue should be applied? Cue_0 lies in the area 0-20 on the slider, Cue_1 at 20-40, Cue_2 at 40-60, and Cue_3 at 60-80. Therefore, the searched index is 3.
We are now using a new Condition called “while”-loop. It will execute the next command as long as its Condition is fulfilled. In our case, the while loop adds up the area size until it is bigger than the slider-position.local currentTile = rangeSize local index = 0 while val > currentTile do index = index + 1 currentTile = currentTile + rangeSize end
-
Now we’ve found the correct index and just have to forward it to the Output.
pixc.callRefs(index)
-
Lastly, we create a Module called “Output” with the action “setCue(index)”. We connect the Output of “computeCueIndex(val)” with the Input of “setCues(index)”.
-
Now “setCues(index)” should place the nowpointer at the right cue, which is achieved by the following line:
Pixera.Timelines.getTimelineAtIndex(0).getCueAtIndex(index).apply()
- Finally, create a Slider with a Range from 0 to 100, connect it to “getSliderValue()” and test it. You should now be able to slide fast through all your cues on the timeline.