 Contact Us


With the release of version 2.0.14X, we are now updating the integration for camera-based calibration from VIOSO 5 to VIOSO 6.
VIOSO 5 is still integrated, but this solution is no longer installed automatically.
As of this release version, only VIOSO 6 will be installed automatically.
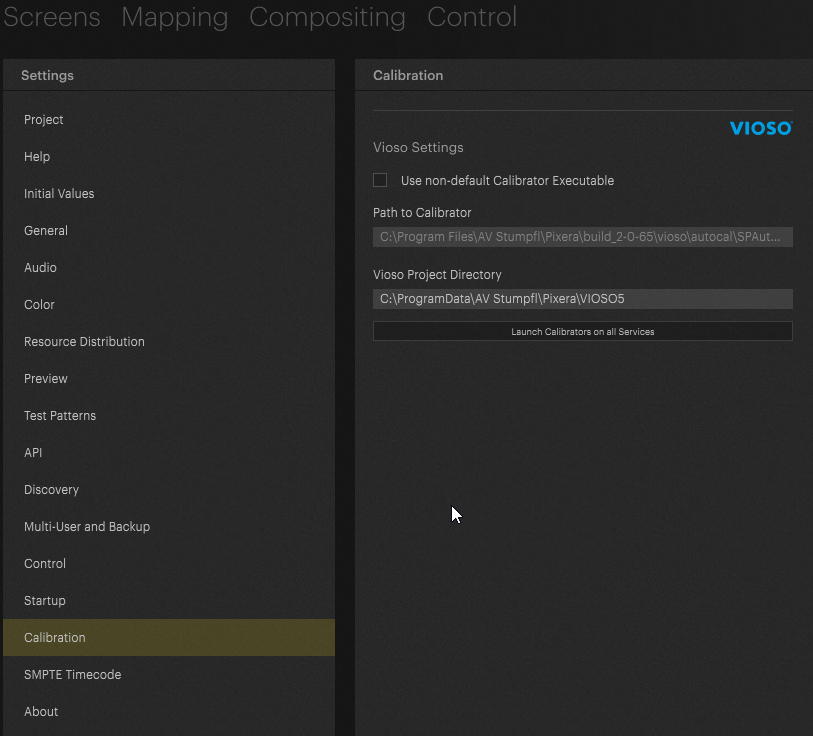
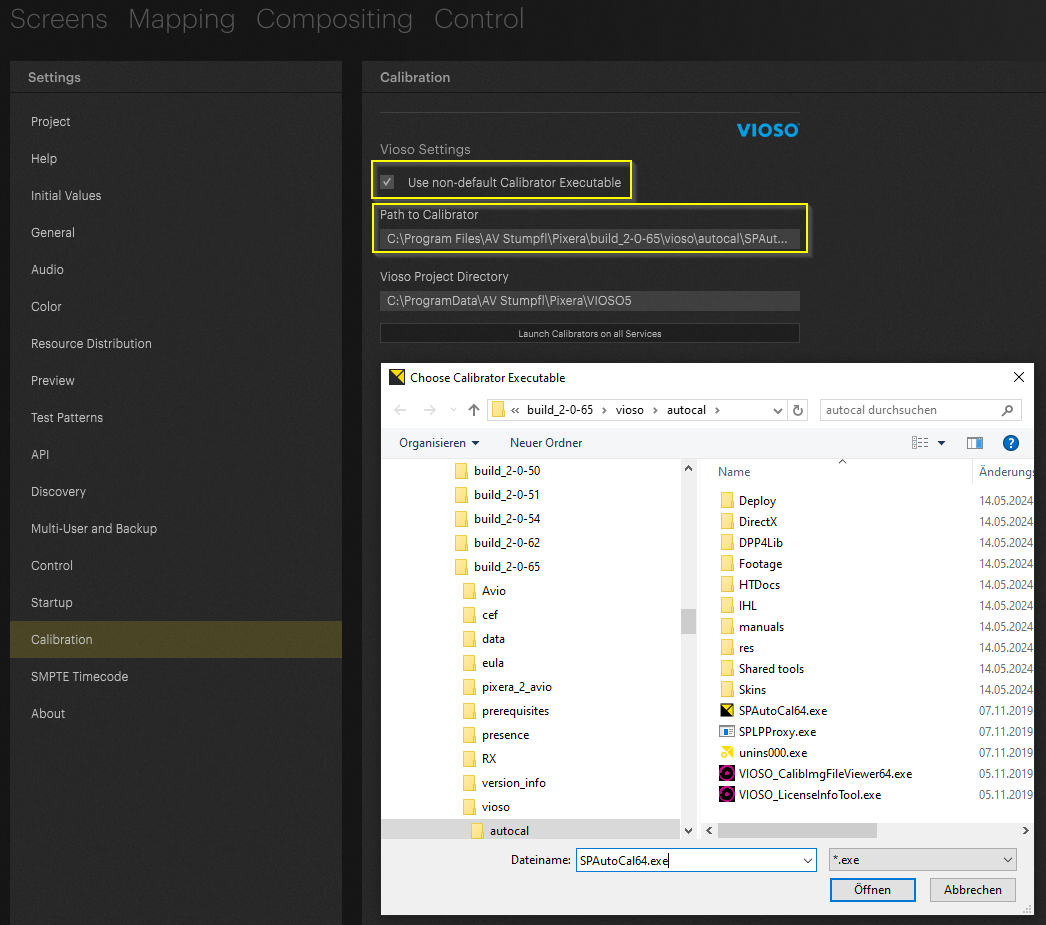
Customers who successfully use VIOSO 5 and wish to continue doing so will not have to make any changes, but the path to the VIOSO calibrator must be redefined once.
When PIXERA is started, it then detects which license is available and loads the correct calibrator when VIOSO is called up in PIXERA.
IMPORTANT NOTE
With the release of version 2.0.14xx and on, PIXERA contains only the installer for VIOSO 6.
If VIOSO 5 is needed and no old Pixera version is installed, please additionally install PIXERA 2.0.0 from the Hub's “Installs/Online/2.0” section to have VIOSO 5 available.
VIOSO 5 - End of Support
Existing and ongoing projects with VIOSO 5, such as fixed installations will continue to be supported.
However, this support service will end on December 31, 2024
For further extensions of this support please contact pro-sales@avstumpfl.com
For new projects there is no VIOSO 5 support service from PIXERA.
Likewise, only VIOSO 6 can be selected via the hardware configurator.
Licenses
VIOSO in PIXERA only works if the Pixera license dongle also contains a VIOSO license.
Dongle stacking - i.e. using a PIXERA dongle and a VIOSO dongle on the same system - is not supported.
PIXERA detects on startup the VIOSO license and select accordingly the correct integration
This automatism needs the correct paths set in the settings of PIXERA to start the correct calibrator. In PIXERA 2.0.14X by default, VIOSO 6 is set as standard calibrator.
Pixera 2.0.14X first installation on one system
In the probably rare case that someone has never installed Pixera on a system and now wants to use a PIXERA license with VIOSO 5, a PIXERA version prior to 2.0.14X must be installed in addition to the installation of PIXERA 2.0.14X.
This is necessary to have all VIOSO 5 files available on the system - VIOSO 5 is not available for PIXERA as a standalone installer.
This can be easily done via PIXERA hub
The path to the calibrator must also be adjusted afterward.
In case your PIXERA licenses contains VIOSO 5 and you want to upgrade to VIOSO 6 please contact pro-sales@avstumpfl.com
Compatibilities
VIOSO 5 Calibrations (.vwf & .sps files) are upwards compatible and can be used in VIOSO 6 without limitations
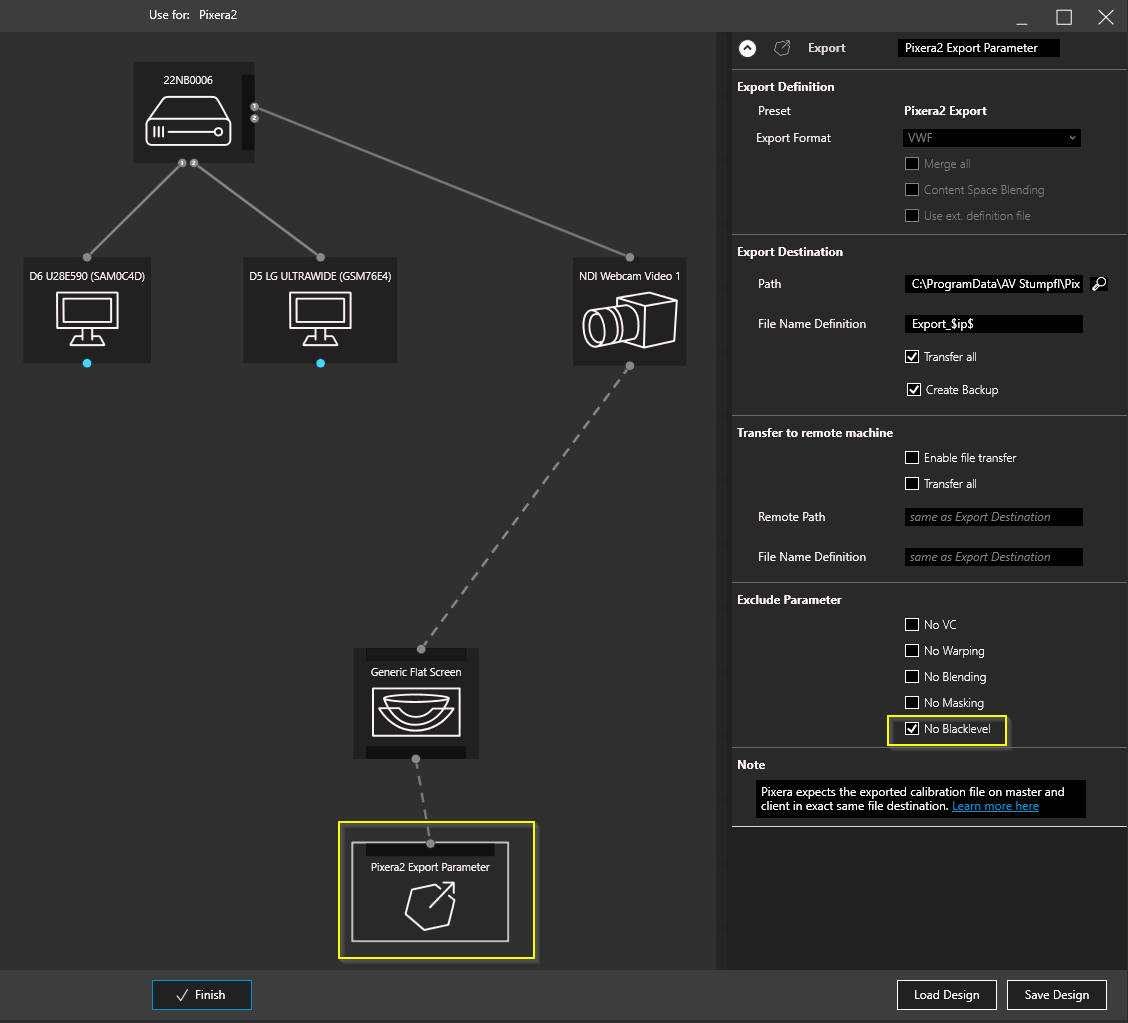
Exported VIOSO 6 Calibrations (.vwf files) are downwards compatible as long as they are exported without “Blacklevel Compensation”.
Further information Camera based calibration
For further information about camera based calibration workflows with PIXERA please read Camera based Calibration article
Before starting the Vioso6 calibration, it is important to change the Screen Settings to "Texture per Screen" like shown in the picture below

Select the Screen in the Project tab. Select a empty directory where your calibration should be stored and click Launch new Calibration

Vioso6 will open up un the Manger and on connected clients and show up the Project Designer Window:

Select the camera and choose the right camera in the inspector and adjust there values.
Select the screen to choose between 2D and 3D Surface Profile. 2D is the default mode for plane surfaces.
When selecting 3D Surface Profile, you can choose between multiple predefined and custom models.

Please note that when importing a 3D Model from PIXERA you have to set the Scale Factor to 1000 because VIOSO is working with mm instead of m.

After all settings are done, click the Finish button, and you are guided to the main menu. Next, click Calibrate button.

Follow the steps for the calibration.
A detailed overview can be found here, VIOSO 6 Overview.
After the calibration is exported, you can close Vioso calibrator and the vwfs will be automatically distributed and applied on your director and clients.
By clicking on the Edit Current Calibration button, Vioso calibrator will launch again, and you can edit your calibration. Don't forget to export again, after you are done. The Auto Recalibrate button will launch an automated recalibration without the need of any user interaction.
This can also be executed via PIXERA control.

Further VIOSO Information
For further information, help and tutorials please visit VIOSO Helpdesk - Knowledgebase
PIXERA 2.0.144 | 14 August 2024 | EF