 Contact Us


Introduction
After undergoing some changes, we have now come up with extensive options for backup. The technical setup changed quite a lot therefore this documentation had to undergo quite a few changes.
In case you have already set up a backup system and are updating to a newer PIXERA version, please read this article carefully and adapt the project accordingly.
This article is split up in three major parts:
Backup without Usage Presets
Usage Presets and their significance
General Backup and MultiUser Setup
Backup Scenarios
The technical setup of backup can differ quite extensively from product to product. Therefore, in the last section of this article, we will look at our recommended backup setups. If something is unclear don't hesitate to contact us via email or discord.
Backup without Usage Presets (simple Version)
Before doing a deep dive into Usage Presets and the benefits they bring we advise you to start setting up your system without Usage Presets. They are not mandatory. Instead of working with usage presets you can use the copy function in the backup settings:
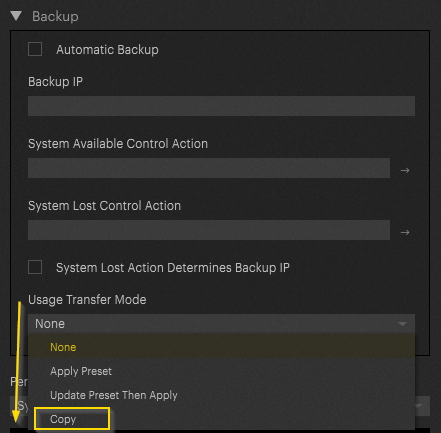
By selecting Copy under Usage Transfer Mode, Pixera will simply copy the current Config to the backup live system. This allows backup configurations to be created without having to manage Usage Presets. In many projects this may not be needed, so it is recommended to start with the Copy mode as it makes the configuration more accessible.
To test the backup process, simply right-click on a selected Client and select 'Copy (ip) local to':
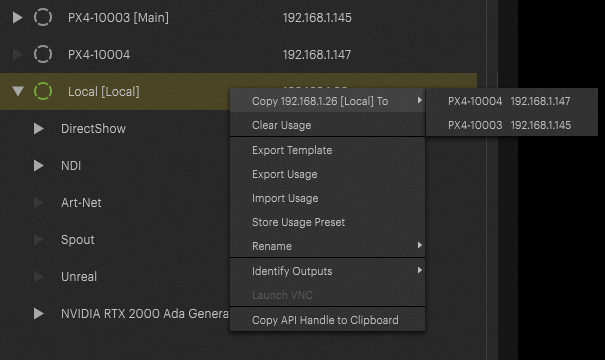
This process is the same as the one triggered by the backup settings. Technically, Pixera uses usage presets for this process. However, the management aspect of these presets is removed.
Copy will copy the current config to the backup system. When working with Usage Presets you can select from 3 more options:
None: In this case the config won't be copied. This option can be used in e.g 1:1 backup scenario, where the backup client already is configured according to the hot client.
Applied Preset: The hot systems current Usage Preset will be applied on the backup server.
Update then Apply: Pixera will first update the config of the current live system (usage presets are not saved automatically, they must be saved manually) and then apply it.
Usage Preset
Usage Presets are a powerful new tool in PIXERAs feature arsenal. They can be used for backup setups. Furthermore, they will enable new feature sets in the future.
So, what are Usage Presets?
To keep it simple, they are presets of the current Live system states. Usage presets can be individually created for live systems. It is possible to create different usage presets at different setup stages. Let's assume the live system config as of now is perfectly fine, although some changes must be tested. Simply create a new usage preset for testing. Later that day, if a return to the initial setup is needed just copy the old user preset over the used live system.
Usage preset carry the live systems settings:
Output assignment
Aggregation
Technical attributes
Artnet/NDI/Spout
Mappings
Warpings
Furthermore, Usage presets can be distributed to additional backup directory on the network. This enables very specific backup scenarios.
Usage Preset Setup
To set up Usage Presets go to the Mapping Tab and select a Live System. In the inspector Usage preset options are available: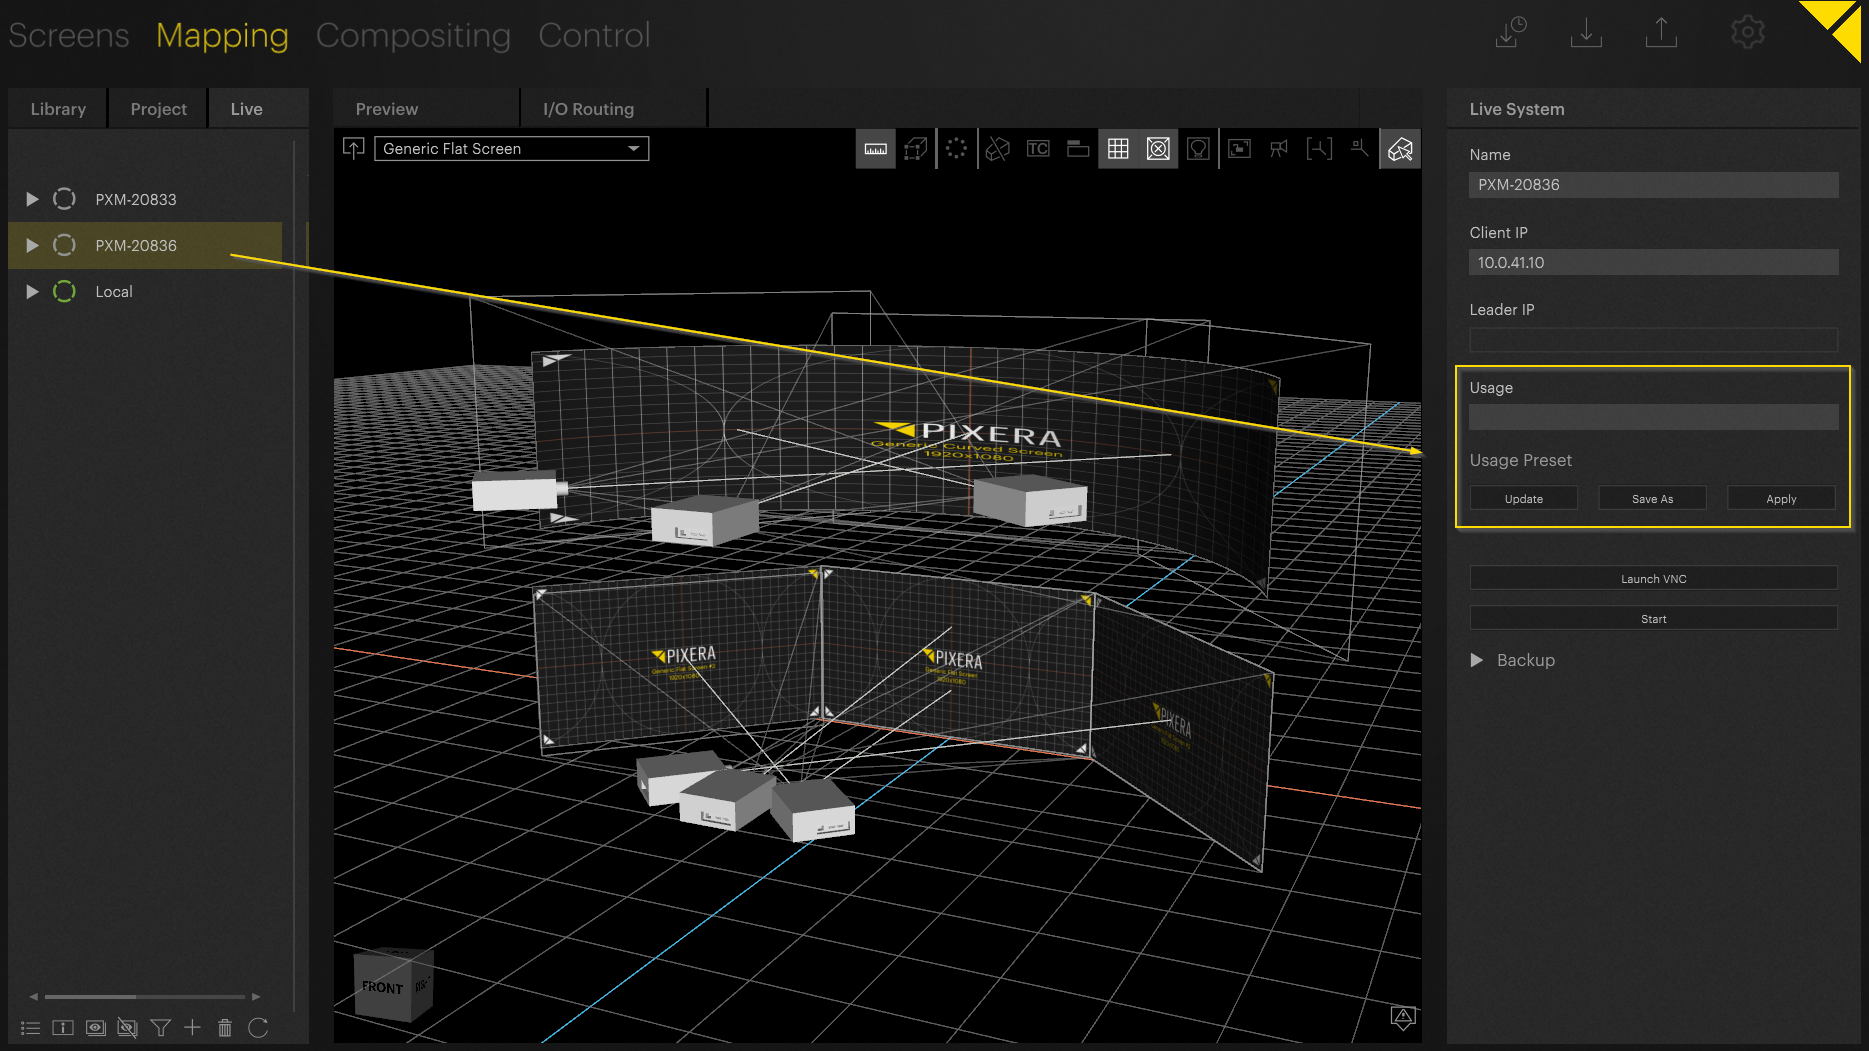
Simply add a Name and hit “update”. The Usage preset is now saved: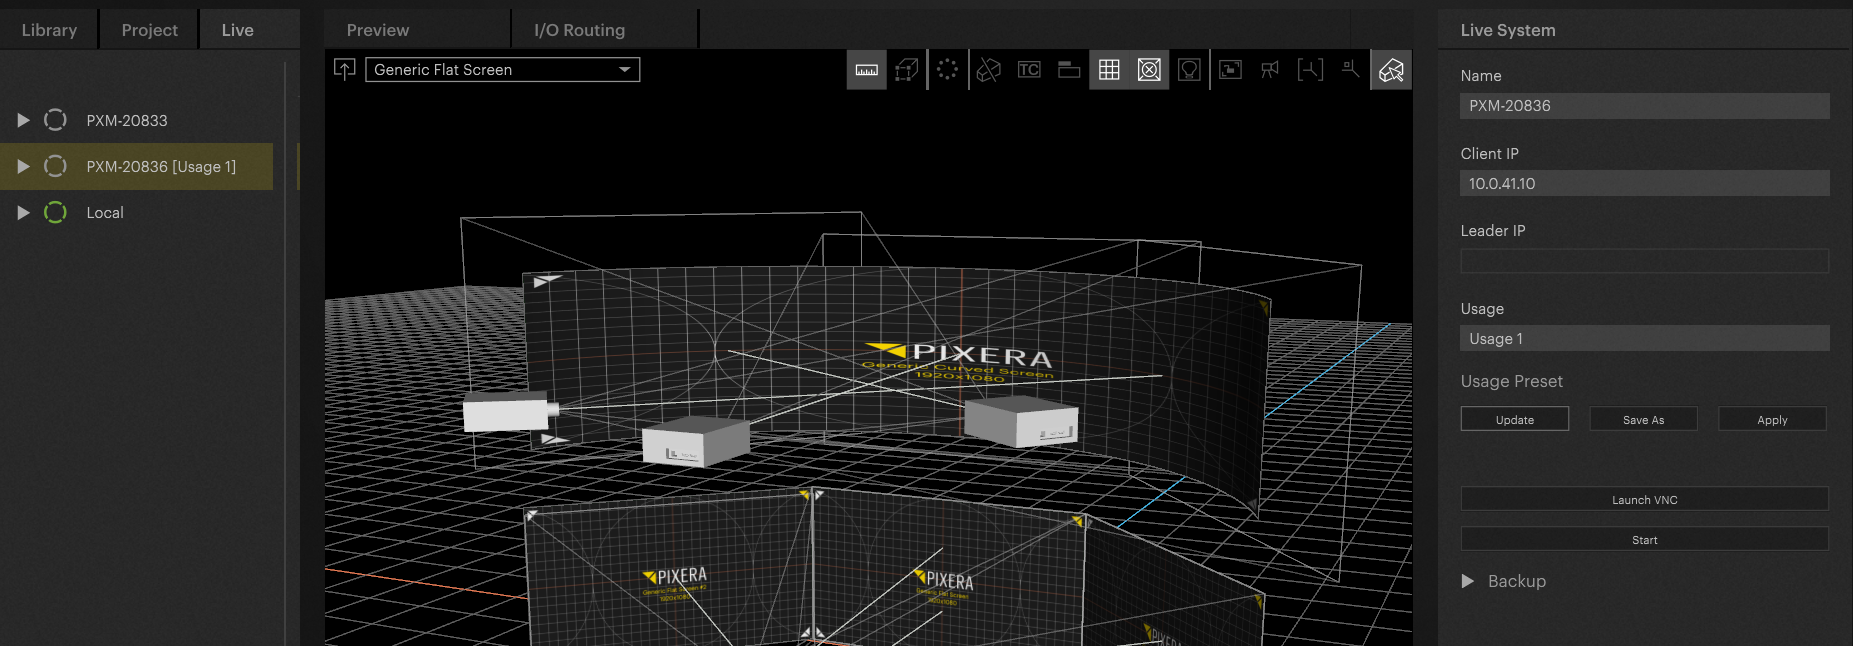
The Usage preset name is always displayed beside the live system if one is applied. Important:
Only one Usage preset can be applied at a time to a live system. However multiple Usage Presets can be created out of the config of a client. For example, Usage 1 was created in the morning to snapshot the config. Later that day, the config is changed and therefore we save another Usage preset. Simply put in the new name and hit update.
PIXERA will add the new Usage presets to the Project tab. This is where all the presets are being stored: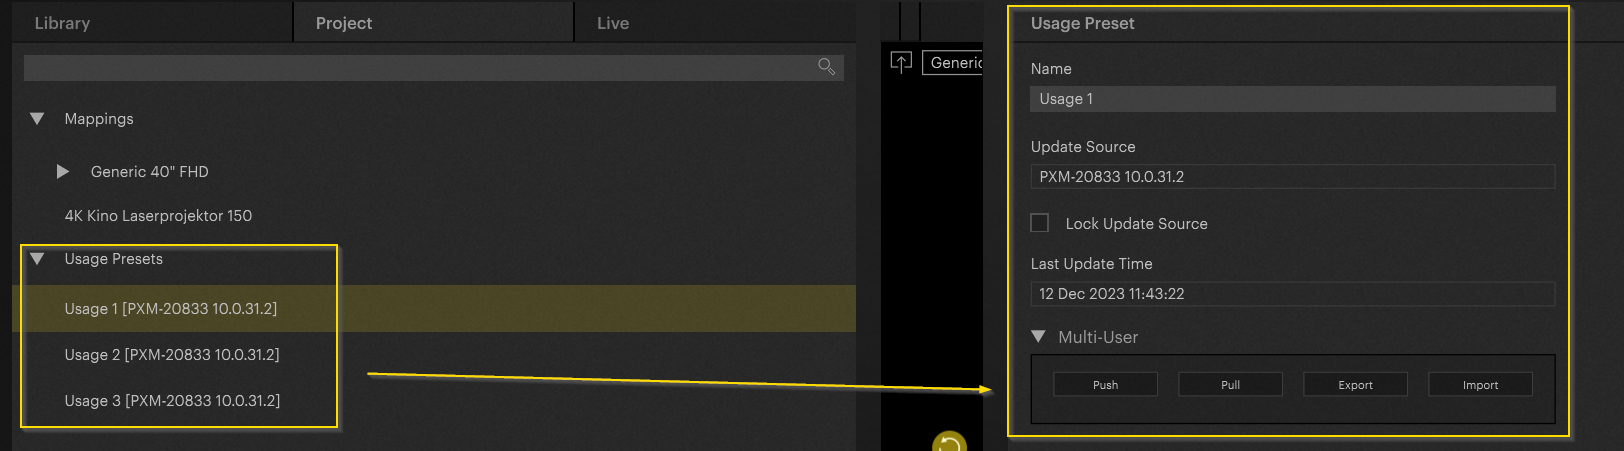
In the inspector you can find information about the selected preset. The presets can be pushed via Multiuser to additional Directors as well.
Important
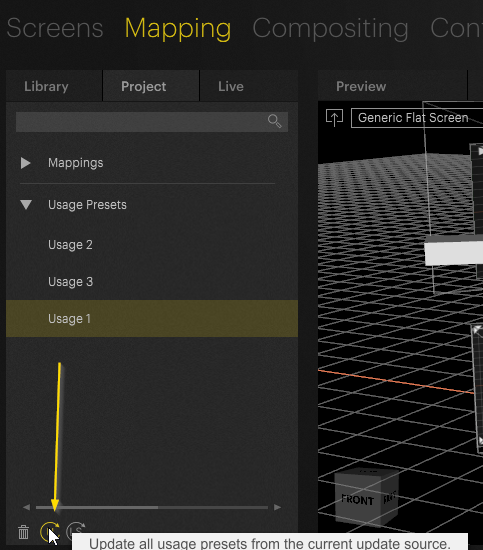
As of now Usage presets are not updated automatically. To update presets either hit the update button in the live system inspector: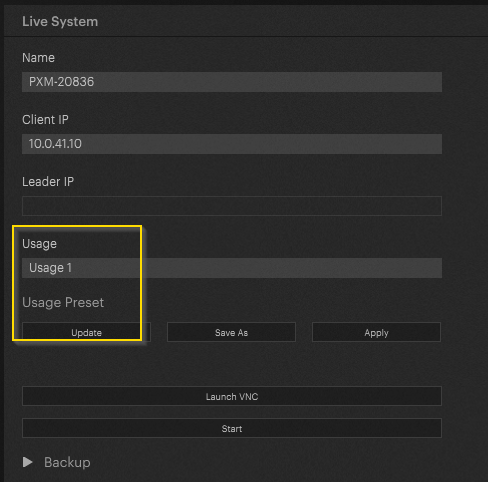
To update all Usage Presets, use the update Button in the Live systems tab:
Usage Presets and Live Systems
As already mentioned, Usage Presets functions as a form of snapshot of the currently used live system. They are saved and are stored in the Project tab within the Mapping tab. Furthermore, they can be moved to additional Director systems via Multiuser.
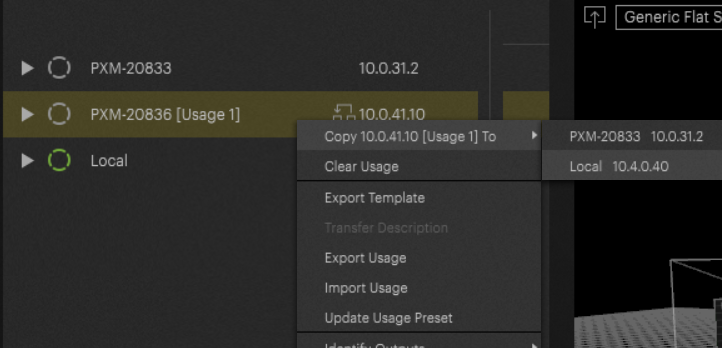
Additionally, Usage Presets can be copied to different clients:
By right clicking on the dedicated client a new option is available. This enables a copy process of the usage preset to a different client.
Important!
When executing a backup scenario, the system can be set up to copy the Usage from the currently live system onto the backup system. Depending on the Backup settings, the right-click copy process may trigger the automatic backup - if “Automatic Backup” is activated in the client settings.
When the Usage is copied from one live system to another, all the client specific settings will be transferred. The copy target will apply the output config, mappings aggregates and so on.
Important
To work, the systems must have the same graphic card Name as well as output Names. If the names differentiate an error will be displayed and the config won't be applied.

Usage Presets and Backup
Usage presets are the fundamental technical concept of PIXERA's Backup mechanisms. When triggering a backup, the Usage is copied to the target backup system. As the Usage preset contains all the client's technical information the correct mappings and so on are applied.
TECHNICAL SETUP BACKUP
Starting with PIXERA 2.0 Backup options are available for both Clients and Directors. To have access to backup options, either set up a multiclient-setup or use dry client programming.
By doing so, clients can be accessed in the Mapping live tab.
For a detailed explanation on multiclient setup: Manager - Client Setup / Multi - Client Setup
Dry Client Programming: Dry Client Programming
Backup declaration
In this demonstration, a simple three machine setup is presented. One PIXERA Director, a playout Client as well as a Backup Client.
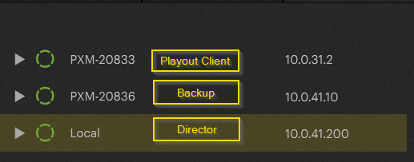
To Access the Backup options, select the desired Client, which should be the backup and navigate down in the inspector:
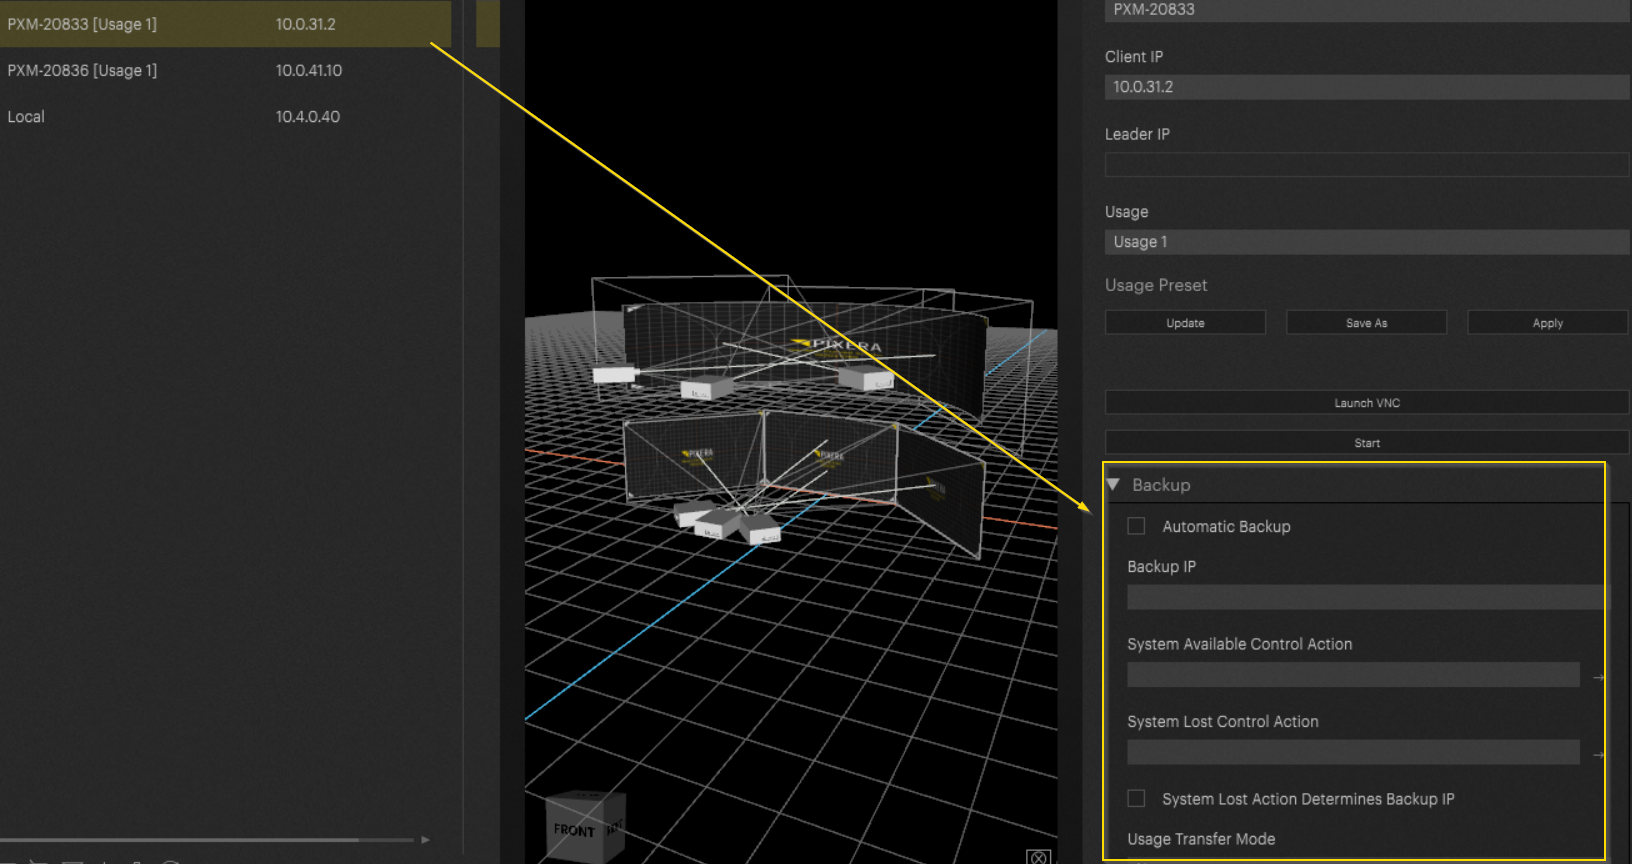
Now we are going to define the PXM-20836 (10.0.41.10) Server as the target for the backup service. Add a line for IP adress by pressing +, then add the IP address to the list:
We now define which Client the Backup Client should take over.
As soon as the IP address has been added, a new icon on the live systems tab beside the target backup machine will appear. This indicates a backup configuration for the Client:

NOTE
As described earlier this feature can be used in the dry client programming steps. Just simply create an empty client and setup the settings accordingly: Dry Client Programming
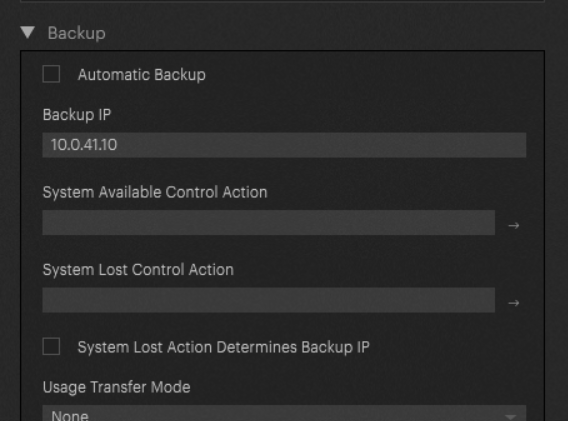
Backup Settings
Trigger Video Matrix via Control in Backup case
Additional options are available in the backup settings. When backup scenarios are triggered, most of the time a trigger must be sent to a matrix switcher to switch the output from main to backup.
This can be solved by putting in actions in the following textboxes:
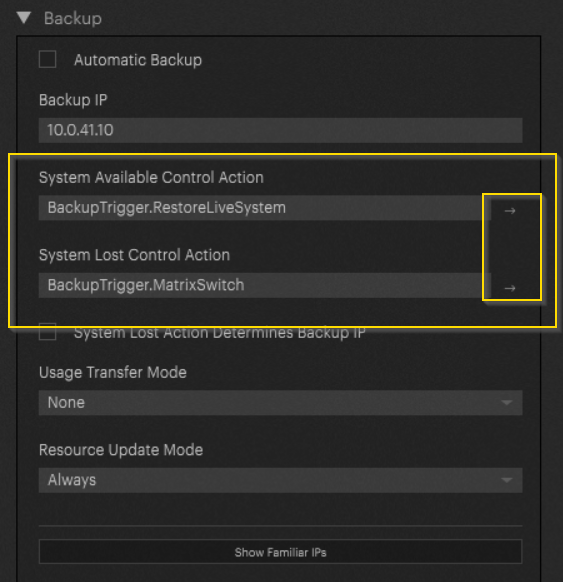
System Available triggers when the lost live system is online again. System Lost triggers when the main system fails and the backup triggers.
These actions are linked to control modules:
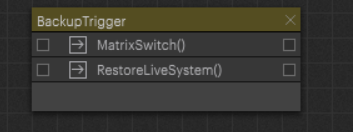
The syntax is:
ControlModuleName.Action
In our case BackupTrigger.MatrixSwitch and BackupTrigger.RestoreLiveSystem.
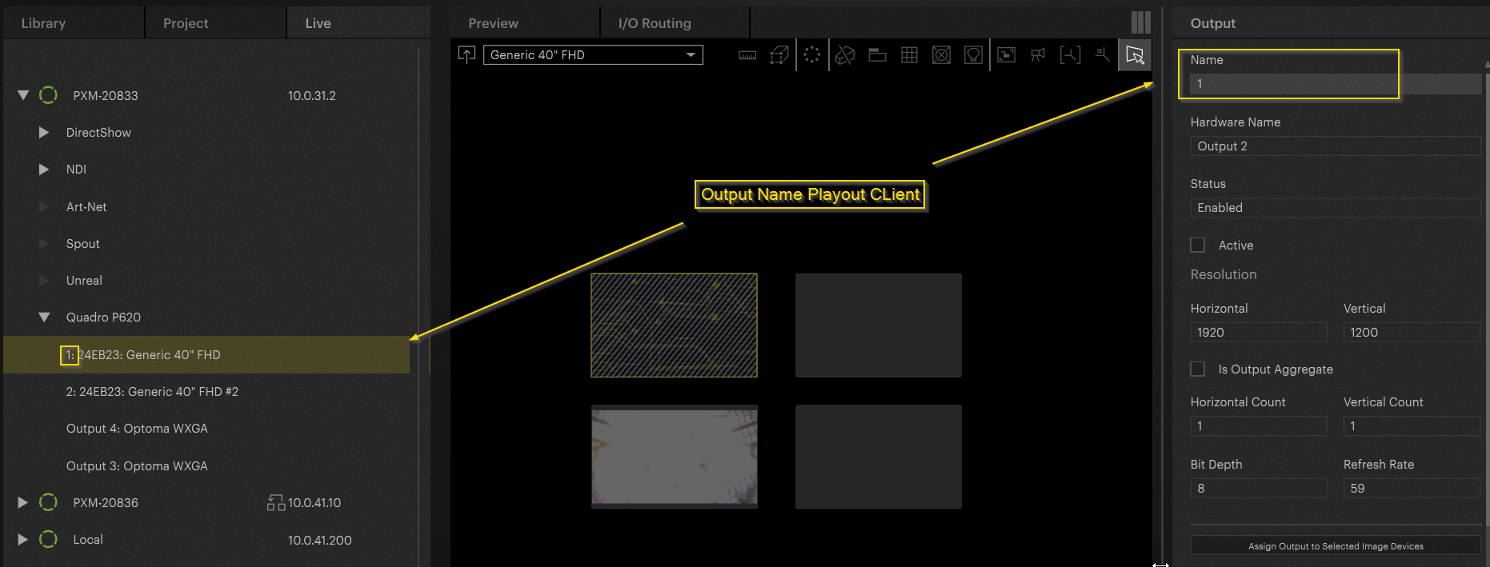
Output declaration
IMPORTANT
To transfer the outputs correctly to the configured backup system, a naming scheme must be used. PIXERA only transfers the outputs to the backup machine's outputs if the outputs do have the same naming scheme.
In our example the outputs for the playout Client are configured as followed:
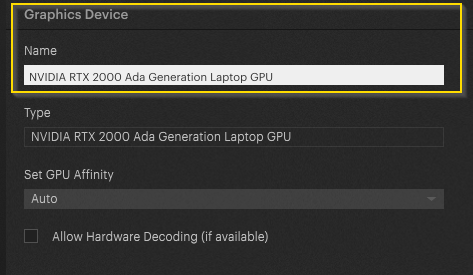
IMPORTANT
It is possible to mix machines and systems when configuring backups. For example, a PIXERA 2 can be programmed as a backup system for a PIXERA RS. To do so, additionally change the Graphic cards name. For the backup to work, the graphic card names also must be the same.
In comparison the output names on our Backup System:
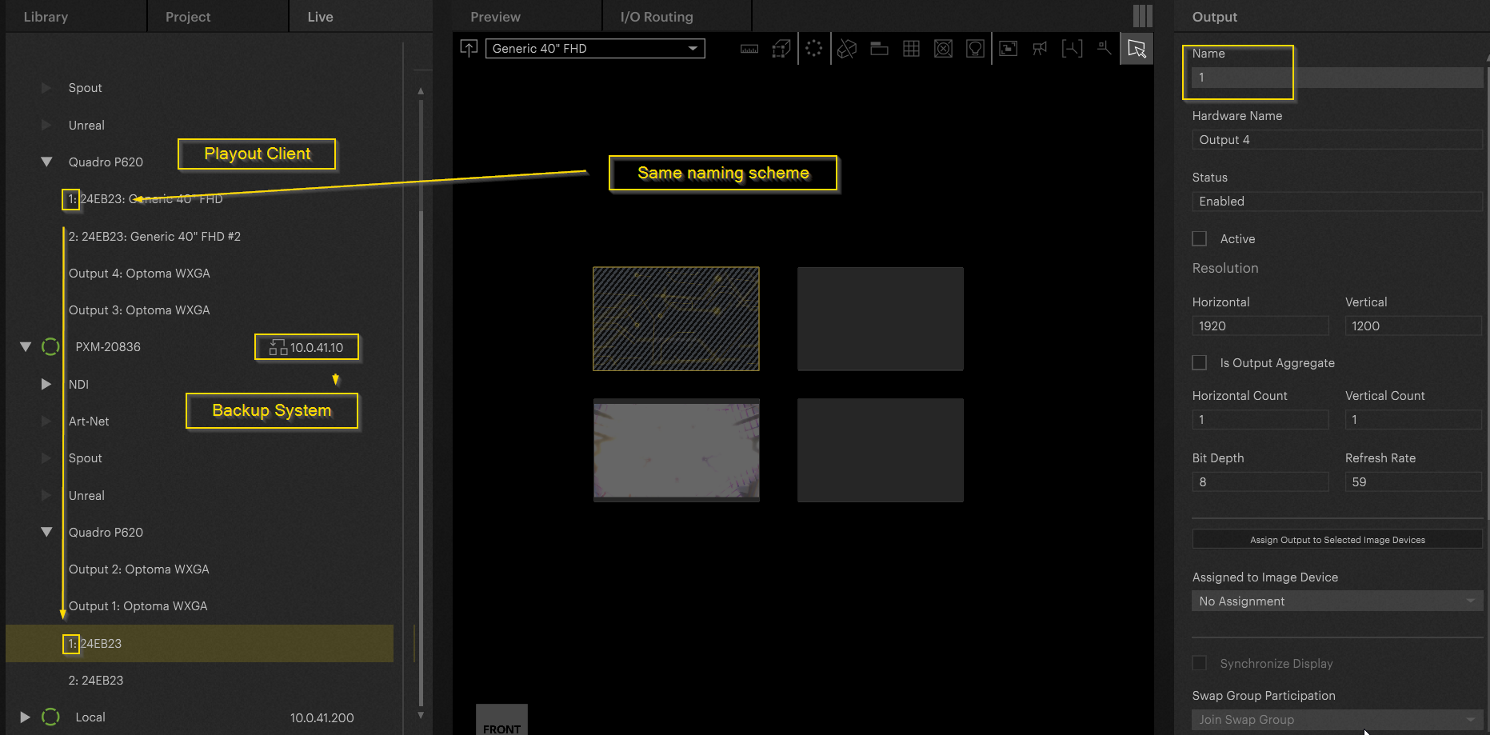
At this point, the Backup-Setup has been completed and the Backup System is ready for takeover.
TRIGGERING THE BACKUP
There are two different strategies to activate the backup. Either it is done manually or PIXERA decides automatically if the backup should be activated.
Manual Backup
There are different methods to trigger the takeover. The first option can be accessed via right-click on a client:
If the previous steps have been configured correctly the backup service will take over the playout. By using the "Copy To" option, the outputs can easily be moved back to the regular playout client if it is available in the live systems.
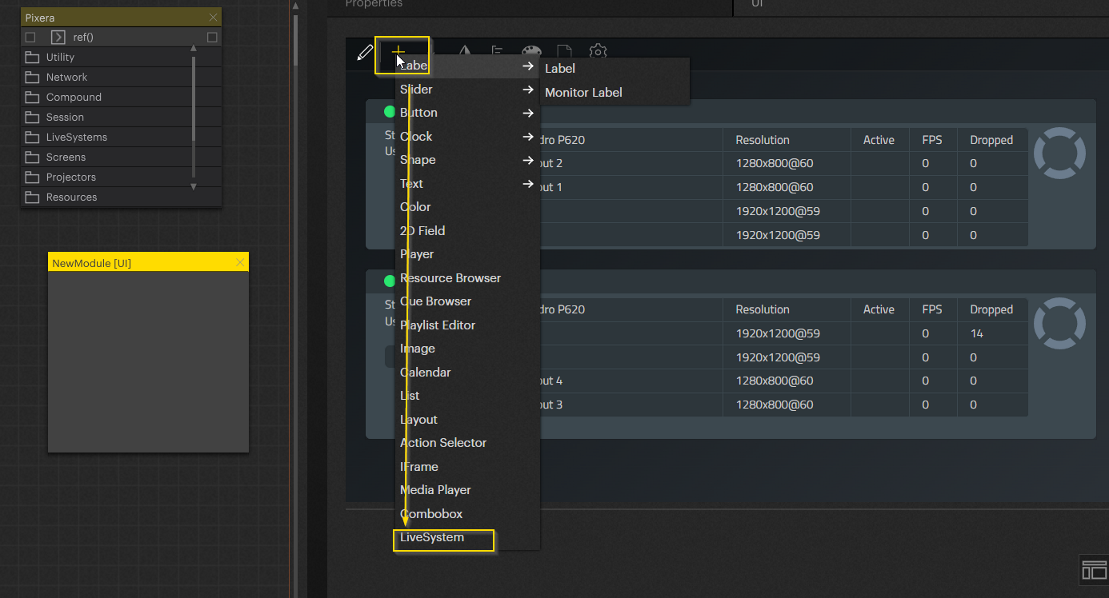
The Backup can be triggered from Control as well. To do so, a new UI element is available. To use it, add a module and create a UI in this module. Add the Live Systems UI element:
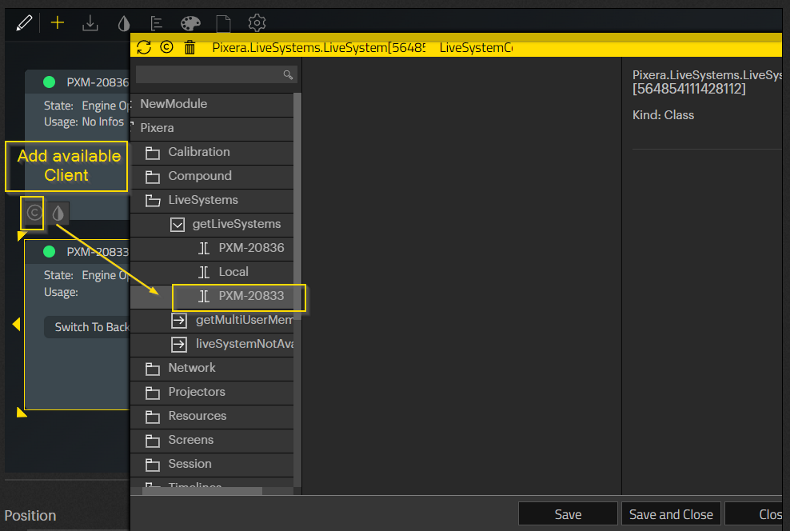
After adding the UI element, connect it to the available PIXERA Client. This process must be repeated for every individual Client:
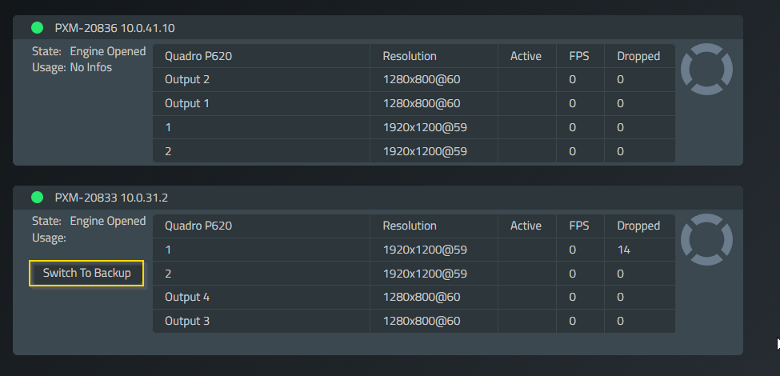
In addition to the backup functionality, this UI element displays performance data as well. Simply hit the "Switch to Backup" Button to switch to the backup service:
Automatic Backup
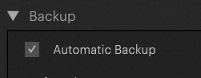
The last setup option is the automized switch. Just apply the option in live system settings of the client. The system will automatically switch to the backup system as soon as the Playout Client is offline:
We recommend activating this setting only for fixed installation projects. For live system setups, we recommend the manual triggered backup scenarios.
LIVE INPUTS
Like the output configuration backup covers live inputs as well. To configure said backup, simply add the same name to the live inputs on the backup system (like the output configuration). If the outputs are correctly routed and the names are set as well, PIXERA will handle the backup situation equal to the output backup.
AUDIO BACKUP
Starting with PIXERA 2.0 audio playout can be assigned to clients as well. When it comes to backup, the usage presets provide additional assignment based on usage presets. Simply select your Audio layer and select the correct Usage preset:
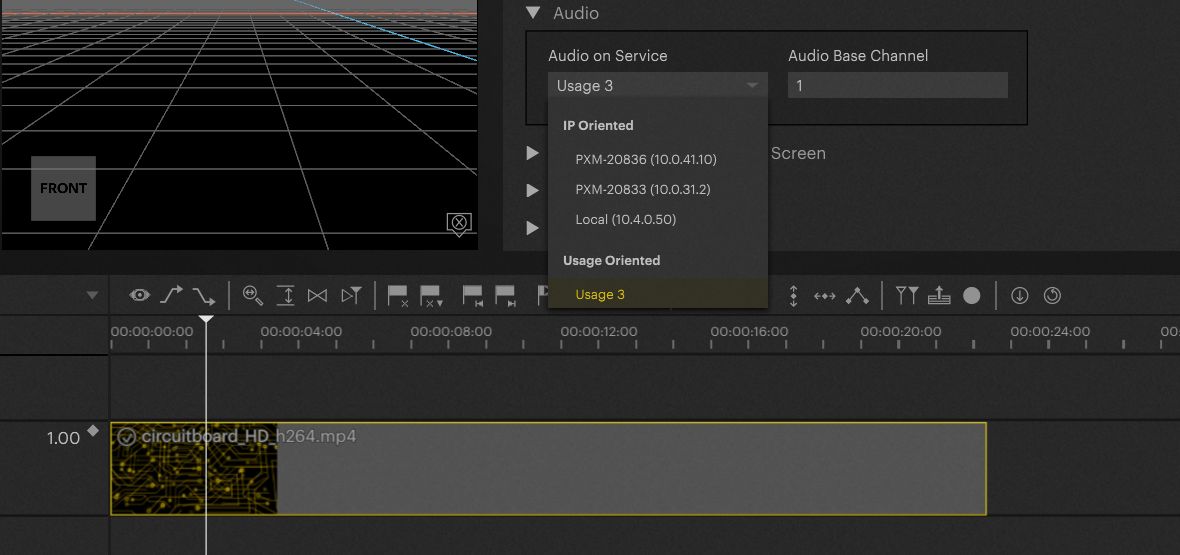
In case of a Backup execution, the audio playout will follow the Usage. Depending on the setup the audio playout will switch from your hot-machine to your backup machine.
Important
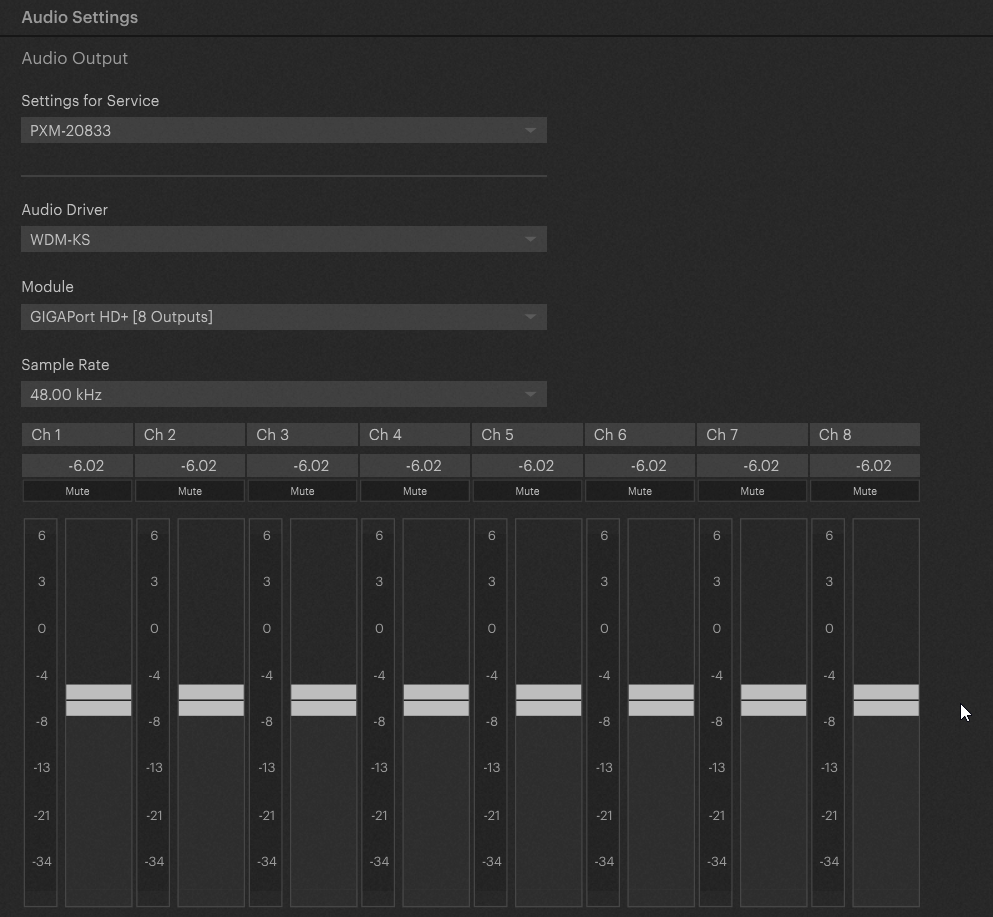
Audio settings are currently not distributed between servers. It is mandatory to do an initial setup on your Backup systems in case multiple Director servers are being used. It is important to set up the correct Audio Driver, Audio Card and Sample/Bitrate for the card. This also true for client audio configurations.
DIRECTOR BACKUP
Of course, it is also possible to back up Director instances, whether they playout or whether they are solely used for show programming.
The multiuser functionality goes hand in hand with the Director backup situation. For a detailed look, please refer to this article:
There are specific options relevant for the Director takeover functionality.
Start by setting up your Multiuser session as described in the article.
As long as the configuration matches (same naming scheme on graphics card, inputs e.g) the config will be “mirrored”.
Important
As of now, when content playback is happening on the Director system the content will be distributed to the second Directors RX Cache folder.
BACKUP USECASES
To help understand the possibilities and different backup scenarios we are showcasing different possible backup scenarios in this article. Different media server systems have different approaches when it comes to backup scenarios as the underlying technical foundations differ.
This part of the documentation is split into different backup scenarios. As some backup features are to be released after the 2.0 launch this article will be expanded.
If you have feedback and suggestions regarding new backup use cases, don't hesitate to contact us.
Full Backup
For a full backup scenario, we are looking at the following setup:

The main system consists of one Director and three Clients. The backup system is a mirrored configuration of the main system.
Follow theses steps to achieve a similar setup:
- Set up a Multi-User environment and distribute the project
- Configure your main system
- On the backup system, configure your backup clients and add the outputs to your project
- This allows for full redundancy playout. PIXERA's internal backup settings do not have to be set up in such a case. The backup clients will just play along. In case of a failure of the Main system, simply switch the output matrix to the backup system.
- Starting with 2.0 it is possible to add multiple outputs to a project. Prior to 2.0 this was not possible; hence the full backup configuration was more complex.
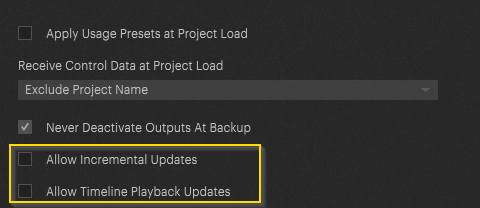
- Set the system to incremental update and follow timeline (Multi-User settings). By doing so the backup system is triggered with the main system and follows all the playback updates
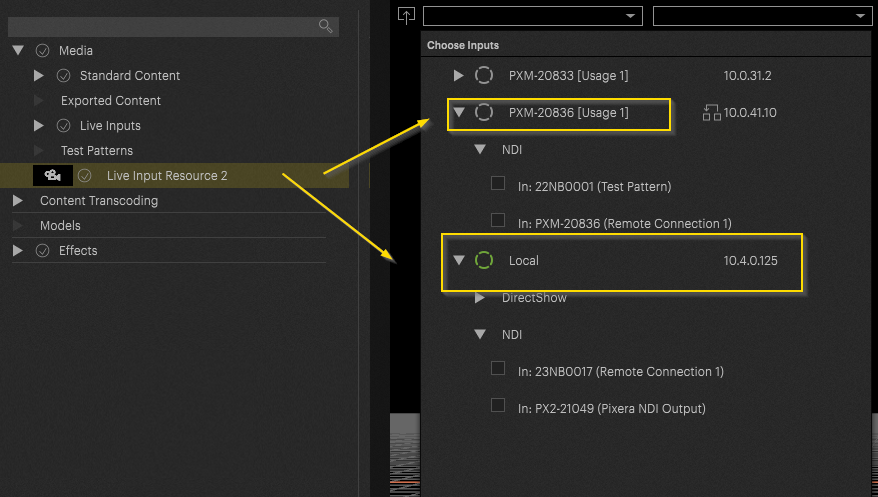
Add the main and backup clients as seen on this screenshot to your projects / LED. Select the output device and add the corresponding outputs: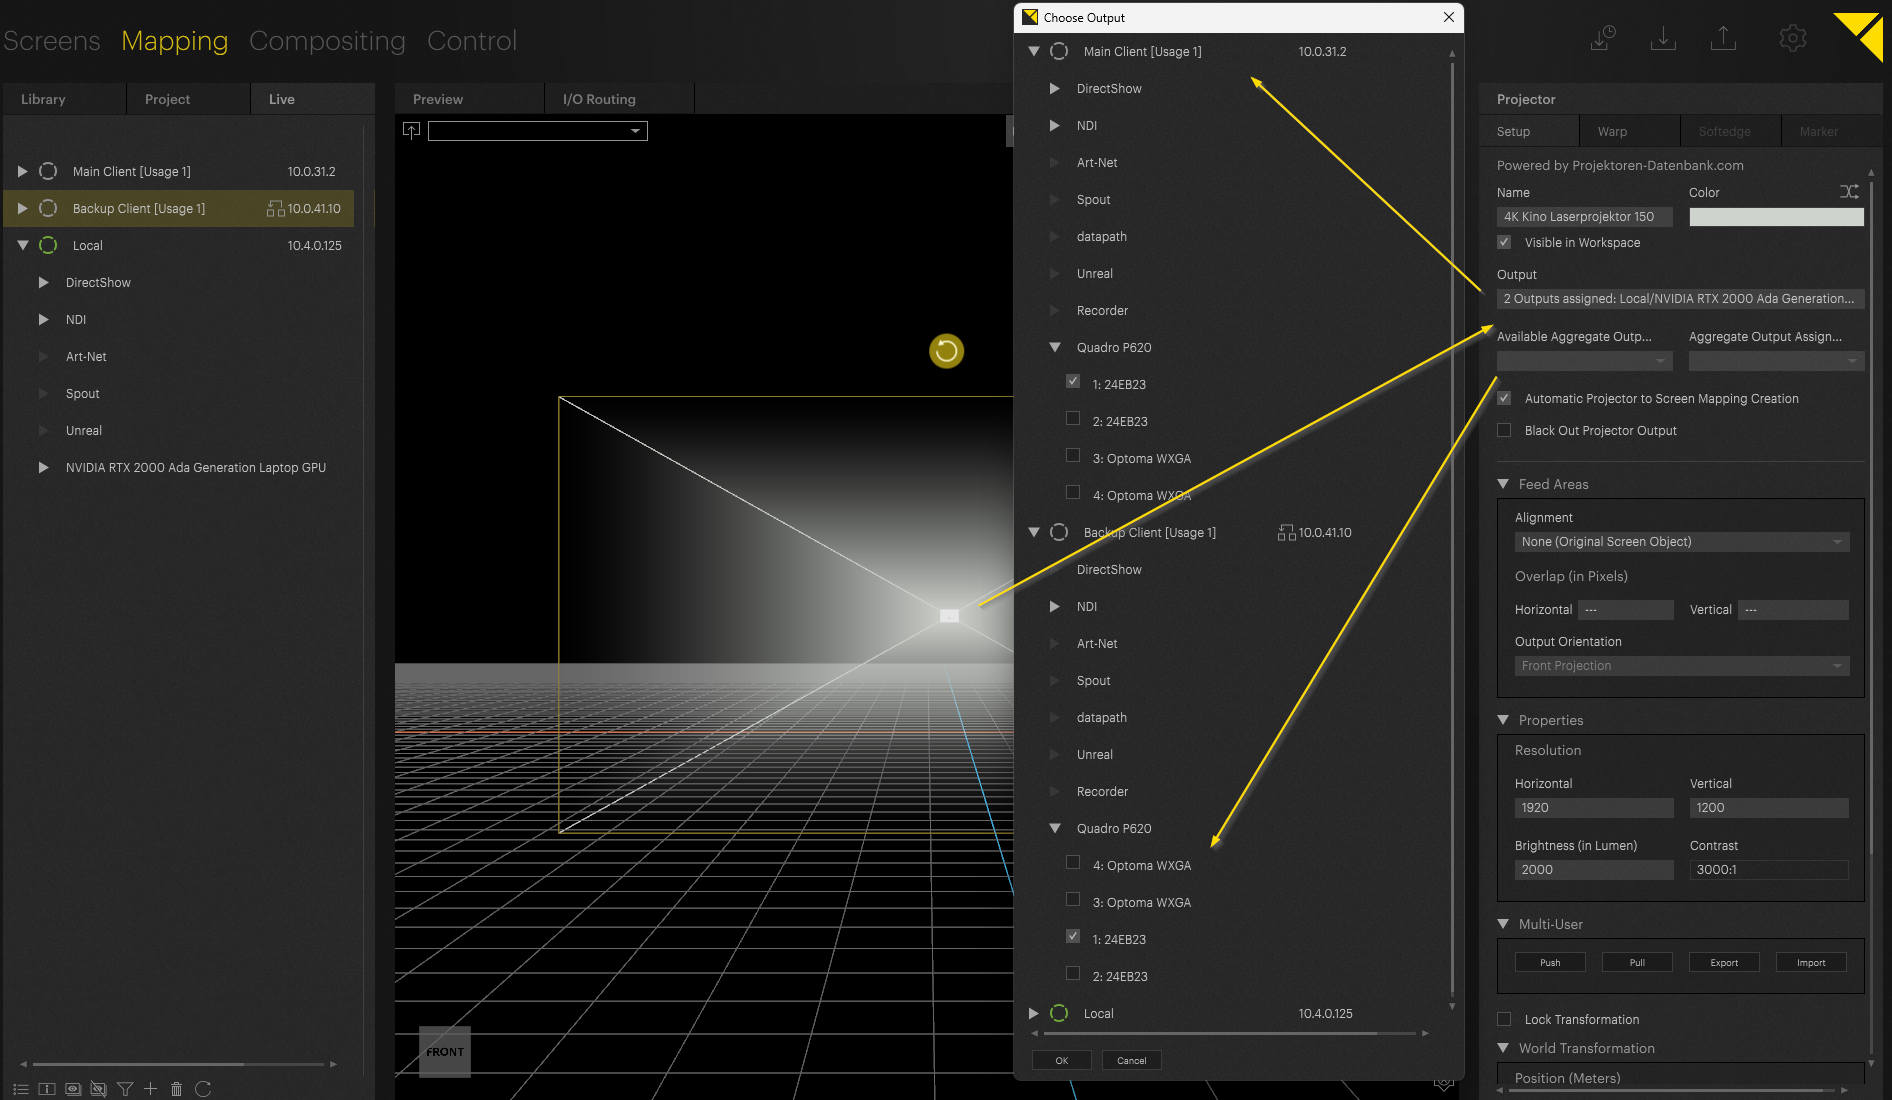
Triggering the Backup
Now in case of failure, simply trigger the backup by switching your matrix switch. As the backup system basically runs simultaniously to the live system there is no need for any additional setup inside PIXERA.
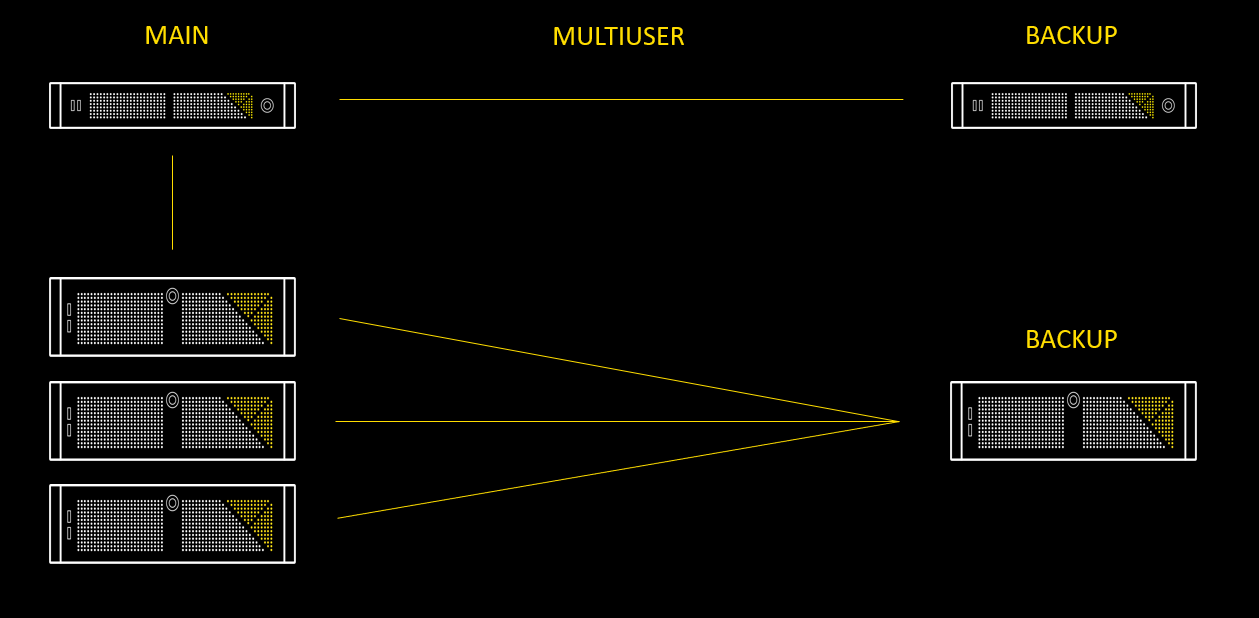
Director Backup (only Director fails)
Let's assume we have the following setup available: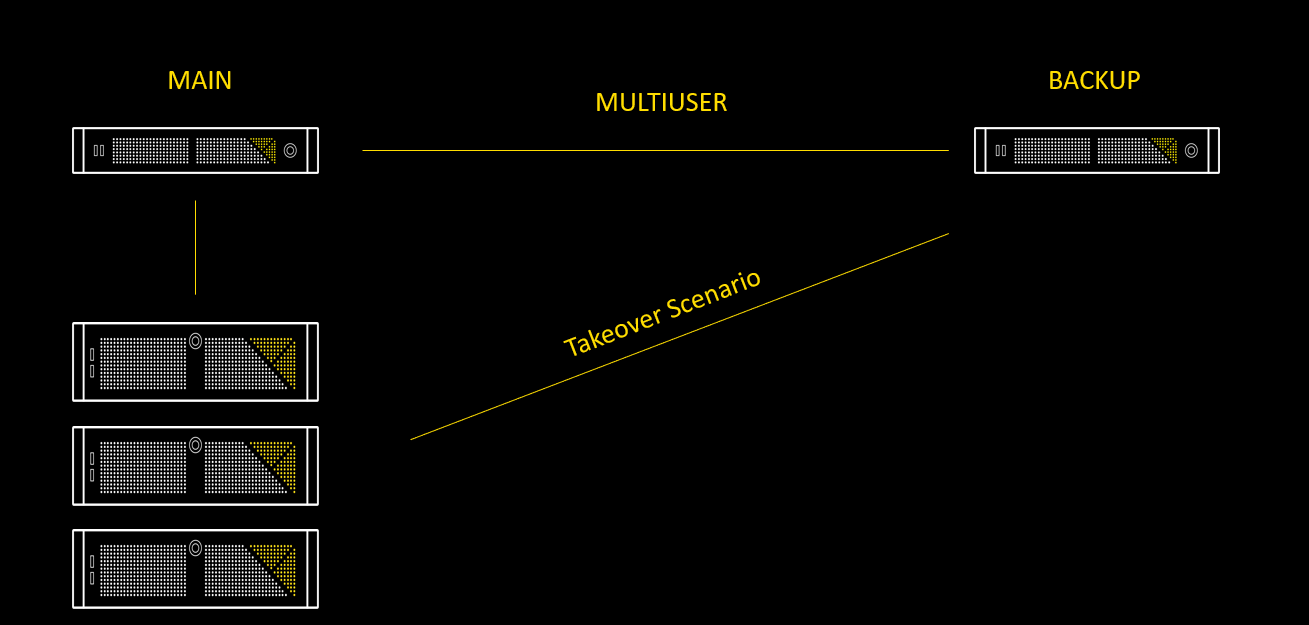
In this case, the Main Director fails. The two Directors are running in a Multi-User environment. In case of a backup scenario, the Backup Director must take over the clients from the failed Main Director system.
To do so activate the following settings in PIXERA´s Multi User settings:
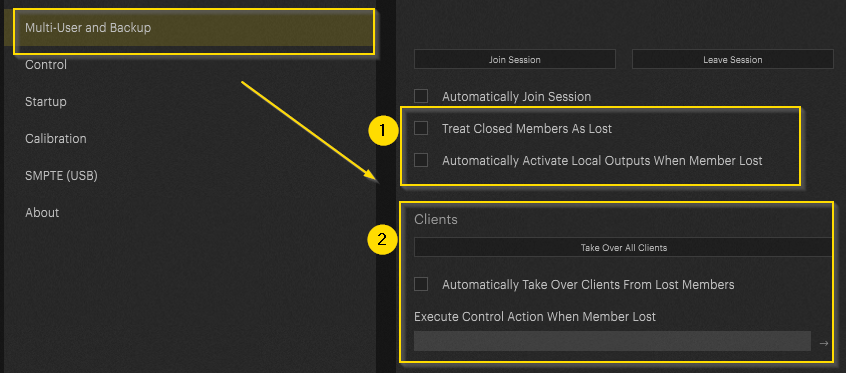
1 - Closed members are treated as lost. As soon as PIXERA is closed on the Main Director, it is treated as lost. By activating the second option the outputs of the backup Director will be opened when a member is lost. This setting is important if the Director server plays out as well.
2 - By pressing the “Take Over All Clients” button the takeover can be triggered manually. The automatic option below the button activate's an atomized take over option as soon as the Main Director is lost.
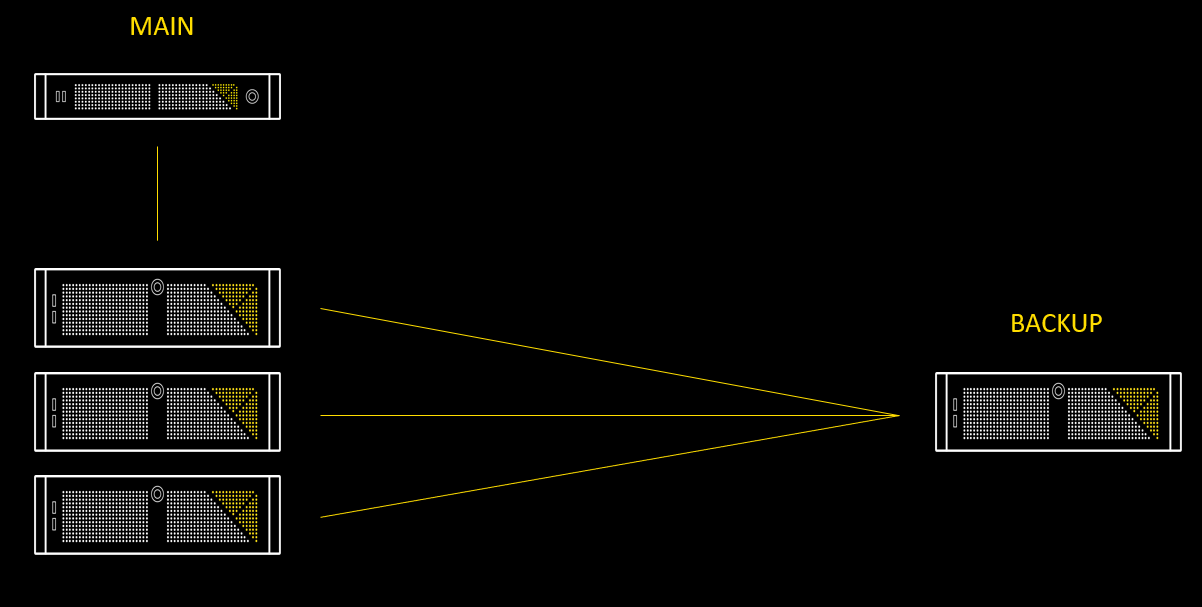
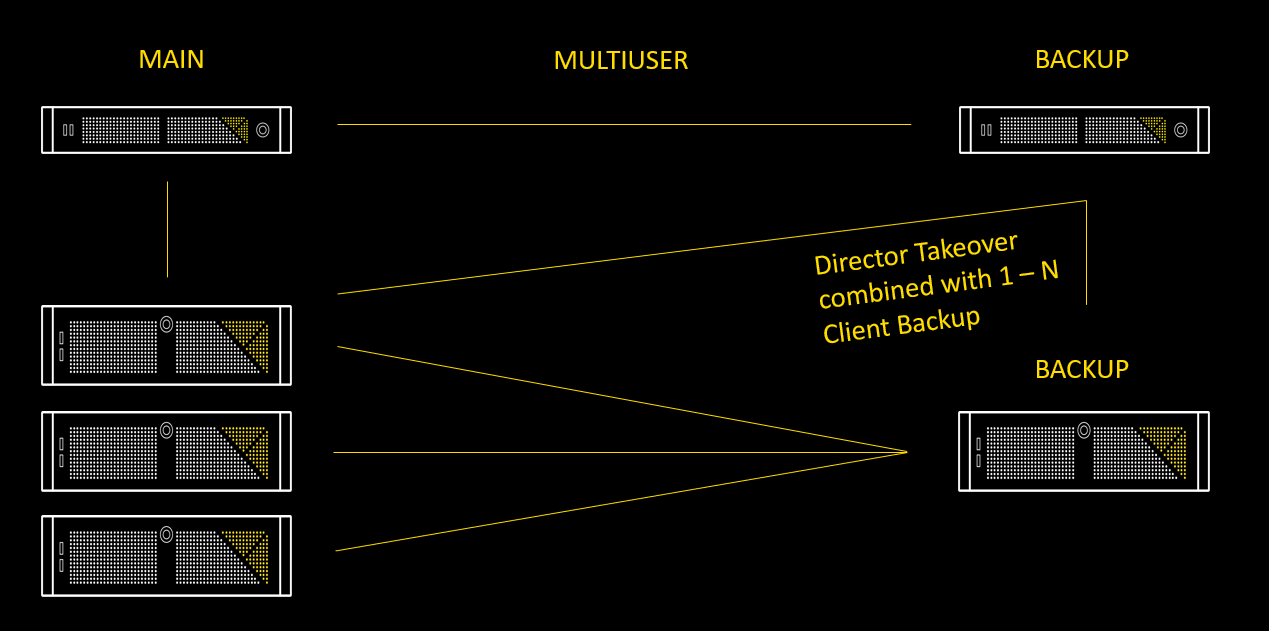
Client Backup 1 to N
To set this up please follow the steps at “Technical Setup” in this article.
Of course, Client and Main Backup functionalities can be combined. Setup´s like this are achievable by combining the prio explained setups:
PIXERA 1.9.224 | 18.December 2023