 Contact Us


Creating a PXImager USB and Installing a PIXERA Server Image
This guide explains how to create a PXImager bootable USB drive and install a Windows image on a PIXERA server.
Requirements
The following hardware and tools are required:
- Keyboard
- USB flash drive (minimum 32 GB)
- Computer with a working internet connection
Prerequisites
Before following this guide, download Rufus from the official website:
You will also need the latest:
-
PXImager ISO file (
*.iso) -
Windows image file (
*.wim)
These files must be requested from the support team:
https://avstumpfl.freshdesk.com/support/tickets/new
⚠️ Important
When requesting the files, always include:
- Server serial number
- Server model
This ensures you receive the correct Windows image.
Available Image Versions
The following images are available upon request:
| Server Model | Image Availability |
|---|---|
| PXM REV.1 / PX1 / PX2 (PIXERA Mini, One, Two) | On request |
| PXM REV.2 | On request |
| PXZ | On request |
| PX1 Gen.2 / PX2 Gen.2 | On request |
| PX4 | On request |
| PX4 Gen.2 | On request |
| PXiso | On request |
Creating the PXImager USB Drive
1. Launch Rufus
- Insert the USB stick.
- Start Rufus.
2. Select the USB Device
Select the USB drive that you want to use for PXImager.
⚠️ Warning
All data on the USB drive will be permanently deleted.

3. Select the PXImager ISO
- Click Select.
- Browse to the location where the PXImager
.isofile was downloaded. - Select the file.


4. Configure Rufus Settings
Configure the following settings:
- Partition Scheme: GPT
- Set the Volume Label according to the PXImager version.
- File System: NTFS.
- Click Start.


5. Create the Bootable USB
- Confirm both warning messages by clicking OK.


Rufus will now create the bootable USB drive
6. Copy the Windows Image
After Rufus finishes:
- Open the USB drive.
- Navigate to the folder:
- Copy the Windows image file (
*.wim) into this folder.
Booting into the PXImager Environment
- Connect the following devices to the PIXERA server:
- Keyboard
- PXImager USB stick
- Start the server.
- Repeatedly press:
- F11 during boot
- F8 on PIXERA four Gen.2 systems
until the message appears:
- Select the USB device from the boot menu using the arrow keys.
- Press Enter.
The server will now boot into the PXImager setup environment.
Image Installation
After PXImager starts, a menu will appear.
1. Select Deployment Mode
To install an image:
- Select Deploy using the arrow keys
or - Press 1
Confirm with Enter.
2. Select the Image
A list of all available images on the USB drive will appear.
- Select the desired image using the arrow keys
or - Enter the number corresponding to the image.
Press Enter to confirm.
3. Confirm Server Compatibility
PXImager will verify that the selected image matches the server type.
Press:
-
Enter
or - Y
to continue.
4. Select Target Disk
- Select the system disk where the image should be installed.
- Confirm with Enter.

5. Confirm Installation
A summary of the planned changes will be displayed.
- Press Enter to start the installation.
- Select No using ← / → to cancel.

6. Restart Option
Choose whether the system should automatically restart after installation.
Automatic restart is recommended.
Confirm your selection with Enter.
7. Image Deployment
The system will now:
- Install the image
- Prepare the system for first boot
⚠️ Important
During this process:
- Do not remove the USB drive
- Do not power off the system
Installation may take several minutes depending on the system configuration.
Windows Installation
After deployment:
- The system will reboot automatically.
- Windows installation will start.
⚠️ Do not interrupt the installation process.
The server may reboot multiple times.
Post-Installation Settings and Drivers
⚠️ Important
After installation, several settings must be configured to ensure optimal performance.
*The following steps are only required for Windows 10 IoT LTSC 21H2 images.
1. Set Time and Timezone
Set the correct:
- System time
- Timezone
This is important for correct event log timestamps.
2. Open NVIDIA Control Panel
Start the NVIDIA Control Panel.
Accept the license agreement by clicking:
Agree and Continue
3. Verify NVIDIA Driver Version
Ensure that the installed driver version matches the requirements in the PIXERA Server Drivers Guide.
If necessary, update the driver using the Graphics Driver Update/Downgrade Guide.
4. Configure NVIDIA Settings
Open:
Configure the following parameters:
| Setting | Value |
|---|---|
| Power Management Mode | Prefer Maximum Performance |
| Threaded Optimization | On |
| Triple Buffering | On |
Click Apply to save the settings.
5. Multi-GPU Systems
If a dedicated GUI GPU is installed:
Assign the OpenGL Rendering GPU to the GUI card according to the Multi-GPU Systems section in the NVIDIA Graphics Settings guide.
Additional Hardware
Sync Card
If a sync card is installed:
Ensure the driver and firmware are up to date using the PIXERA Server Drivers Guide.
Deltacast Capture Card
If a Deltacast capture card is installed:
Ensure the following are updated:
- Firmware
- Dcare software
Use the PIXERA Server Drivers Guide again for this.
PIXERA License Files
If optional features such as:
- Dante Virtual Soundcard
- NVIDIA Rivermax (SMPTE 2110)
are enabled, the license files can be found in:
Troubleshooting
No Images Visible in PXImager
Verify that the .wim image file is located in:
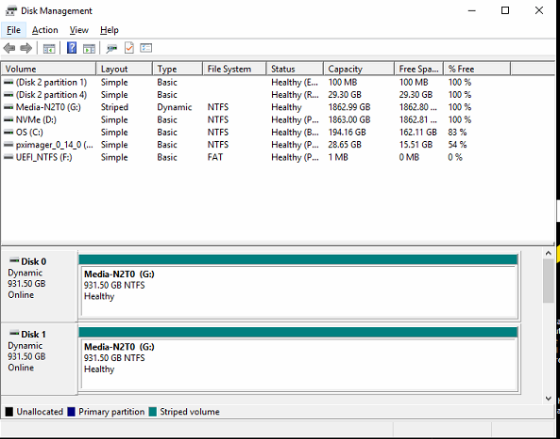
Media Drive Not Visible in Windows
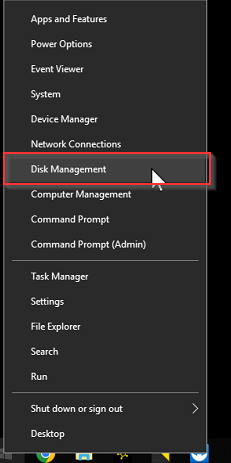
- Right-click the Windows icon.and open Disk Management
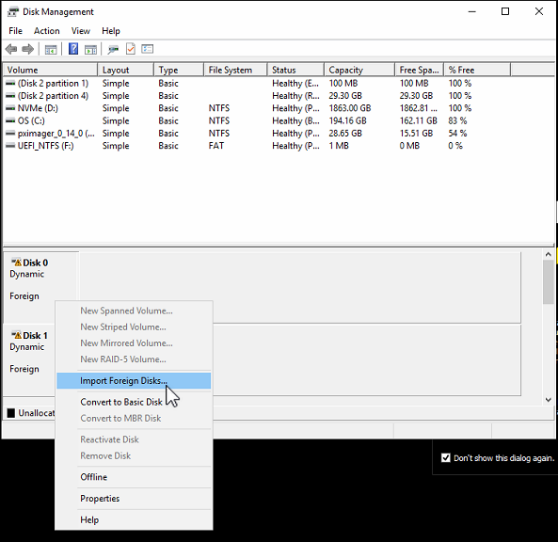
- Right-click one of the affected RAID disks and select: Import Foreign Disks
- Confirm by clicking OK twice.
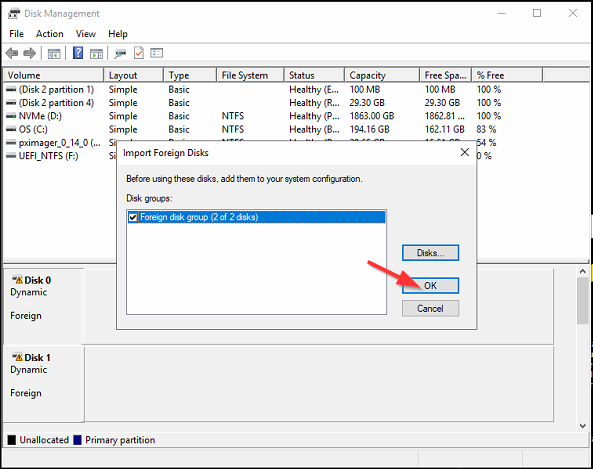
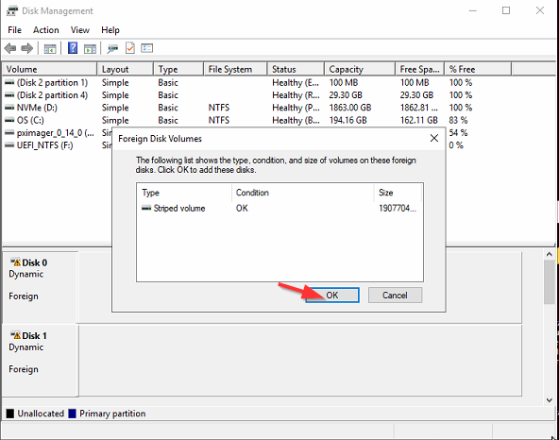
The media drive should now appear again.
February 24, 2026 | A.L.