 Contact Us


DRY CLIENT PROGRAMMING
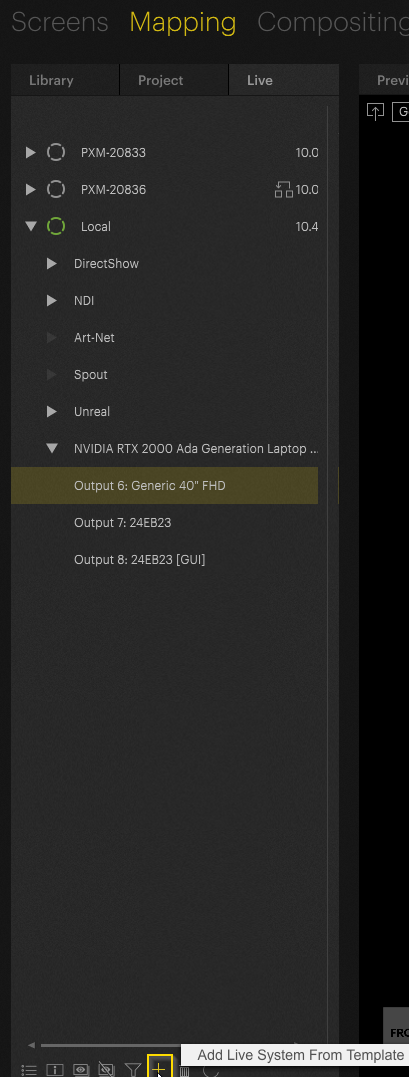
In 2.0 you can add “dry” clients to a project that is not currently hooked up to a Multiclient system. This is extremely helpful for pre-visualization and pre-programming. In the Mapping tab, under “Live,” you will see a plus button at the bottom of the screen that allows you to choose a client from a list of our hardware line.
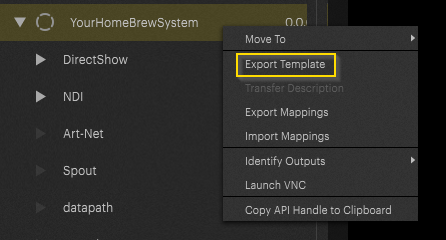
You can add multiple clients to fit your project's needs. If you are using PIXERA software on your own servers, you can export your system by right-clicking on it and selecting “Export.”
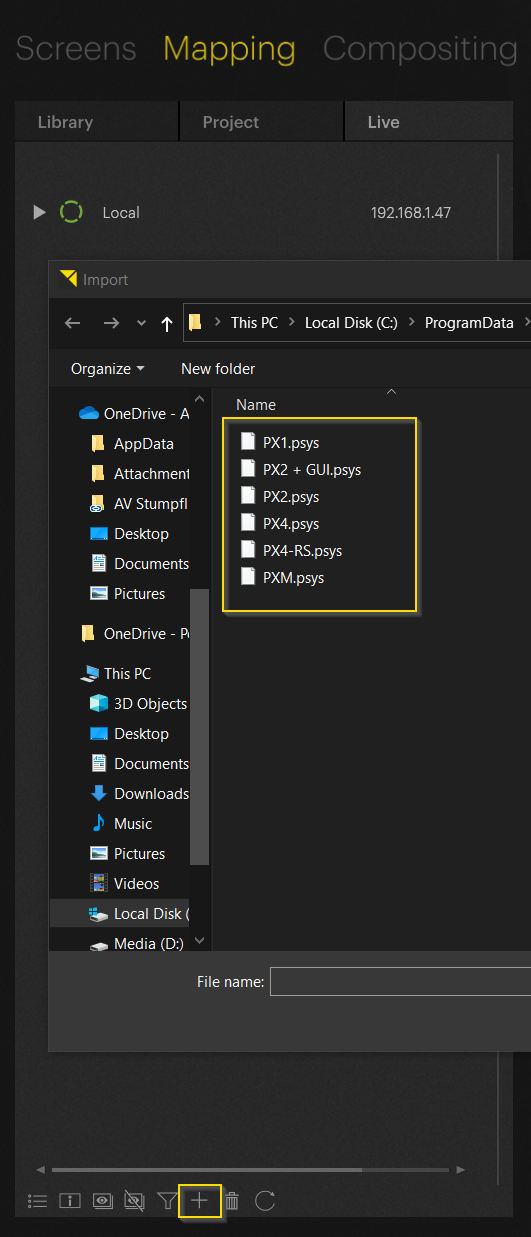
If you want to do some pre-programming and do not have access to your system, please choose the PIXERA system that best matches your own. You can find hardware specifications here.
Once you add a new client, it will show up in the Live tab just like your local system, however it will be greyed out.
IMPORTANT

Greyed out clients are either clients discovered in the network (please refer to Director - Client Setup) or clients imported to the workspace for preprogramming purposes. They are offline.
The significant difference is that the attributes of discovered clients are already populated, whereas imported clients for the need of dry client programming are unpopulated.
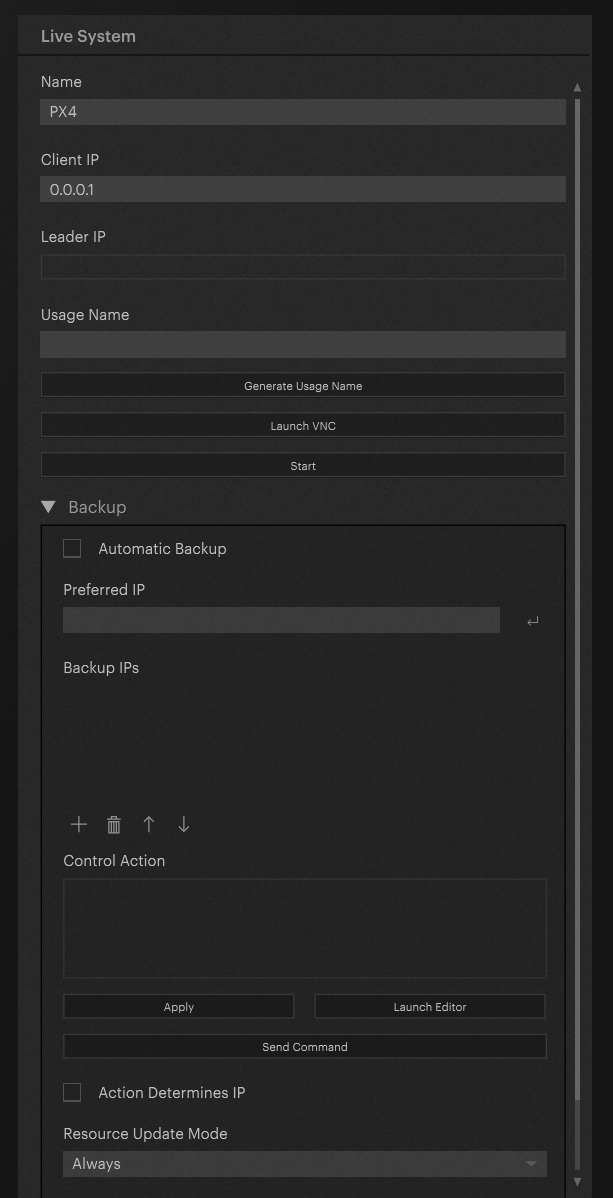
Green Clients are Clients which are currently used with this Director instance. The Director connects to an offline client by pressing the “Start” Button in the inspector:
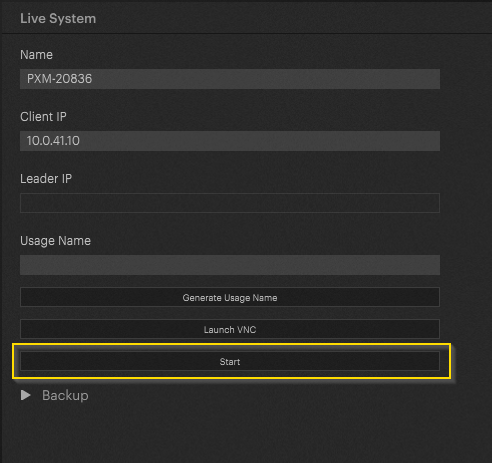
After hitting the “Start” button the icon will turn green:
Click on the system and navigate to your inspector. Here you can rename your client, add an IP address, and add any backup systems as needed.
As soon as regular clients are discovered from PIXERA in the network, offline Clients are automatically generated. In this example there is a local instance (live - green icon), two offline clients and a dry programmed client (the IP was left unchanged for better visual representation):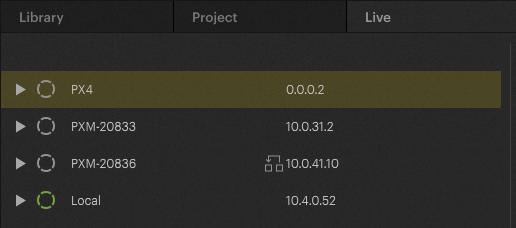
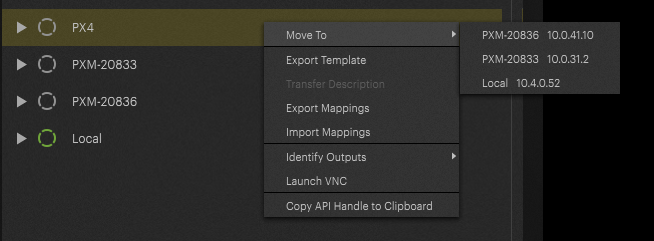
To get use out of the preprogrammed client the settings must be transferred to one of the discovered clients. Right click on the dry client and select the correct client:
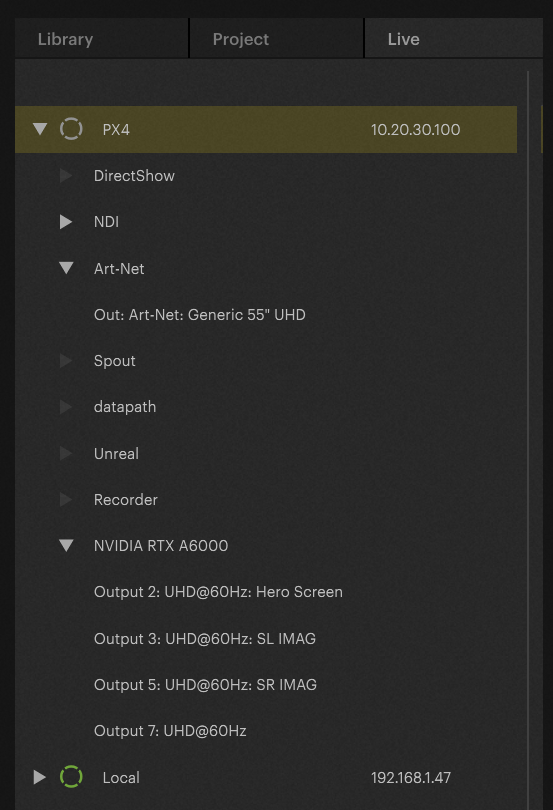
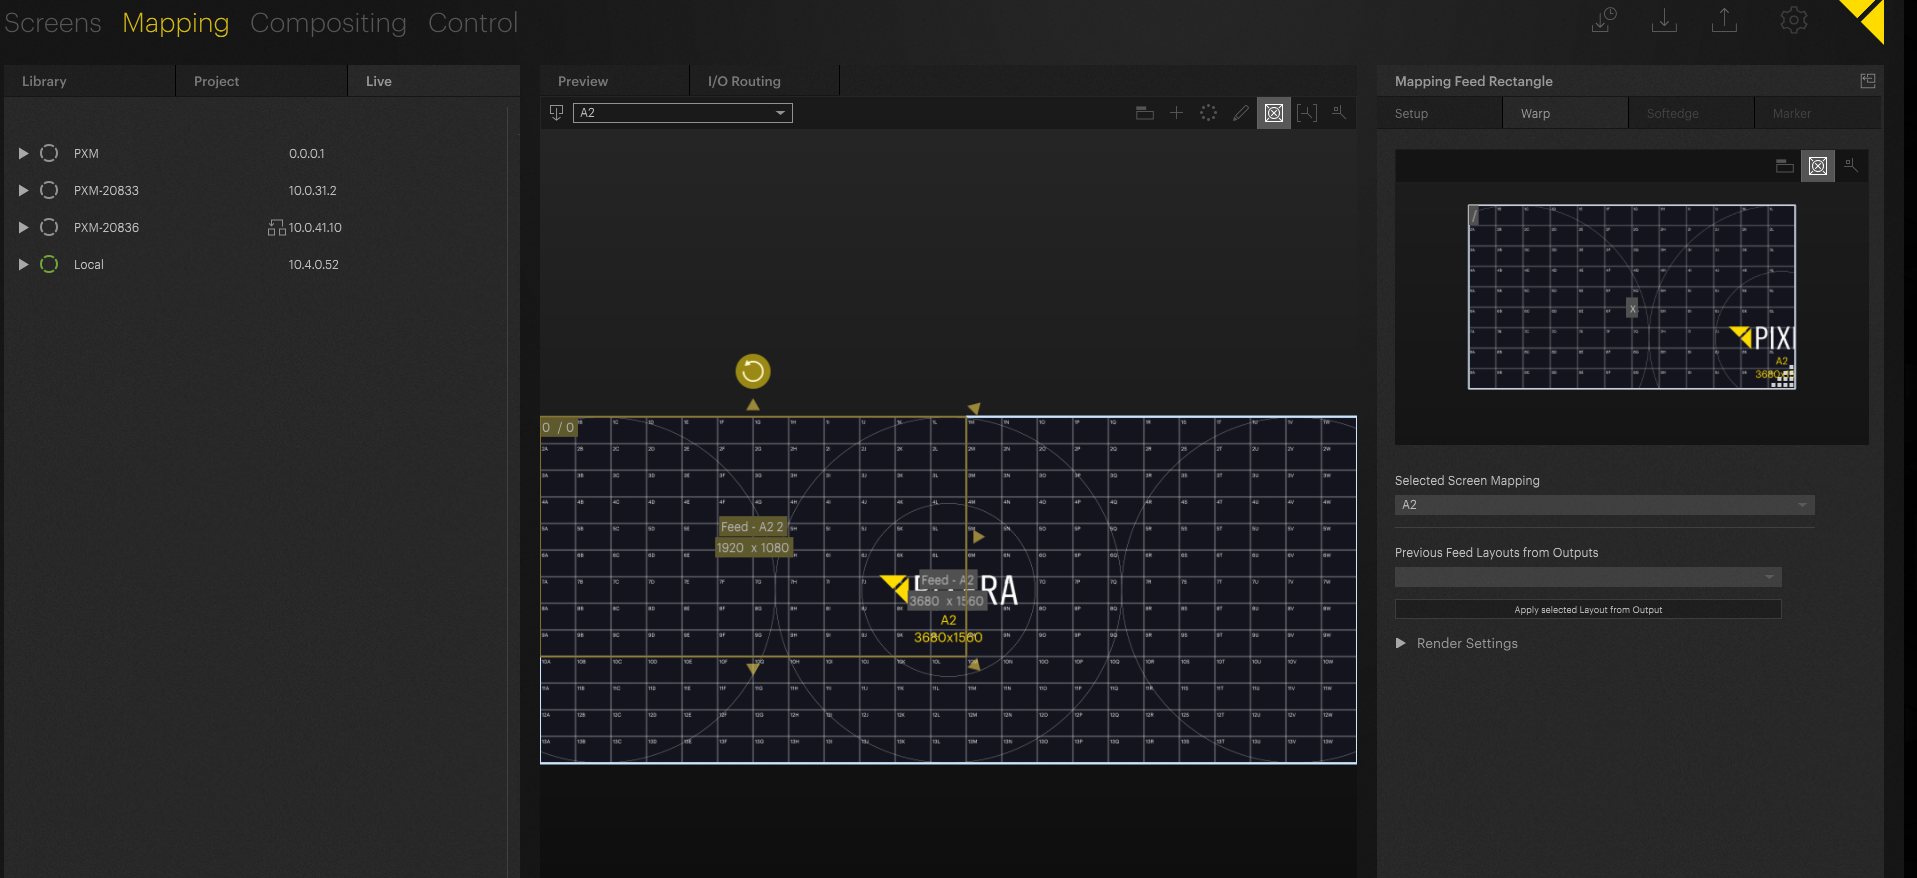
You can now assign outputs to your screen objects just as you would normally. You can also add and configure output streams to Art-Net, Spout, Unreal, etc.
WORKFLOW EXAMPLE
By utilizing dry client programming even preprogramming of LED mappings can be achieved. Simply create the dry client as needed and change the resolution to the used resolution in the project. Assign the outputs to the LED:
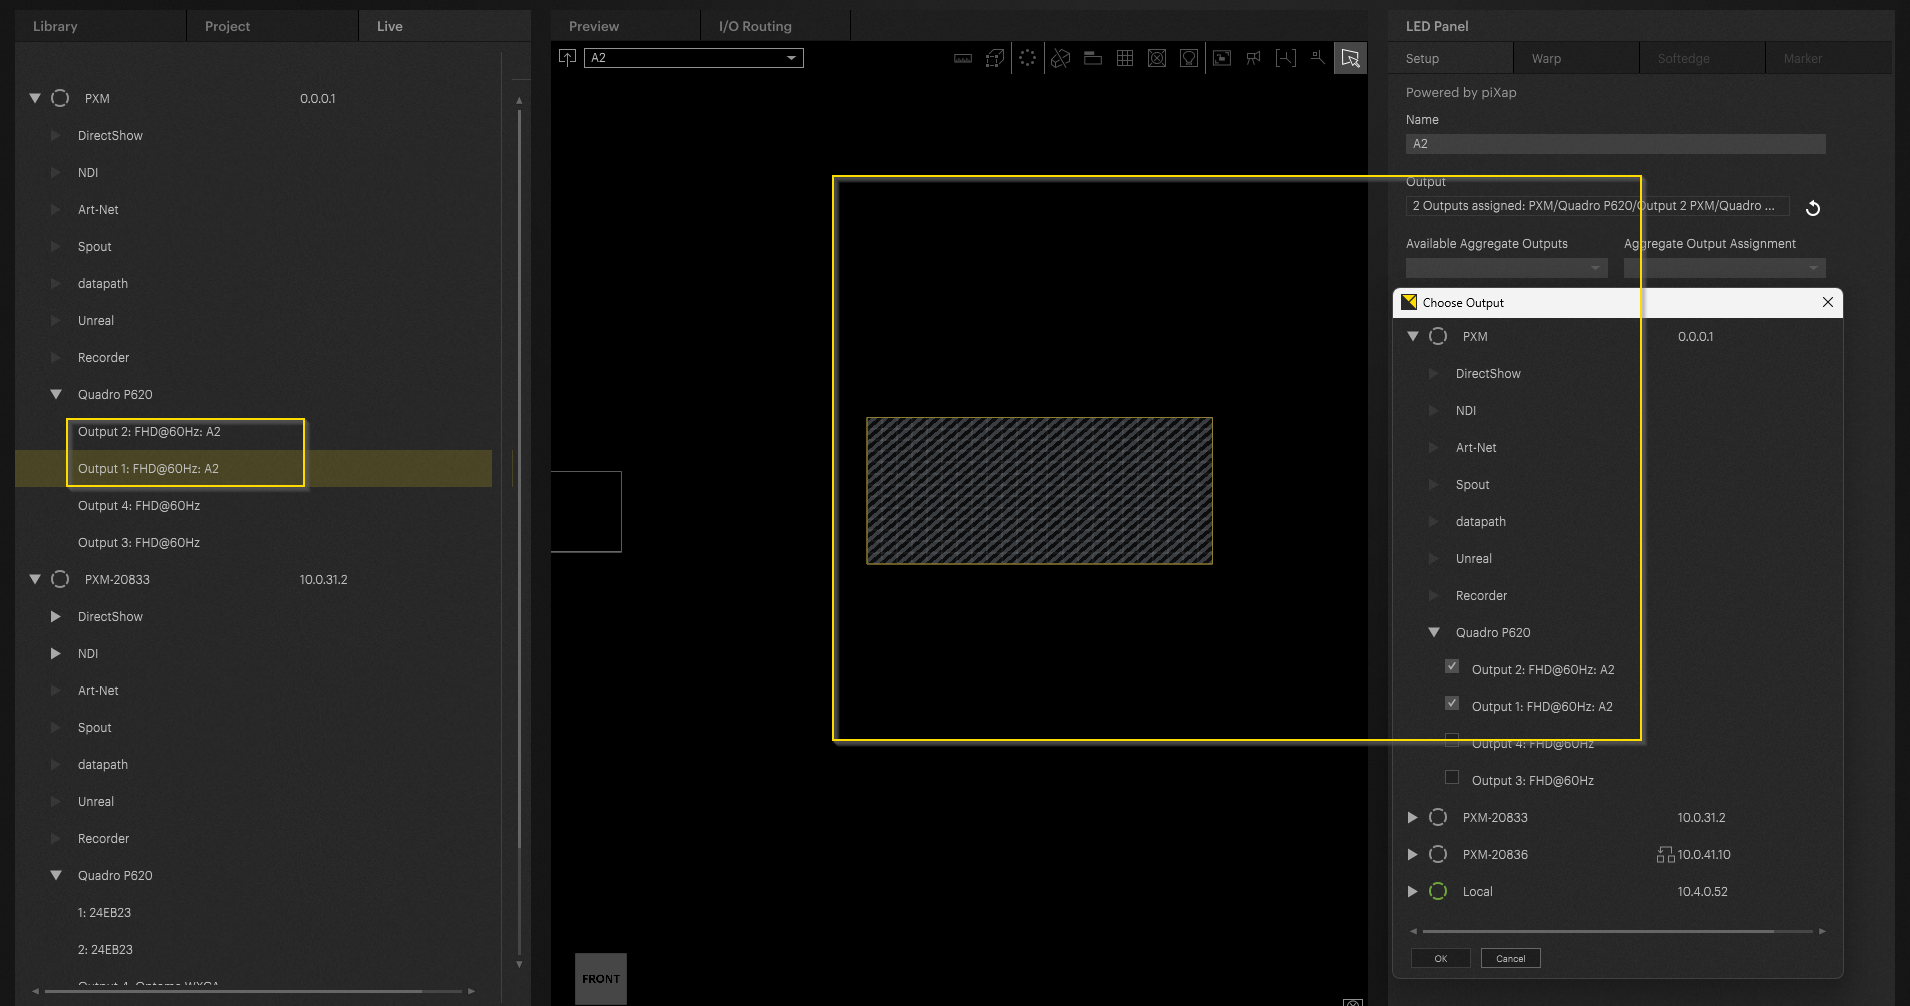
By doing so you can create custom remappings in the “Warp” section:
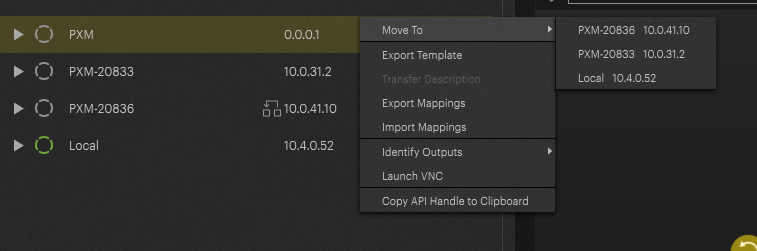
When finished simply move it to your desired used client:
Important
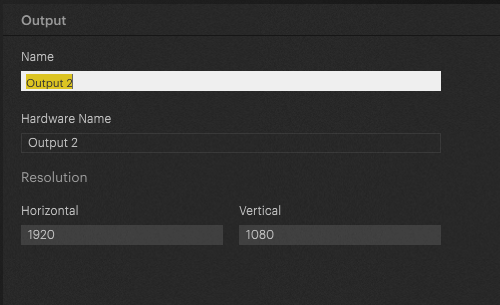
In order to transfer outputs, they must be of the same name. Change the output name on the dry client (or hot client) by selecting it and by changing the output - names in the inspector. The must match in the end:
PIXERA 2.0 | 3. October 2023