 Contact Us


Overview
The API Browser allows the user to easily find the API command they wish to call on any UI Element of a Module. The browser also aids the user in understanding what each API command does, its results, and the parameters it must be given along with what parameters can be passed.
Activation
First you must activate the API Browser by going to Settings/Control and toggling the Use API Browser to on: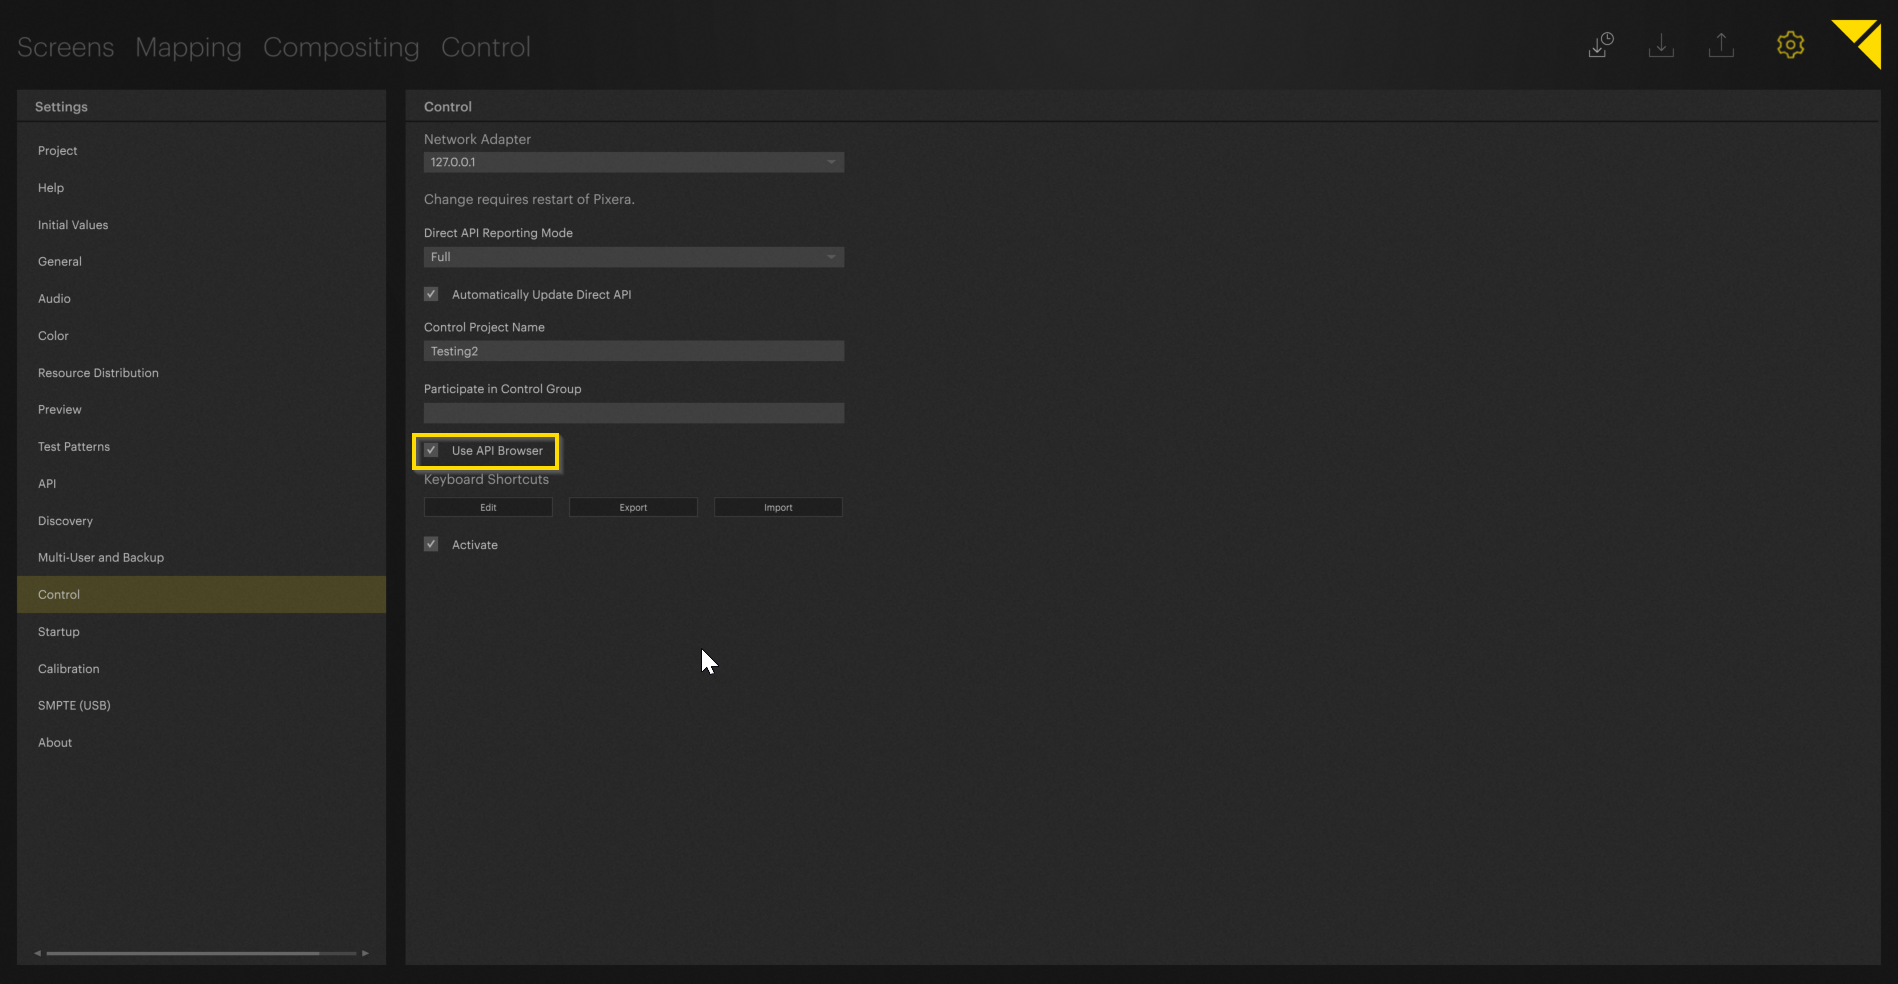
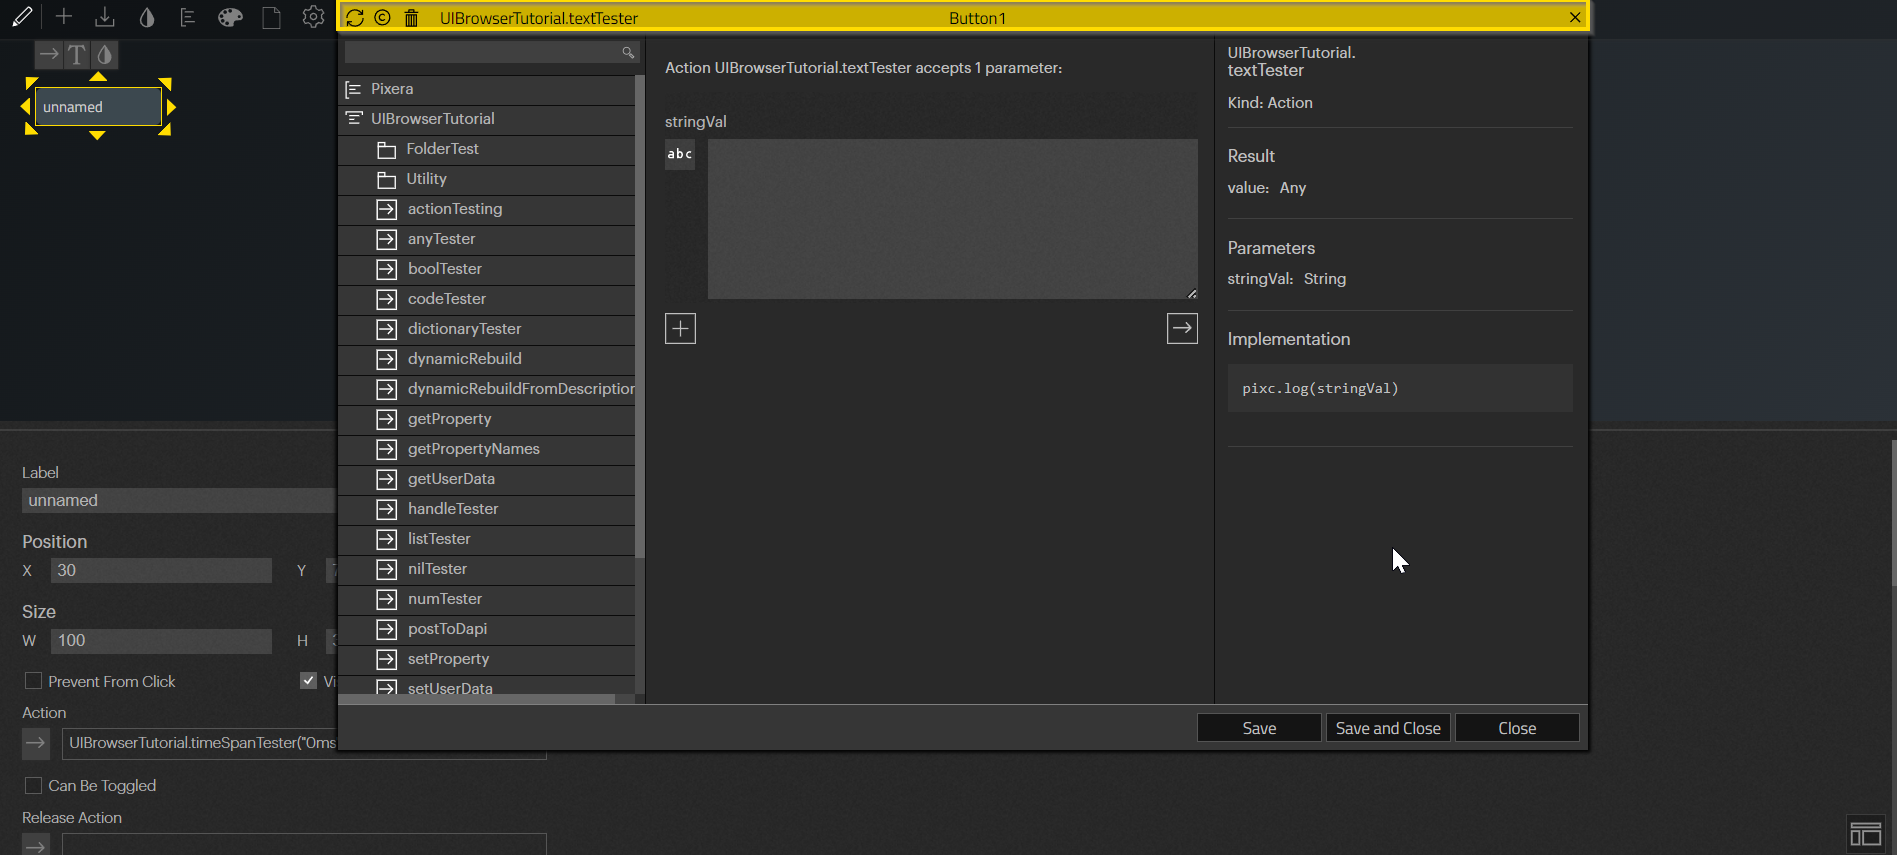
Module Usage
Next, go to the Control Tab and drag in a New Module. Go over to the UI tab in the Inspector and create a new UI. Add a new Element using right click or the plus icon, select the Element, and click on the arrow in the top left corner. The API Browser will now open for you!
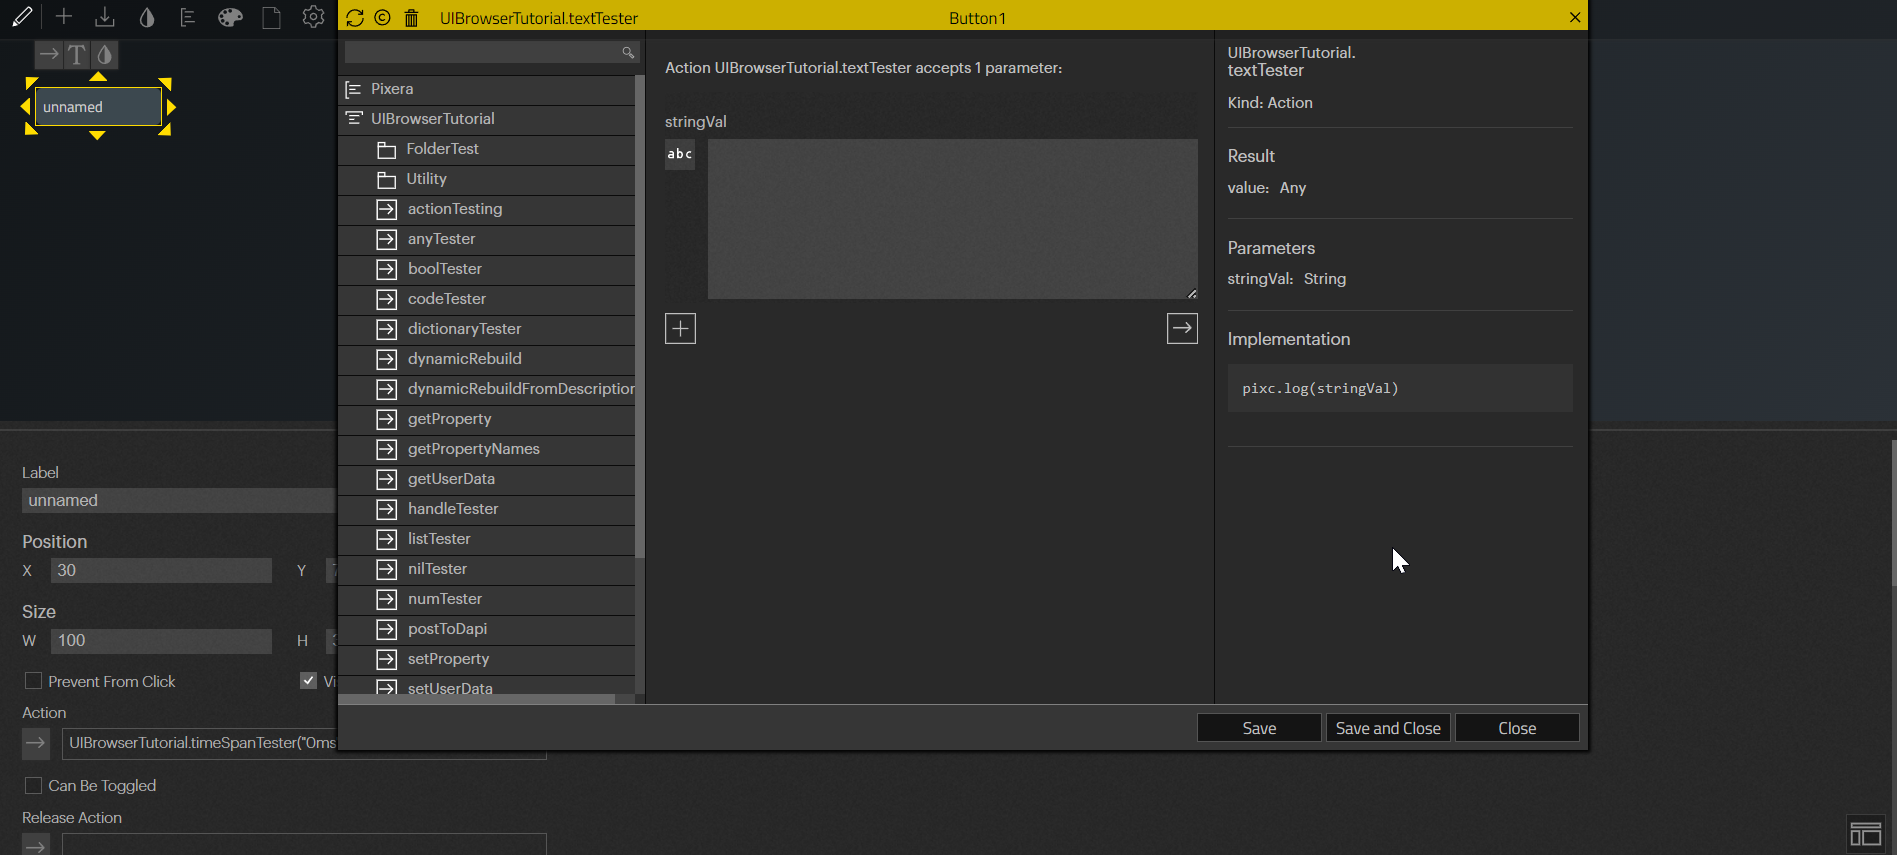
The API Browser is broken up into multiple sections.
Top Bar
In the top bar are the refresh, class view toggle, delete, and exit button respectively, which each interact with what is selected in the Library.
Left Section: Library
The Library is the left major section. It contains every Module opened in the Pixera project allowing the user to dive through all the Actions they hold. There is also a search bar to quickly find a desired Action.
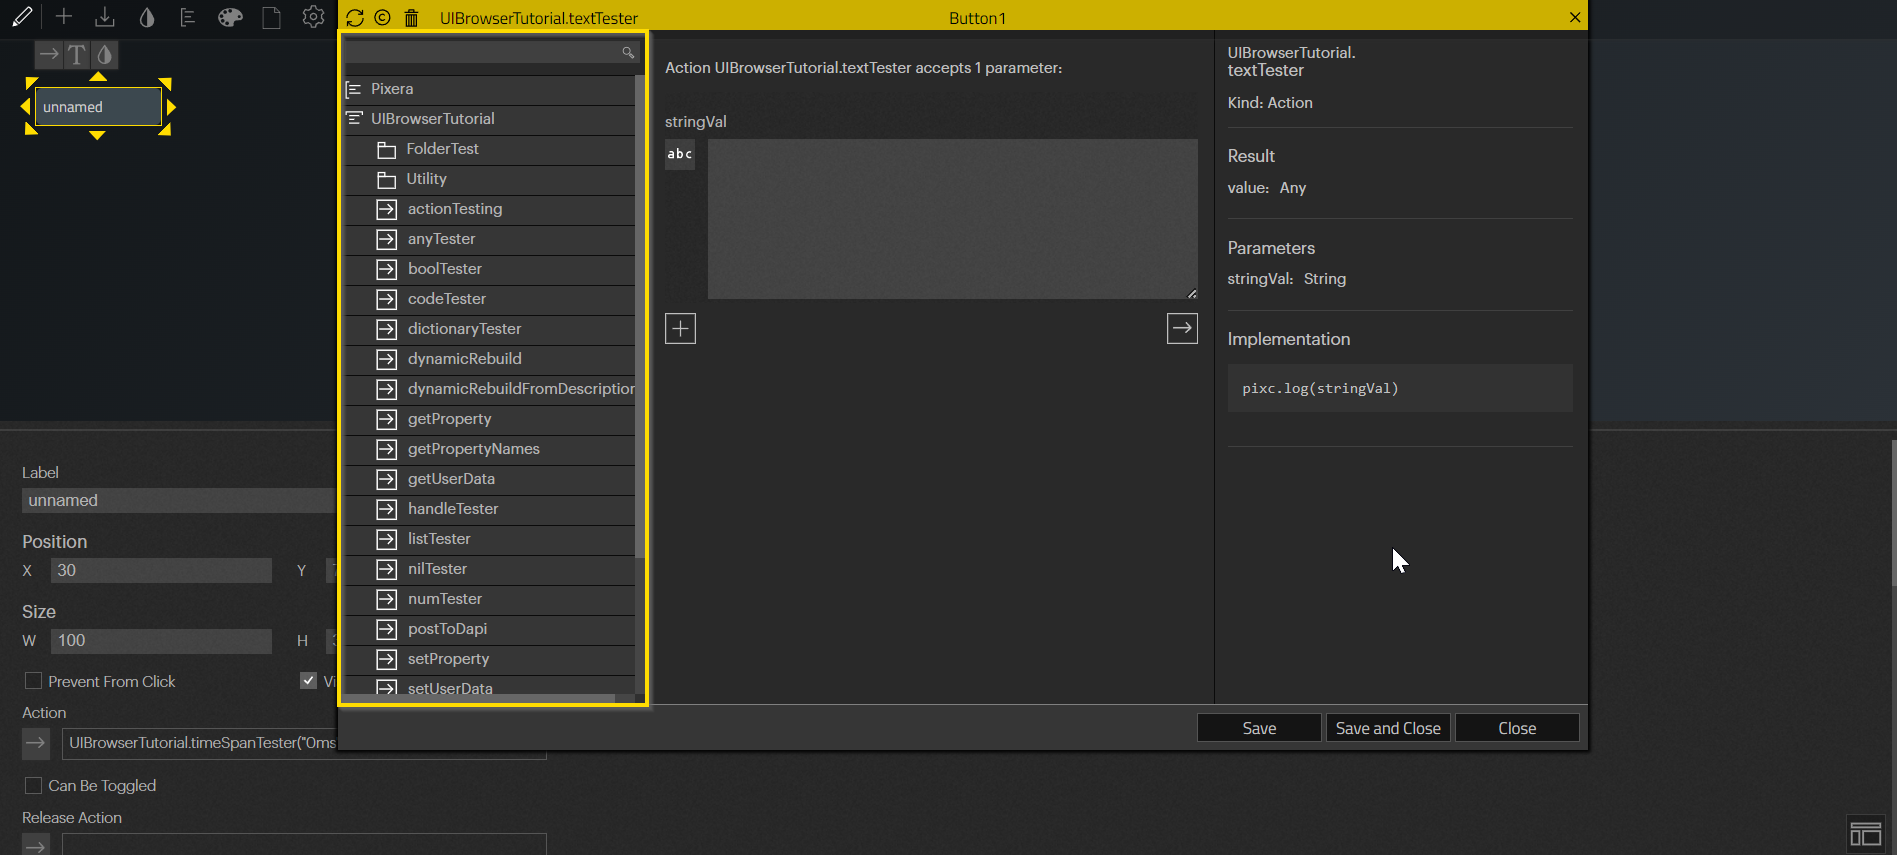
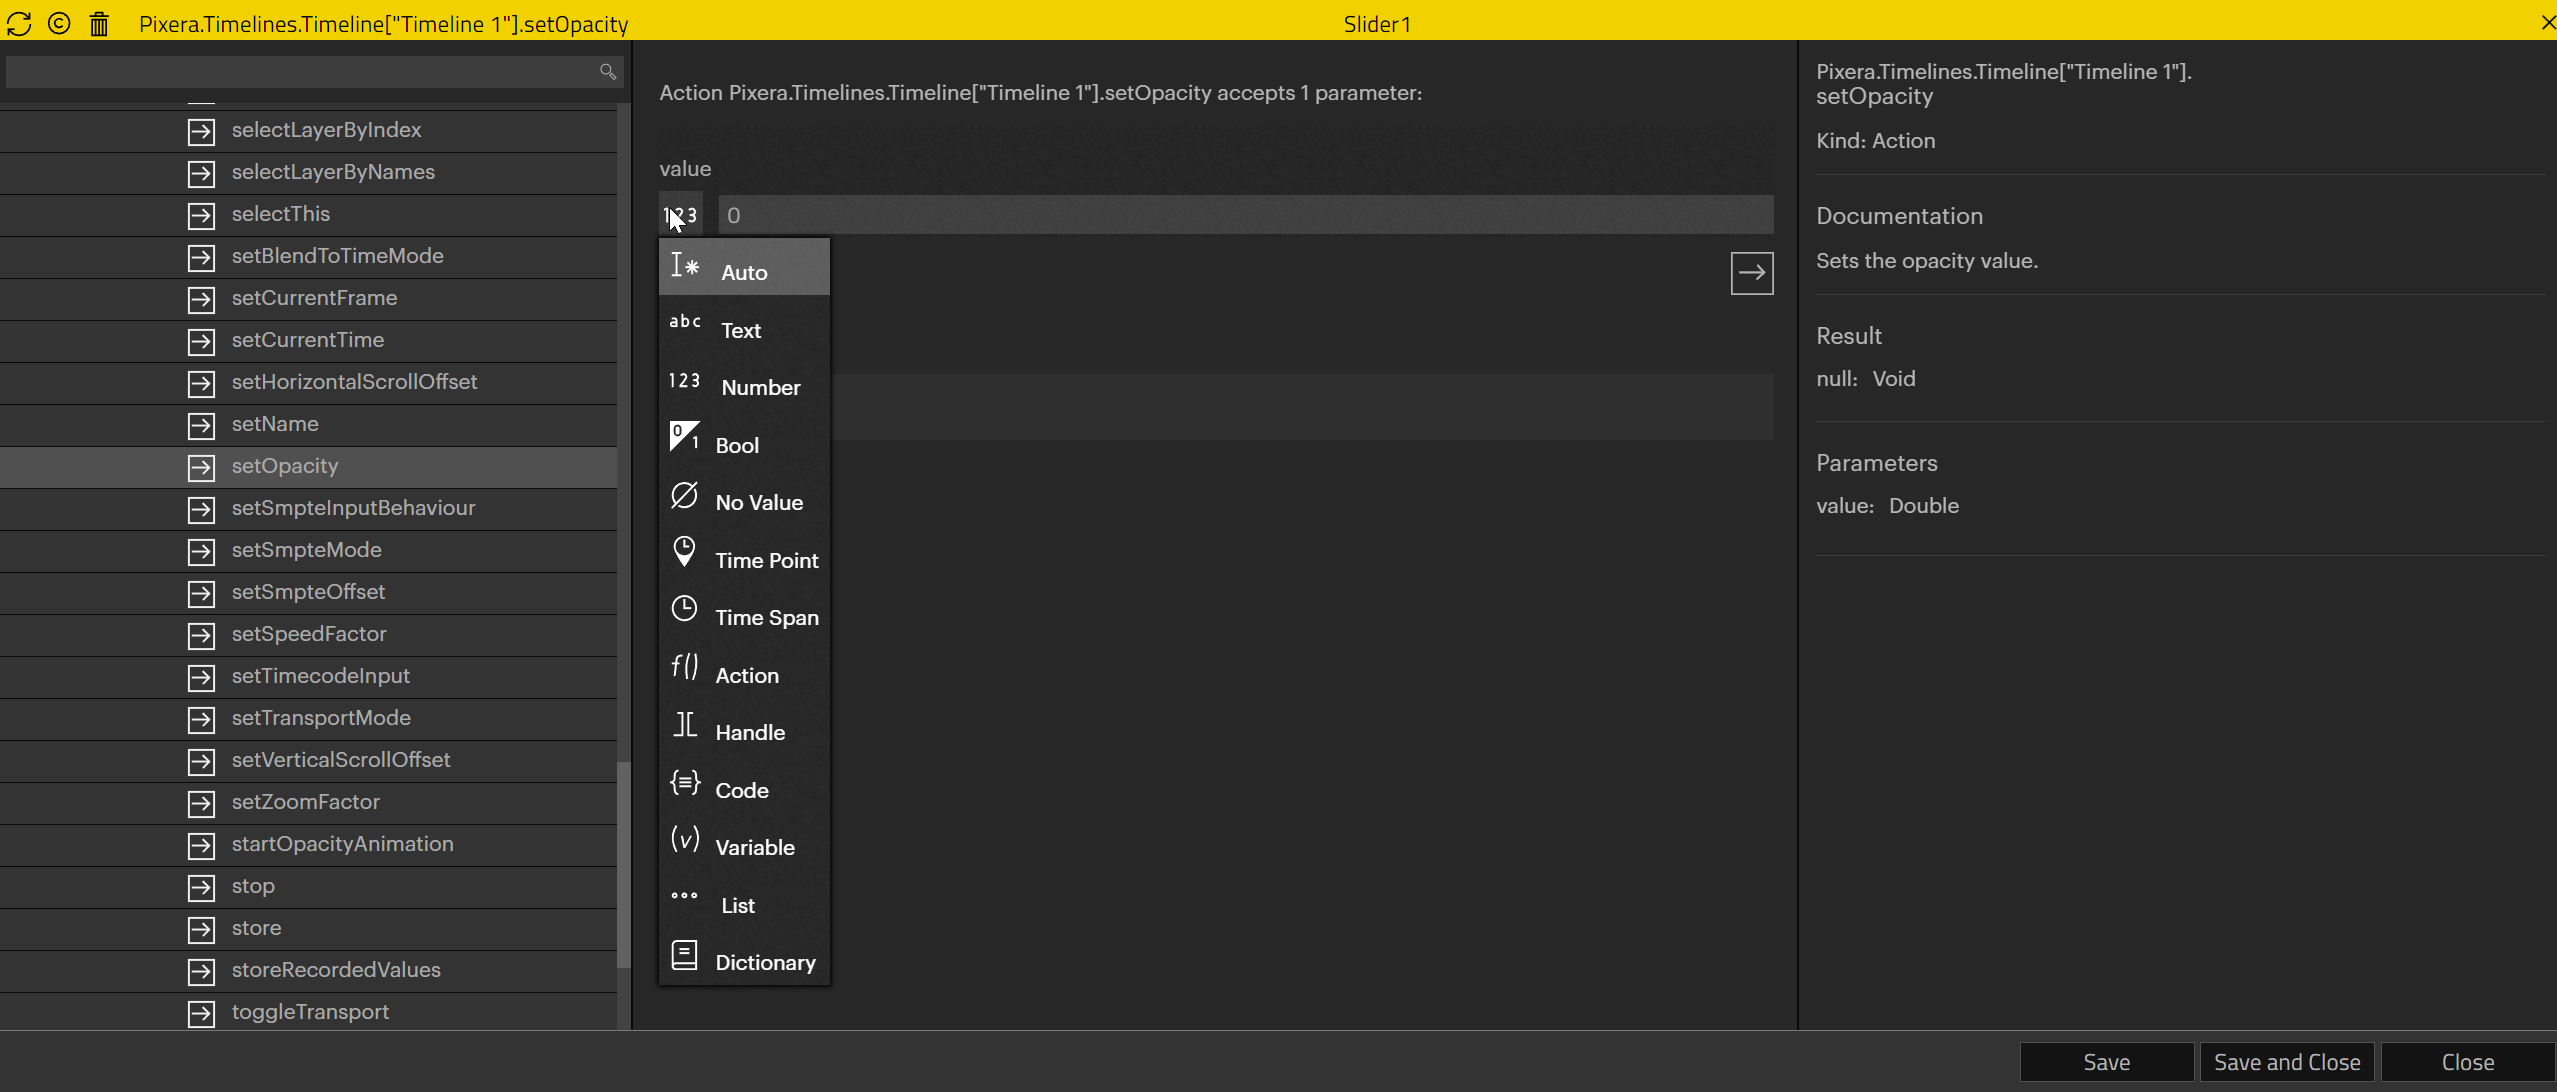
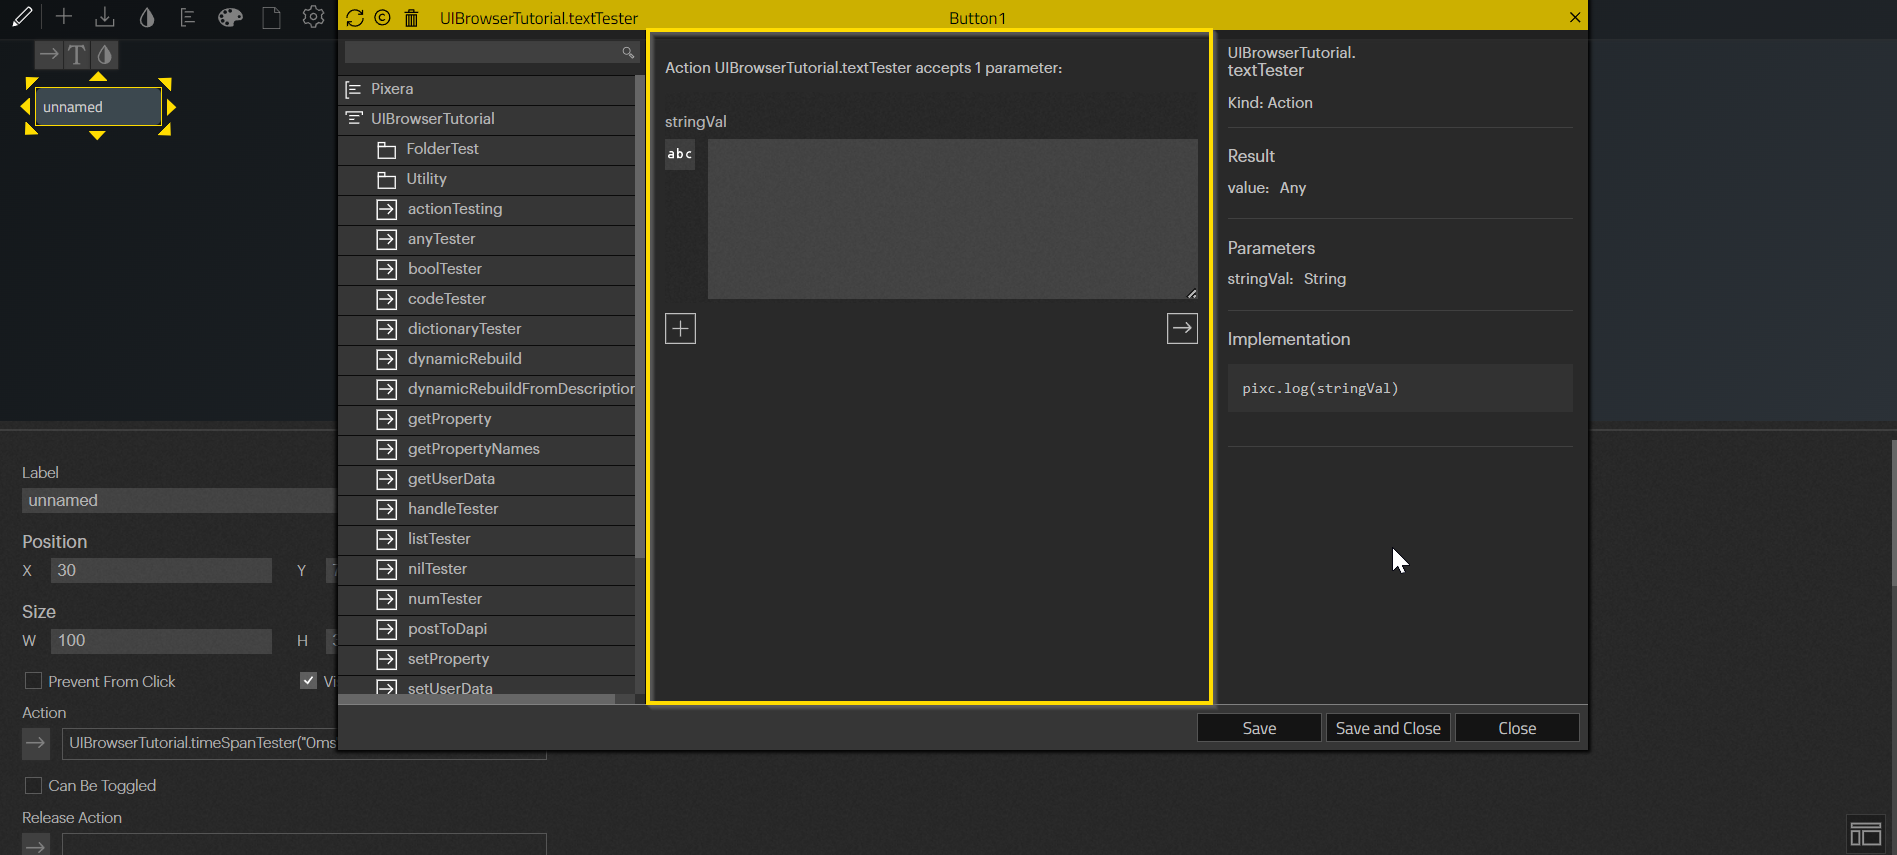
Center Section: Parameters
The center major section are the Parameters. This section will populate with a textbox for every parameter specified in the Action. The user can manually set what type of value will be passed through as well as entering the exact value to pass.
Types of Parameters
There are a variety of parameters that can be sent from the API Browser:
- Auto will automatically choose a parameter type which most closely matches the currently entered value.
- Text is used for any string value being passed. This includes any character from a keyboard including letters, numbers, symbols, an whitespaces.
- Number is used for any numerical value. These include: int, short, long, float, and double values.
- Bool represents a true or false relationship. These values can be represented in two ways. Either as strings being “true” and “false”. Or numerically using 1 for on (true) and 0 for off (false).
- No Value is used to send a nil value. Nil represents an empty value with no data which can be use as an error handler
- Time Point is used to send a date and time in the format of [Month/Day/Year Hour:Minute AM/PM]. In the UI Browser there will be a calendar icon the user can use to quicky select a date an time.
- Time Span is used to send a time in milliseconds. The milliseconds can be tied to another Action using the time such as a delay.
- Action is used to send the path to another Action. This can be used to have a specified Action be activated when the current Action is activated.
- Handle is used to point towards objects within Pixera so that other Actions may be done to the objects. This would include specifying the handle for a timeline which the user wants paused.
- Code is used to send specified prebuilt commands to the Action which can be ran either directly as Action to a LUA code or in a json format.
- List is used to send a group of other parameters which will be accessible through a Action to a LUA table by index of their location.
- Dictionary is used to send a group of other parameters which will be accessible through a Action to a LUA table by the respective key the user gives to each Element.
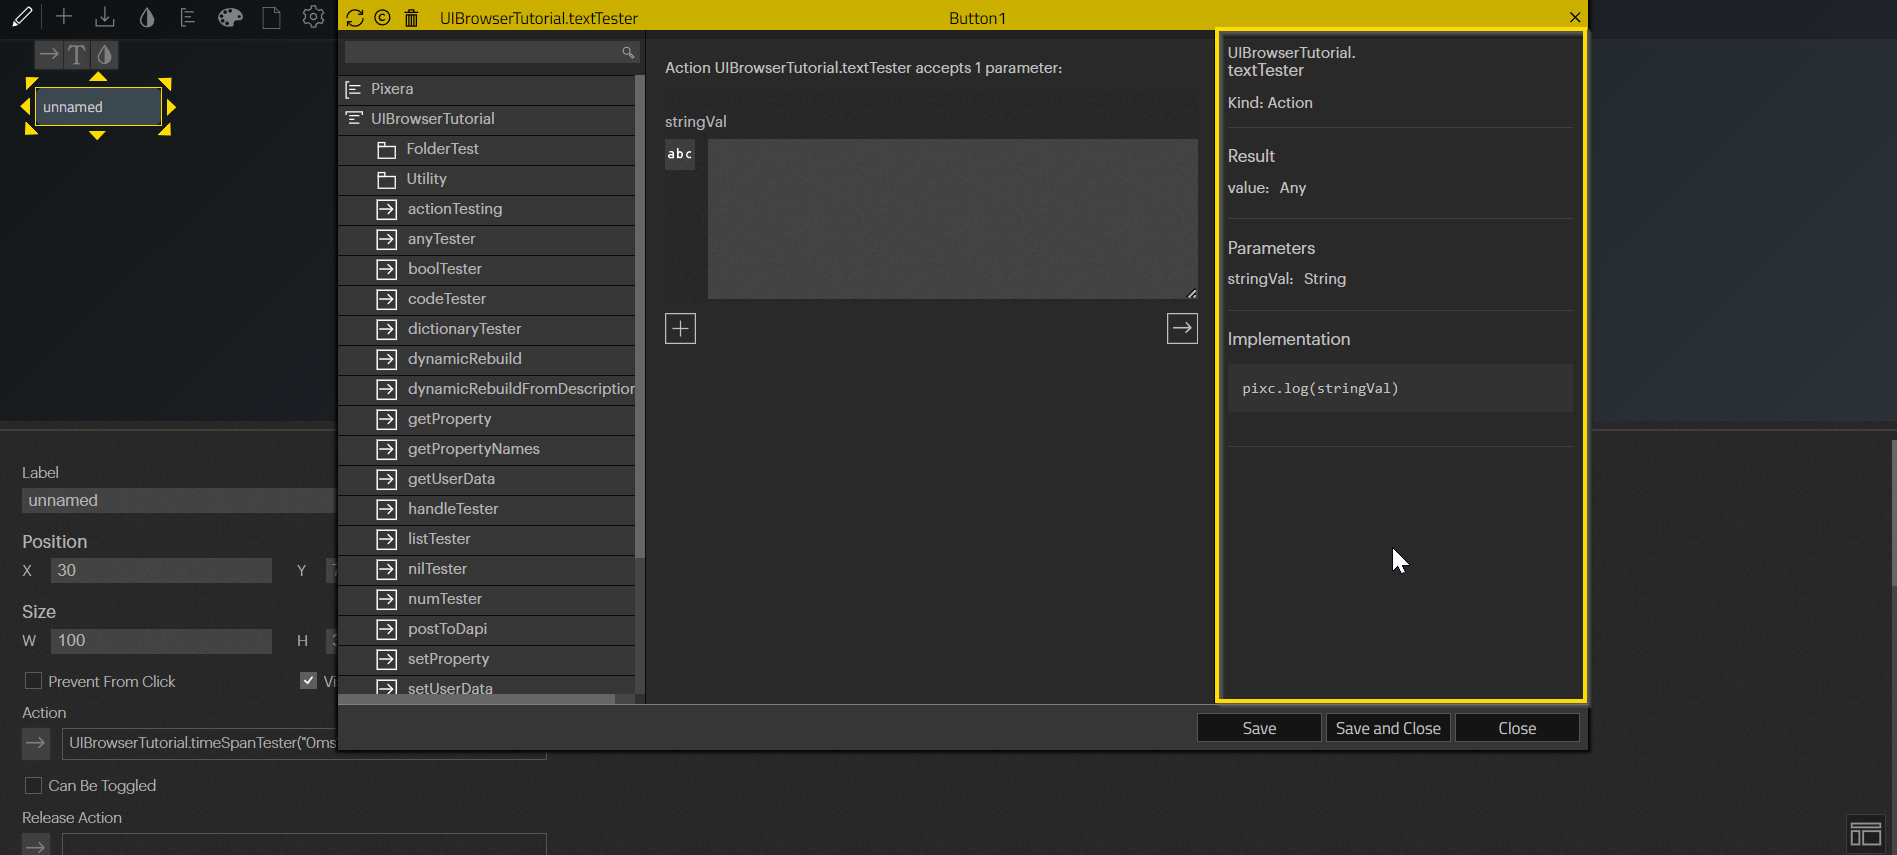
Right Section: Inspector
On the right side is the last major section, the Inspector. This section holds all the information about the currently selected Action including: Name of the Module, name of the Action, the kind of Action, parameters used in the Actions, and the code inside of the Action.
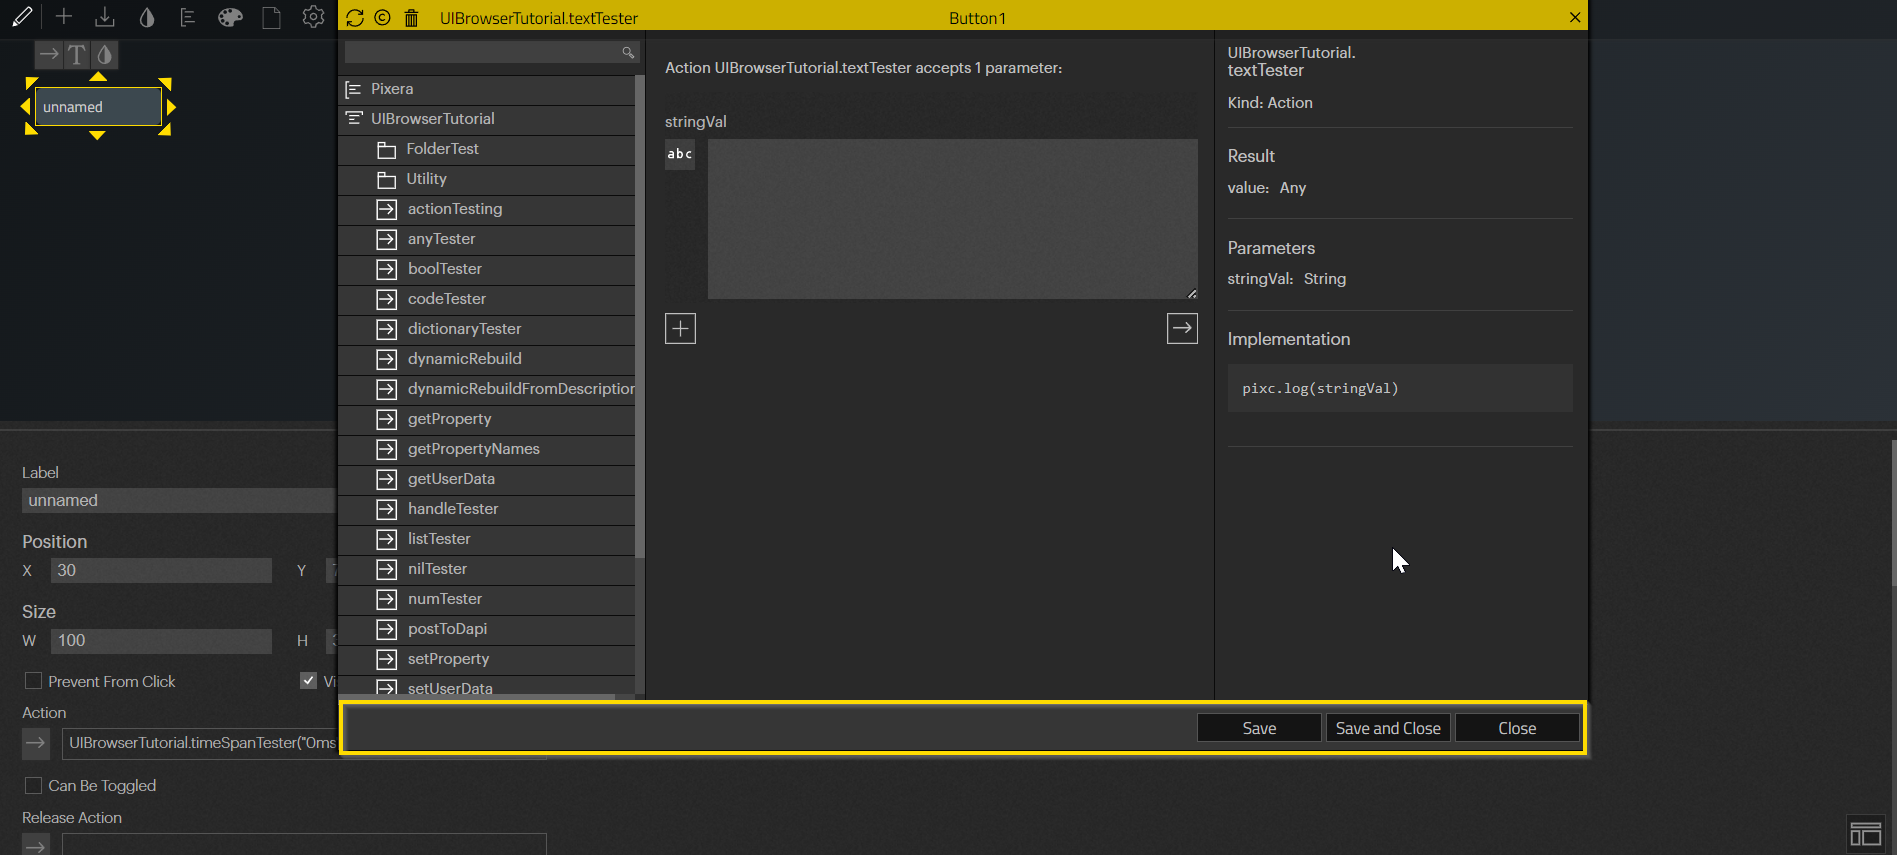
Bottom Bar
The final section is on the bottom which holds three buttons. Save will save the current Action and its inputted parameters to the UI Element. Save and Close will do the same and then automatically close the API Browser. Lastly the Close button will simply close the API Browser without saving any changes.
Pixera 25.1 RC 1 | 25. April 2025 | C.L.