Contact Us


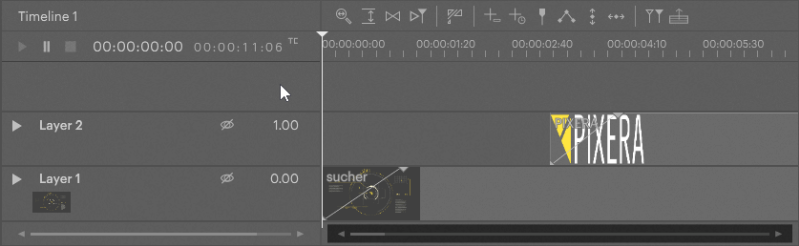
Timeline User Interface & Navigation
Changing pane sizes
The pane sizes between the left part of the Timeline pane which contains the Timeline's name, Transport Buttons, Timecode Display and Layer Section, and the right part which contains the actual Timeline itself can be changed through clicking the vertical line between them and dragging it to either side.
Changing the Zoom of the Timeline
The + and - keys on the keyboard are quick options to zoom in or out on the Timeline view. Another way to change the zoom of the Timeline view is the Zoom button in the Timeline's tool palette:
By clicking the tool's icon, a slider pops up and allows to adjust the zoom level of the Timeline view.
Changing the Line Height of Layers
The line height of layers can be changed by:
- Clicking and dragging the line underneath the layer's name.
or - Clicking the Line Height icon in the Timeline's tool palette.
Collapsing / Expanding the Cue Section
The Cue Section can be collapsed or expanded by pressing k on the keyboard.
Collapsing / Expanding Nodes
To access sub-nodes of a layer (i.e. Clip Transport Mode, Clip Position, Clip Rotation, Clip Size or effect properties) as well as settings of them, the respective layer or node needs to be expanded through either:
- Clicking the triangle next to its name.
or - Double-clicking the layer's or node's name.
Moving around in the Timeline
To move around in the Timeline, there are different options:
- Using the scroll bar at the bottom of the Timeline pane scrolls the view in the Timeline.
- Using the Scroll to Nowpointer button in the Timeline's tool palette scrolls the view so the Nowpointer is in the viewable area again.

- Using the arrow keys (←, →) on the keyboard moves the Nowpointer one frame forward or backwards. Holding the key pressed will keep moving the Nowpointer forward or backwards until it is released.
- Holding down Shift and pressing one of the arrow keys (←, →) moves the Nowpointer to the next or previous clip border.

- Holding down Alt while pressing one of the arrow keys (←, →) moves the Nowpointer to the next snapping coordinate. This can be another clip, a cue or an event.
Automatic scrolling during playback
To automatically scroll the view of the Timeline when the Nowpointer leaves the viewable area, the Follow Nowpointer tool in the Timeline's tool palette can be activated:
 Follow Nowpointer tool