Contact Us


101: Creating the Composition
After the screens are set up, the compositing can be started. This can already be done before any mappings or output configurations are made in the Mapping mode, which allows content designers to set up the project and see the visualization of the show without having the skills of mapping or knowing how to distribute and feed the signals to the projectors or LED screens. In future releases, it will further be possible that one user is doing the compositing while another one is working on the mapping at the same time.
In this simple project, the goal will be to loop two sample clips with a dissolve transition and have a fade in and fade out at the beginning and the end of each iteration. Additionally, a logo should fade in on top and fade out again after some seconds.
Adding media files to the project
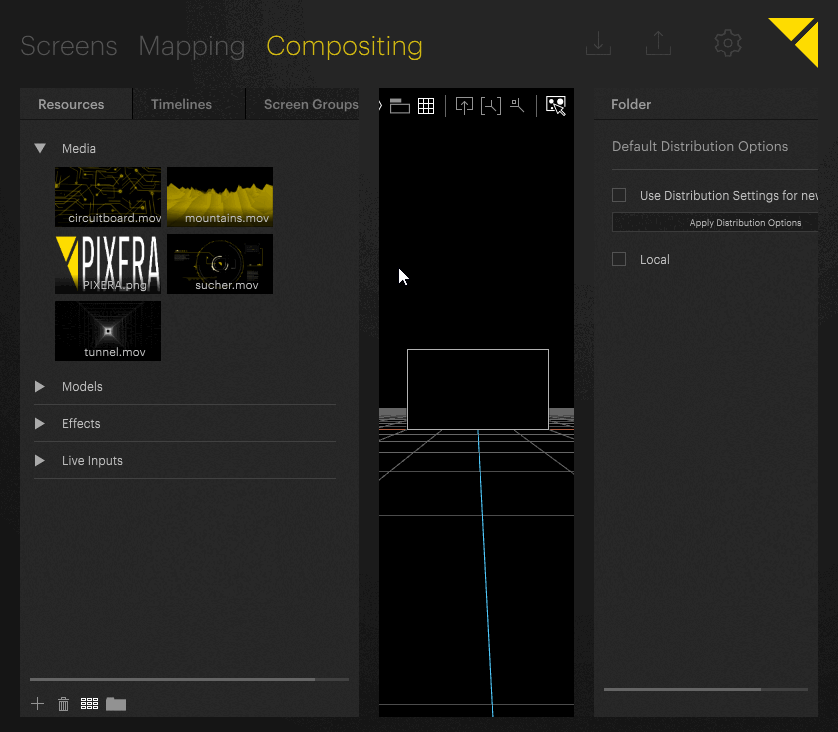
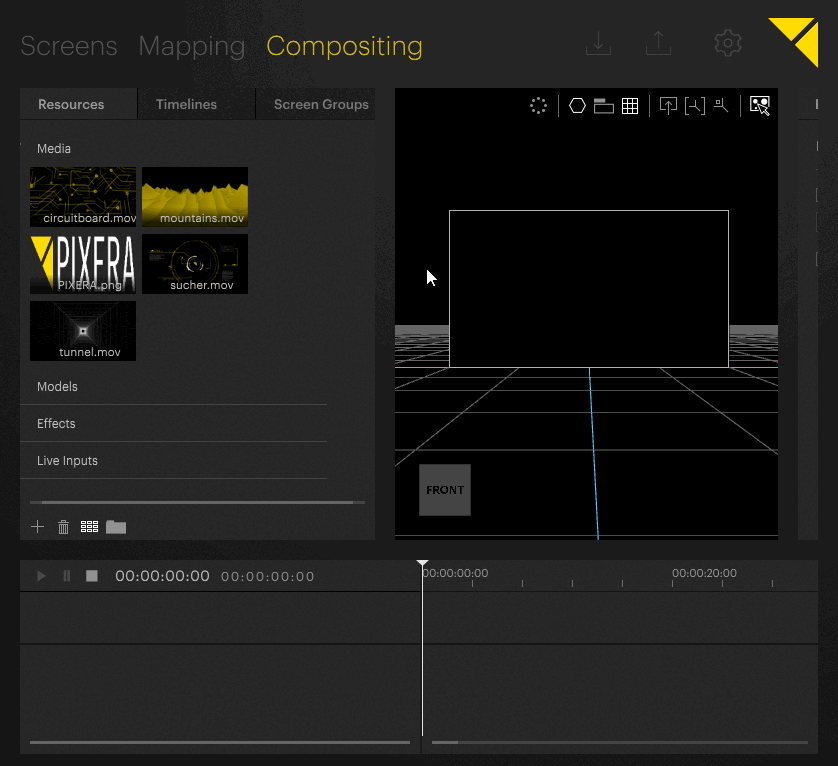
First, the media files need to be added to the project:
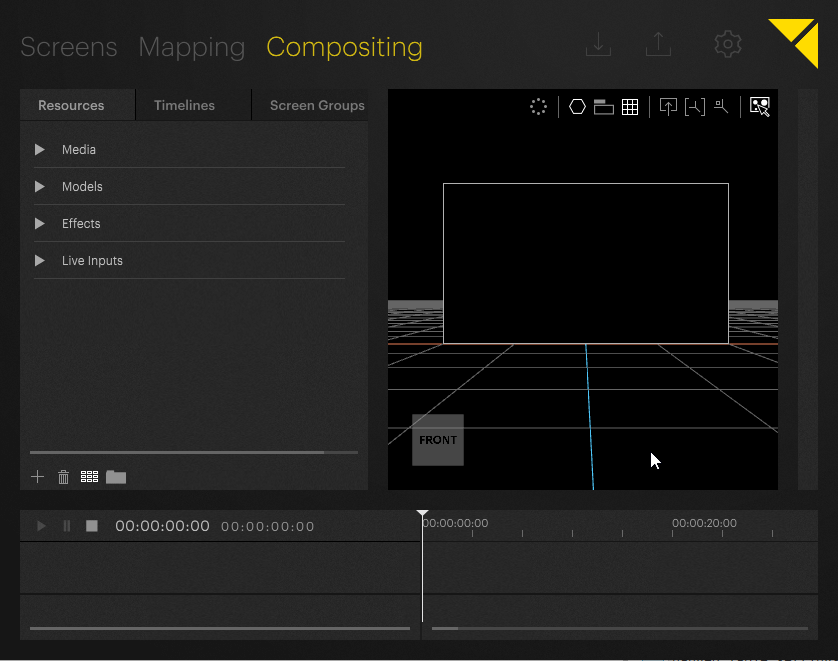
- Make sure the Compositing mode is active.
- The Resources tab in the left pane shows the available media content, 3D models, effects and live inputs of the project.
- Expand the Media section by clicking the triangle next to it and make sure it is selected.
- Click the ‘+’ icon on the bottom of the pane to open a dialog window.
The media will now be added to the project. This may take a few seconds, depending on the size and number of the files selected.
See the media file’s details
To get detailed information about the media file, simply select it in the Resources tab and see all available information in the Inspector on the right side.
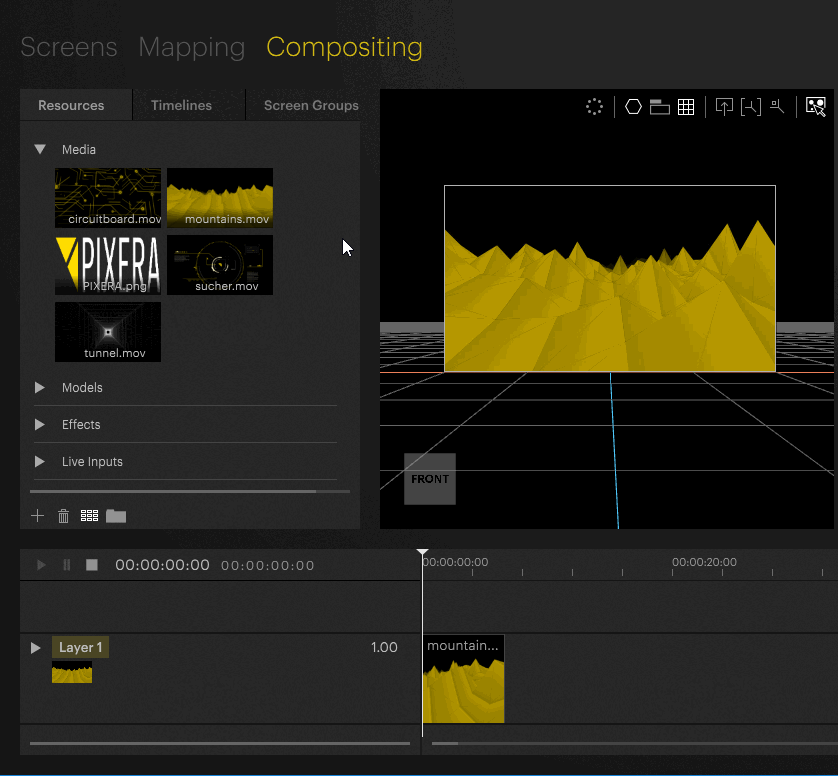
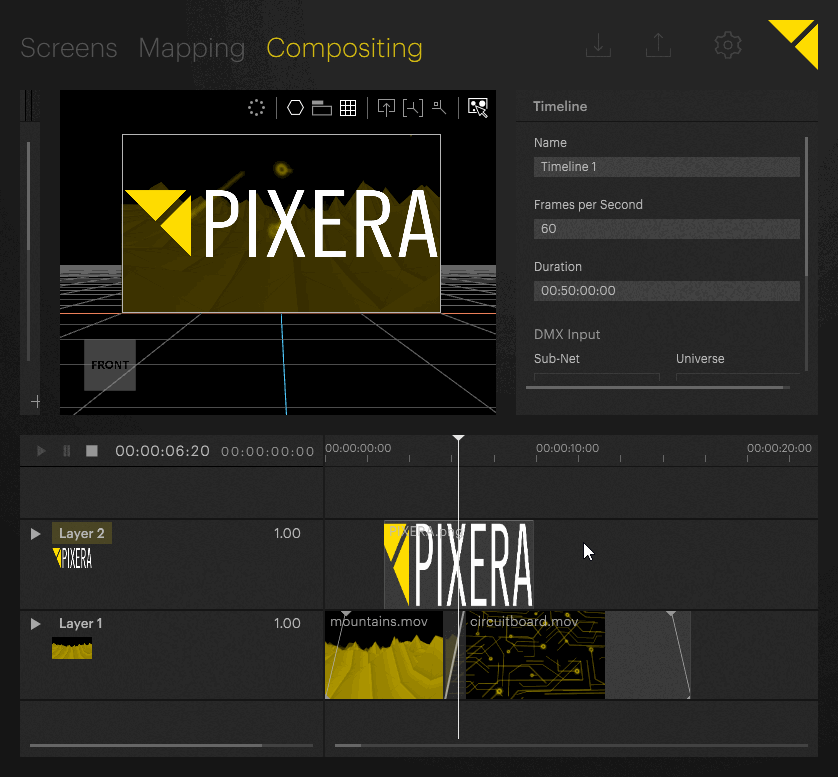
Placing media clips on the timeline
Each new project already has a pre-created timeline.
To place media on the timeline:
- Select the media file in the Resources tab.
- Drag and drop the media file to the desired screen in the Workspace.
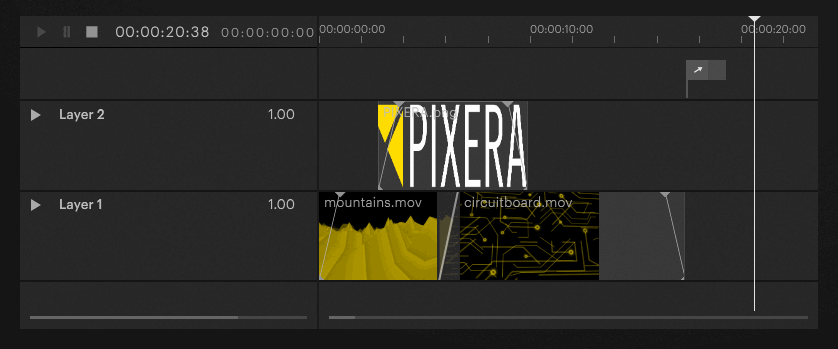
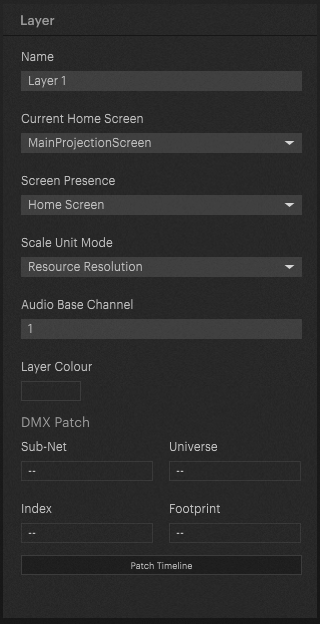
This creates a new layer on the timeline, while the screen the media clip was dropped onto represents the layer’s Home Screen.. By default, all media clips on a layer will be scaled to fit the screen. This can be changed by selecting the layer and changing its Scale Unit Mode in the Inspector.
Note that a media clip in the timeline can simply be replaced by dropping another media file onto it.
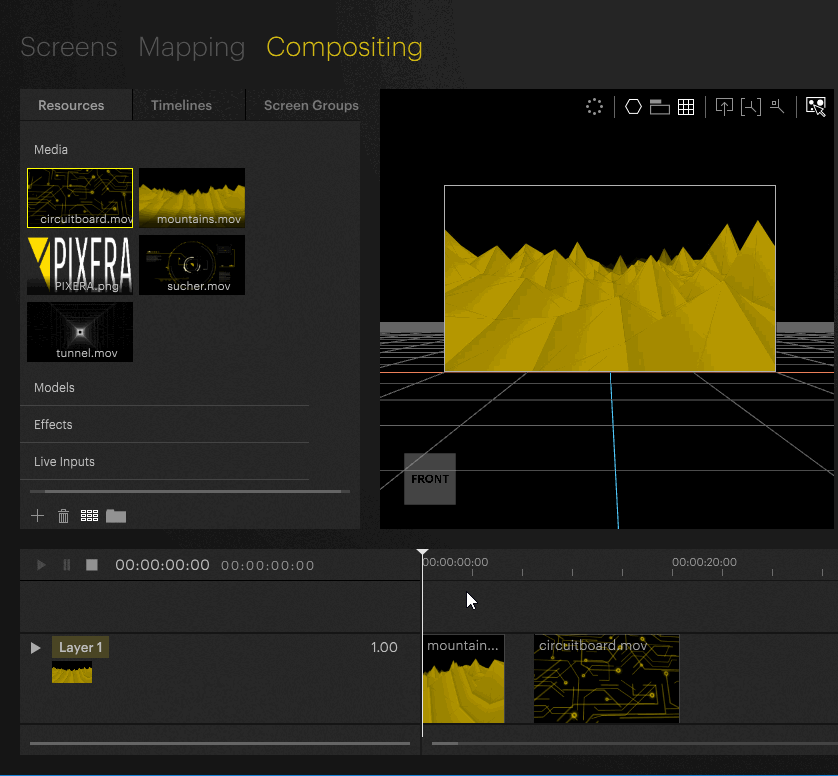
A second media clip can either be placed on the same layer or a new layer. To make use of the automatic dissolve feature we want to achieve, the media clip has to be placed on the same layer:
- Select the media clip in the Media tab.
- Drag the media file behind and onto the same layer as the first media clip.
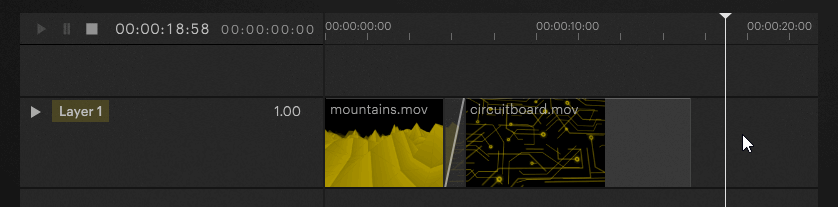
Dissolving between two media clips
To create a dissolve transition using the automatic dissolve feature:
- Click on the second media clip in the timeline and move it to the left until it interferes with the first media clip.
- Notice the grayed out area crossed by the light gray line where the two media clips overlap. This area marks the transition, which always is a linear dissolve.
Fading the layer’s opacity
Each layer has an opacity value, determining how transparent or opaque a layer will be rendered. The actual opacity value is displayed next to the layer’s name in the timeline.

Fading the opacity of a layer is achieved by keyframe animation. To set the according keyframes:
- Double-click on the thumbnail on the according layer’s main track (the track where the media file’s thumbnail is shown) to set an opacity keyframe.
- Dragging the keyframe on the track changes its position and value. Moving it to the left or right positions the keyframe timewise and dragging up or down sets the keyframe’s opacity value.Click on the keyframe to select it and enter the numeric values for time and opacity in the appearing keyframe value fields.
or
- Set the keyframe at time 00:00:00:00 (hours : minutes : seconds : frames) with an opacity value of ‘0’ by selecting the keyframe and entering the values in the appearing keyframe value fields.
- Set a second keyframe at the time 00:00:01:00 with an opacity value of ‘1’. This will result in an one second fade in at the very beginning of the timeline.
- Set a third keyframe with the opacity value of ‘1’ just one second before the end of the two clips to ensure the opacity value stays ‘1’ from the fade in until one second to the end of the two media clips.
- Now set a fourth keyframe with an opacity value of ‘0’ again at the end of the two clips. This will result in an one second fade out after the end of the two media clips.
Adding a logo onto a new layer
To add the logo on a seperate layer:
- Move the Nowpointer to a position behind the two already placed media files.
- Select the logo file in the Media folder and drag it onto the screen in the Workspace.
This will create a new layer with the logo file and set the screen the media file was dropped onto as the layer’s Home Screen. - Click the logo file in the timeline and drag it to the desired position.
- Grab the end-handle of the logo file in the timeline to adjust it’s duration or select it and set the duration in the Inspector on the right.
- Note that the logo does not show up on the screen, because the newly created layer is rendered behind the first layer. To change this, click on the layer’s name and drag the layer to the top. Now the logo layer is rendered on top of the other two media clips.
![]()
Changing the layer’s Scale Unit Mode
By default, the logo will be scaled to fill the screen. If the logo file’s aspect ratio does not match the screen’s aspect ratio, it will be stretched either horizontally or vertically. To solve that, the layer’s Scale Unit Mode can be changed to not fill the screen but to be rendered at it’s actual resolution. To change the layer’s Scale Unit Mode:
- Make sure the layer is selected in the timeline to open the layer’s settings in the Inspector on the right.
- Select Resource Resolution from the dropdown menu under Scale Unit Mode.
The Scale Unit Mode is now set to render the logo file at it’s actual resolution.
Fading the logo layer’s opacity
To fade the logo in and out, set opacity keyframes as done before in ‘Fading the layer’s opacity’.
The final result should look like this: