 Contact Us


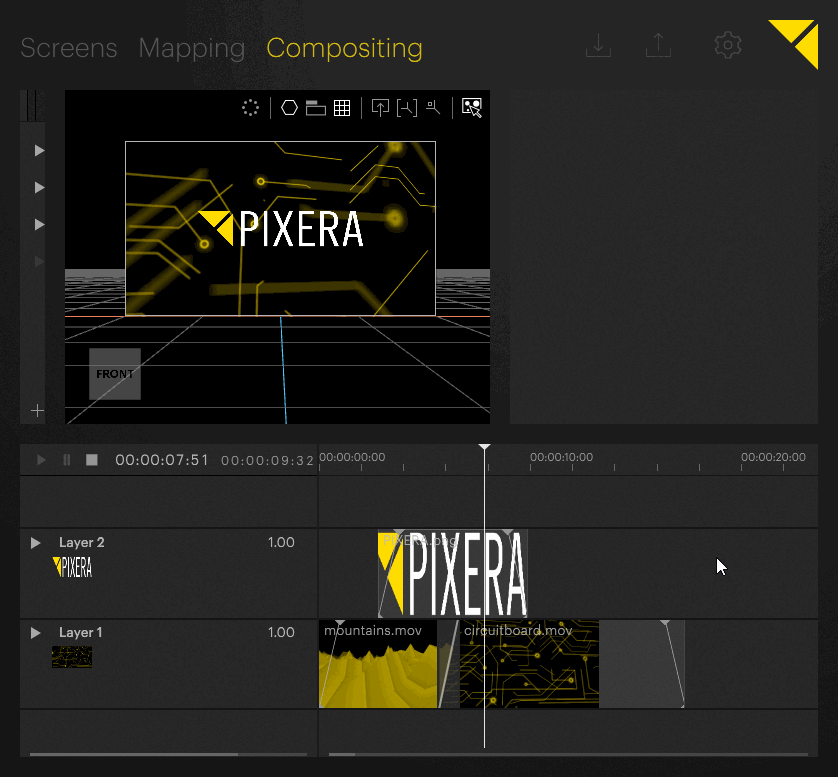
101: Controlling the Timeline
The timeline can be controlled in different ways:
- Click at the desired point in the top bar of the timeline showing the timecode to set the Nowpointer to a specific position.

- Click and drag the mouse to scrub through the timeline.
- Press [Space] to start playback. Pressing it again toggles between Play and Pause states.
- Click on the Play, Pause or Stop buttons on the top left of the Timeline pane.

Play starts the timeline from the Nowpointer’s current position.
Pause pauses the timeline on the current position.
Stop stops the timeline and resets the Nowpointer to the beginning of the timeline (00:00:00:00).Note: The active operation will be highlighted bright gray while the other, inactive buttons, are dark gray.
- Set cues in the timeline.
- Send DMX data to control the timeline.
- Use Pixera’s API to control the timeline.
Note the timecode on the top left of the Timeline pane, showing the actual position of the Nowpointer and the time to the next cue.
- The bigger timecode on the left side shows the actual position of the Nowpointer.
- The smaller timecode next to it indicates the remaining time to the next cue

The timeline of the sample project now has a media clip fading in, a logo fading in on top, fading the first media clip into another media clip, fade out the logo on top and finally fade out the second media clip at the end.
To loop this part of the timeline in an endless behaviour, cues can be used:
- Double-click the area between the timecode bar on top of the Timeline pane and the layer tracks at the desired position to create a cue.
By default a Play cue is created, but the cue operation can be changed by selecting the cue in the timeline and setting a different behaviour under Operation in the Inspector tab on the right. - Select the cue in the timeline to open the details in the Inspector tab on the right.
- Click and drag the cue icon on the timeline to move the cue to the desired position.
Click on the cue in the timeline to open the Inspector on the right side. Set the cue position by entering the timecode value in the Inspector’s Time field.
or
- Open the drop-down menu under Operation and select Jump to change the cue type to a jump cue.
Notice the drop-down menu Mode appearing underneath the Operation menu giving the option to jump to a specific time by selecting To Time or jump to a cue by selecting To Cue. - The timecode the Nowpointer should jump to is set by the Goal value, which is (00:00:00:00) by default. Since that already is the value required for the loop, this value does not need to be changed.
Starting the timeline by pressing the Play button on the top left of the Timeline pane, will now loop the timeline in an endless behaviour.